This is the abridged developer documentation for Ren
# Quickstart
> Ren is a platform to build agent factories. Delegate your first task, then scale from a single chat into an autonomous factory your whole team runs on.
Ren is a platform to build agent factories. Delegate your first task, then scale from a single chat into an autonomous factory your whole team runs on.  [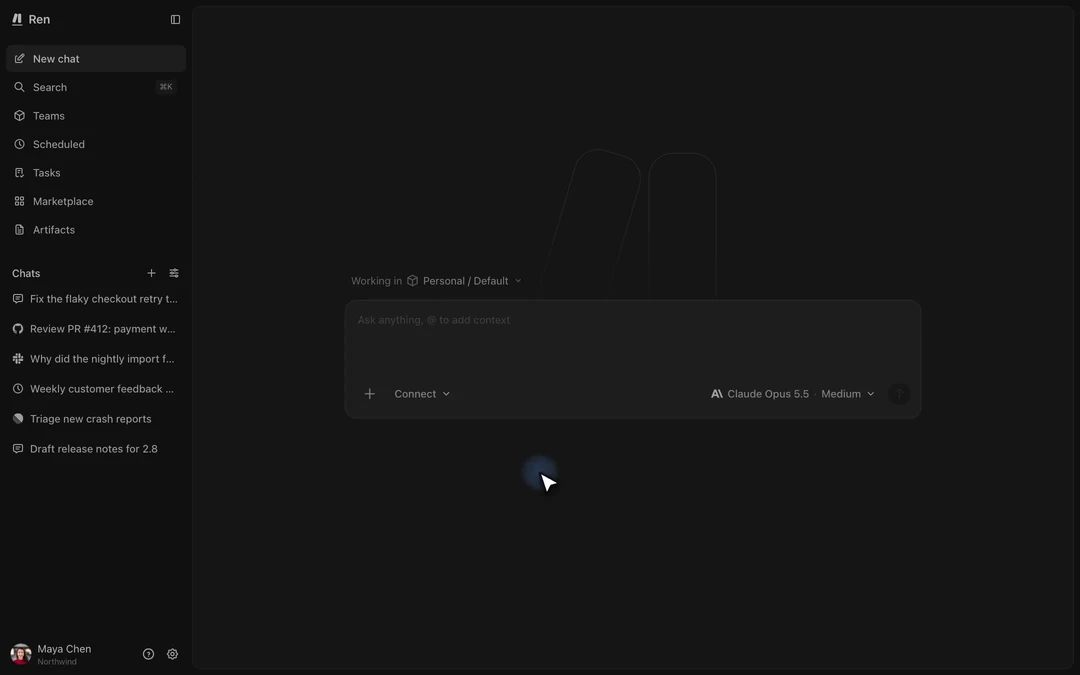](/_astro/gmail-digest.DzWmLQbA.mp4 "Summarize your unread Gmail, connect it when Ren asks, and schedule it") ## [Create your account](#create-your-account) [Create an account with your email](https://useren.ai/app/signup), or select **Continue with Google** or **Continue with Slack**. If you sign up with your email, enter the six-digit code Ren emails you. Select **New chat** in the sidebar. ## [Connect Gmail](#connect-gmail) Ask Ren to connect your Gmail: [Connect my Gmail account.](https://useren.ai/app/sessions?prompt=Connect+my+Gmail+account.) [Open in Ren ](https://useren.ai/app/sessions?prompt=Connect+my+Gmail+account.) 1. Select **Connect** in the chat. 2. Sign in to your Google account. 3. Authorize access. 4. Return to the chat. The card shows **Connected**. ## [Delegate your first task](#delegate-your-first-task) Send this request in the same chat:
```text
Summarize my unread Gmail from the last day. Group it by what needs a reply.
```
Ren summarizes your unread email, grouped by whether each message needs a reply. ## [Schedule it](#schedule-it) Follow up in the same chat:
```text
Run this every weekday at 9am.
```
To set the time zone, include it in your request. Select **Scheduled** to see the schedule and its next run. Each run creates a new chat with that day’s summary. ## [Start with a blueprint](#start-with-a-blueprint) Browse ready-made setups in the [Blueprints catalog](/blueprints/).
# Channels
> Send work to Ren from Slack, GitHub, Linear, Telegram, and email, and get replies in the same conversation.
A channel connects a Ren project to Slack, GitHub, Linear, Telegram, or email. You send requests there, and Ren replies in the same conversation. ## [What a channel is](#what-a-channel-is) A channel is another way to reach the same [project](/docs/concepts/projects/). Channel chats use the same project instructions, skills, apps, and storage as web app chats. * **Project mapping:** Map each channel to a project. People in that conversation can send requests, subject to sender matching and fallback rules. Slack DMs use your personal space without a mapping. An open [task](/docs/concepts/tasks/) assigned to a project can route its linked conversation to that task’s chat. * **Conversation history:** The first message starts a Ren [chat](/docs/concepts/chats/). Later messages in the same conversation continue it with the existing context. The table below lists each channel’s conversation boundary. * **Files:** Replies can include files. * **Web app:** Every channel chat also appears in the web app, so you can pick it up there. Chats from Slack, GitHub, and Linear have an **Open in** link in the chat header that takes you back to the original conversation. In the API and CLI, the channel resources are `slack`, `github`, `linear`, `telegram`, and `email`. Slack, GitHub, and Linear are installed once for the organization in **Settings → Mentions**, and only an organization admin can install them or map them to projects. Telegram and email need no install, and you set them up per project on the project’s **@Ren** tab. In a shared space, the project’s **@Ren** tab is for organization admins. In your [personal space](/docs/concepts/spaces/), you can turn on email and add Telegram chats yourself. Web app Instruction method Web app (app) Open **Settings → Mentions** to see each channel and whether it’s connected.  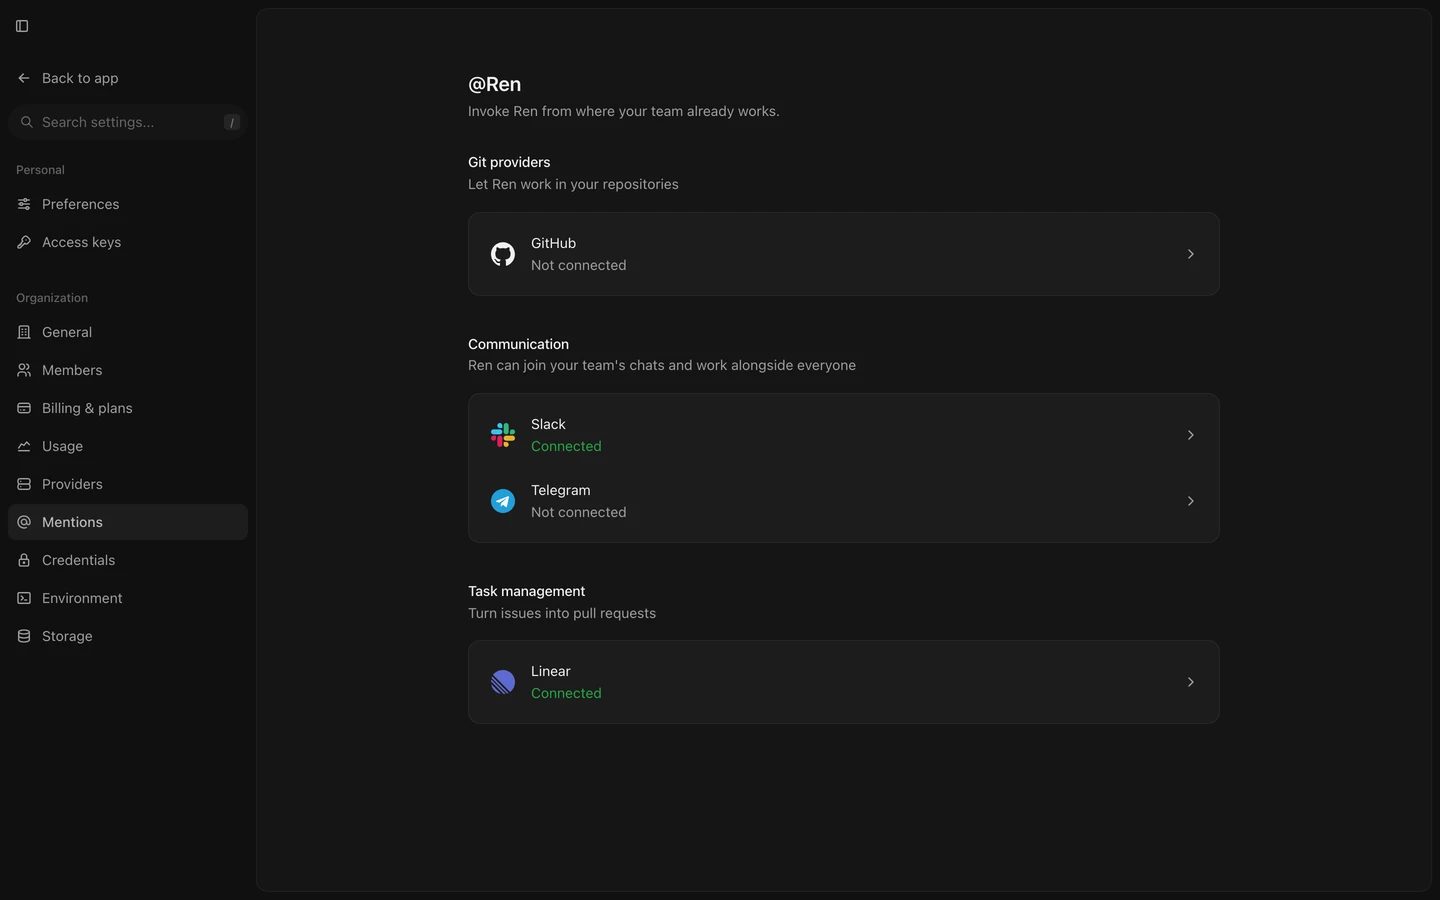 ## [Each channel](#each-channel) | Channel | A project maps to | How you reach Ren | One chat is | | ------------------------------------ | ------------------------------- | --------------------------------------- | ---------------------- | | [Slack](/docs/channels/slack/) | A Slack channel | @mention Ren in a thread, or DM Ren | A Slack thread | | [Linear](/docs/channels/linear/) | A Linear project | Assign an issue to Ren, or @mention Ren | A Linear agent session | | [GitHub](/docs/channels/github/) | A GitHub repository | Mention `@renagent` on a pull request | A pull request | | [Email](/docs/channels/email/) | The project’s own email address | Send an email to the address | An email thread | | [Telegram](/docs/channels/telegram/) | A Telegram group or DM | @mention the bot, reply to it, or DM it | A reply chain | **Slack:** Ren replies to mentions in mapped channels through threads. DMs use your personal space and need no mapping. **Linear:** Ren works as a [Linear agent](https://linear.app/docs/agents-in-linear) and posts progress and responses on the issue. One issue can contain several agent sessions, each with a separate Ren chat. **GitHub:** Mention `@renagent` in a pull request comment or a comment on a diff line. Ren reads the pull request, replies, and can push commits. **Email:** Projects have individual addresses, like `acme.support@agents.renai.build`. Include the address in **To**, **CC**, or **BCC**. Ren replies in the email thread. **Telegram:** A project link adds the bot to a group or DM. In a group, mention the bot or reply to it, and in a DM, send a message. Reply to a Ren message to continue its chat. ## [Work across channels](#work-across-channels) A project can use every channel that’s mapped to it, not only the one a message came from. For example, if a project has a Slack channel and a Linear project mapped, a chat that starts from a Linear issue can post a summary to the project’s Slack channel. Ren can only post to channels mapped to the chat’s project. It can always reply in the conversation the chat came from, even after a [task](/docs/concepts/tasks/) moves the work to another project.
```text
When you finish this issue, post a two-line summary in our Slack channel.
```
## [How Ren picks a project](#how-ren-picks-a-project) Each incoming message goes to its mapped project. When a conversation is linked to an open [task](/docs/concepts/tasks/) that’s assigned to a project, the message goes to that task’s chat first. When nothing matches: | Channel | What happens | | -------- | --------------------------------------------------------------------------------------------------------- | | Slack | Ren posts “This channel isn’t connected to a Ren project yet.” with a **Connect to Ren** button. | | Linear | Ren posts “No Ren project is mapped to this issue” on the issue. | | GitHub | Ren ignores the mention. | | Email | Ren drops the email without replying. | | Telegram | In a DM, the bot replies that the chat isn’t connected to a Ren project yet. In a group, it stays silent. | ## [Who Ren acts as](#who-ren-acts-as) Ren runs each message as the person who sent it, so the chat is attributed to them. It matches the sender to a Ren user in the project’s space: | Channel | How Ren matches the sender | | -------- | ------------------------------------------------------------------------ | | Slack | Signing in to Ren with Slack, or the email on the sender’s Slack profile | | Linear | The email on the sender’s Linear account | | GitHub | The sender’s public GitHub email | | Email | The sender’s email address | | Telegram | A Telegram account linked to Ren in **Settings → Mentions → Telegram** | Ren uses the mapping’s **fallback sender** if the sender has no matching Ren account or doesn’t belong to the project’s [space](/docs/concepts/spaces/). Choose a space member when you map the channel. GitHub calls this the **default sender**, and Linear calls it the **session sender**. If neither account belongs to the space, Ren doesn’t run the request. Slack, GitHub, and Telegram explain the rejection, while Linear and email send no reply. A fallback sender lets teammates without a Ren account send work to Ren. Ren checks the sender again on every message, so several people can work in the same conversation. ## [Attachment limits](#attachment-limits) | Channel | What Ren receives | Limits | | -------- | --------------------------------- | ----------------------------------------- | | Slack | Files and snippets in the message | Files over 32 MB are skipped with a note. | | Telegram | Documents and photos | Files over 32 MB are skipped with a note. | | Email | Attachments on the email | None set by Ren. | | GitHub | The comment text only | Ren reads the pull request itself. | | Linear | The issue and comment text only | None. | Ren reads images, text files, and PDFs directly. Other file types, like ZIP archives, are saved to the space’s machine, where Ren can open them with its tools. ## [When to use a channel](#when-to-use-a-channel) * **Your whole team should use Ren.** Channels bring Ren to everyone in the tools they already use, including people who never open the web app. * **You want to hand work off and come back to it later.** Mention Ren where the work comes up and read the reply when it lands. Use the [web app](/docs/surfaces/web-app/) instead for longer sessions, or when you need to answer Ren’s questions or approve its actions. ## [FAQ](#faq)
# Email
> Give a project its own email address, then send, forward, or CC it, and Ren replies in the same email thread.
Each [project](/docs/concepts/projects/) can have its own email address. Send, forward, CC, or BCC that address, and Ren works on the email and replies in the same thread. ## [Set a project’s email address](#set-a-projects-email-address) Email is off until you turn it on for a project. There’s nothing to install. Ren generates the address from the organization and project slugs, like `acme.support@agents.renai.build`. Slugs contain lowercase letters, numbers, and hyphens. Ren adds a number if the address isn’t available. You can’t choose or edit the address. Web app Ask Ren CLI Instruction method Web app (app) 1. Open the project’s **@Ren** tab. 2. On the **Email** card, select **Create project mailbox**. The card shows **Mailbox enabled**. To find the address, ask Ren for it in the project, or run `ren email list`.  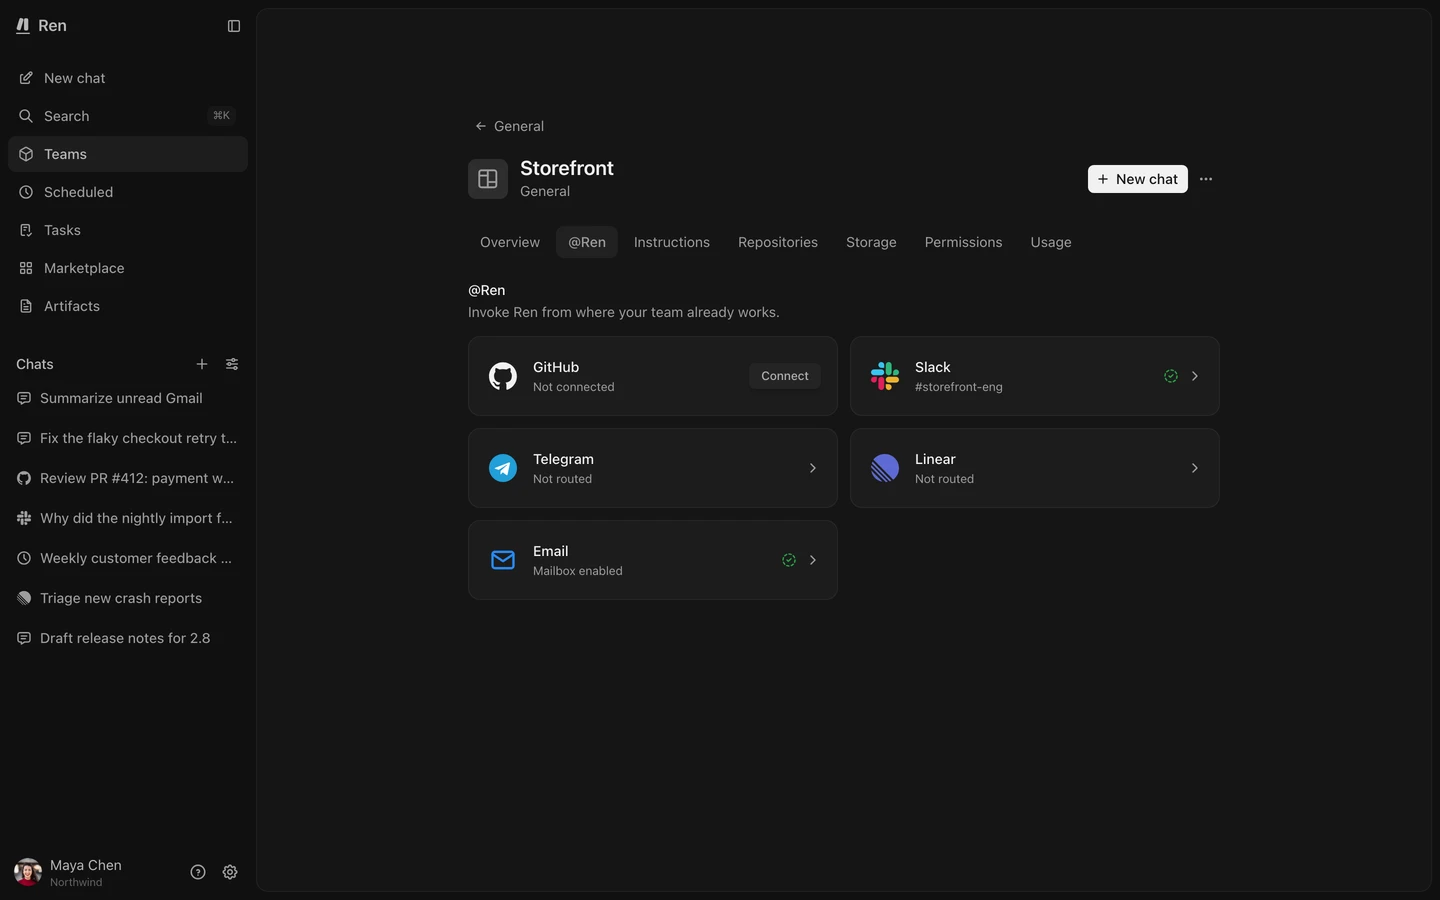 [Turn on email for this project and tell me its address.](https://useren.ai/app/sessions?prompt=Turn+on+email+for+this+project+and+tell+me+its+address.) [Open in Ren ](https://useren.ai/app/sessions?prompt=Turn+on+email+for+this+project+and+tell+me+its+address.)
```sh
ren email set
ren email list
```
`ren email list` shows each project’s address. Add `--fallback-sender-user-id ` to `ren email set` to choose a fallback sender. ## [When to use email](#when-to-use-email) * **Forward requests that arrive by email.** Send a customer’s question to the support project and let Ren draft the answer. * **Hand off documents.** Email invoices, contracts, or reports as attachments and ask Ren to extract or summarize them. ## [How email threads map to chats](#how-email-threads-map-to-chats) The first email starts a [chat](/docs/concepts/chats/) in the project, and replies in the email thread continue that chat. Ren reads only the new part of each email, not the quoted history below it. If an email comes from an automated sender, like a `no-reply` address or a mailing list, Ren still works on it but doesn’t reply by email. ## [Forward an email to Ren](#forward-an-email-to-ren) Forward the email to the project’s address and add a note on what you want:
```text
Draft a reply that offers a refund and keeps it under 100 words.
```
A forward starts a new chat. Ren replies to you, the person who forwarded it, and your replies to Ren continue the same chat. ## [CC and BCC](#cc-and-bcc) Ren receives emails addressed to it through **To**, **CC**, or **BCC**. If an email addresses two projects, only the first receives it. Ren replies only to the person who sent the email, not to everyone on it. ## [Attachments](#attachments) Ren receives email attachments and reads images, text files, and PDFs directly. It saves other files to the space’s machine and opens them with its tools. Ren can attach files it creates to its replies. ## [FAQ](#faq)
# GitHub
> Install the Ren GitHub app, map repositories to a project, and mention @renagent on a pull request to hand Ren the work.
Install the Ren GitHub app in your GitHub organization, then map a repository to a [Ren project](/docs/concepts/projects/), and mention `@renagent` on a pull request to hand Ren the work, and Ren reads it, replies, and can push commits. ## [Install the Ren GitHub app](#install-the-ren-github-app) Install the Ren GitHub app once per GitHub organization and choose which repositories it can access. The app has its own identity, separate from your personal GitHub account. Installation needs: * **In Ren: an organization admin** to start the install. * **On GitHub: permission to install apps on the organization.** That’s usually an organization owner. If you can’t install it yourself, GitHub sends the request to an owner for approval. Web app CLI Instruction method Web app (app) 1. Go to **Settings → Mentions**. 2. In the **Git providers** section, select **Install Ren on GitHub**. 3. On GitHub, pick the organization, then choose **All repositories** or **Only select repositories**. 4. Approve the install. You return to Ren.
```sh
ren github install
```
Open the GitHub URL it prints and finish the install there. To give Ren access to more repositories later, change the app’s repository access in your GitHub organization’s settings. ## [Add repositories to a project](#add-repositories-to-a-project) A repository reaches Ren only when it’s mapped to a project. Each repository maps to one project, and a project can have several repositories. Web app Ask Ren CLI Instruction method Web app (app) 1. Add the repository to the project. See [Repositories](/docs/concepts/projects/#repositories). 2. Open the project’s **@Ren** tab. 3. On the **GitHub** card, pick the repository. To map several repositories to one project, use **Settings → Mentions → GitHub**: select a project, then select each repository to route to it.  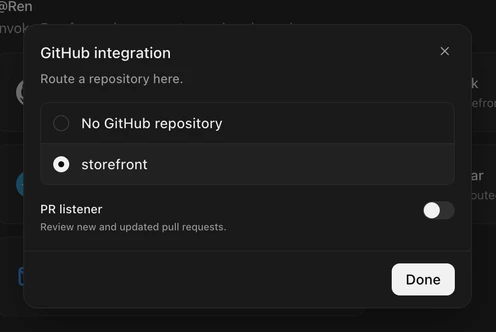 [Map the acme/storefront GitHub repository to this project.](https://useren.ai/app/sessions?prompt=Map+the+acme%2Fstorefront+GitHub+repository+to+this+project.) [Open in Ren ](https://useren.ai/app/sessions?prompt=Map+the+acme%2Fstorefront+GitHub+repository+to+this+project.) Mapping needs an organization admin, so ask from an admin account.
```sh
ren github repos
ren github mappings set --installation-id --repo-full-name acme/storefront --project-id
```
Add `--fallback-sender-user-id ` to set a fallback sender. ## [Mention @renagent](#mention-renagent) Mention `@renagent` in a comment on a pull request, or in a review comment on a line of the diff:
```text
@renagent the null check in parseConfig is missing. Fix it and add a test.
```
Ren adds 👀 and underlines `@renagent` when it starts. It can reply, review the pull request, or push commits. When it finishes, it usually replaces 👀 with 🚀. Ren responds to mentions on pull requests in mapped repositories. It ignores ordinary issues, unmapped repositories, and comments from other bots. ## [How Ren writes code](#how-ren-writes-code) Who Ren commits as depends on the project’s [space](/docs/concepts/spaces/): * **Shared spaces:** Ren’s commits and comments show the Ren app as the author, not the person who mentioned Ren. * **Personal space:** Commits and comments use your GitHub account. To connect it, open **Settings → Mentions** and select **Connect your GitHub account** on the GitHub row marked **Needs attention**. Ren matches the commenter by their public GitHub email. If no Ren account matches, it uses the repository’s fallback sender. If neither belongs to the project’s space, Ren explains the rejection in a comment and doesn’t act. See [Who Ren acts as](/docs/channels/#who-ren-acts-as). ## [FAQ](#faq)
# Linear
> Install Ren as a Linear agent, map Linear projects to Ren projects, and hand Ren issues by assigning or mentioning it.
Ren works as a [Linear agent](https://linear.app/docs/agents-in-linear). Assign it an issue or mention it in a comment, and it posts its progress and answer on the issue. ## [Install Ren in Linear](#install-ren-in-linear) Connect Linear once for your organization. You need: * **A Ren organization admin** to start the install. * **A Linear workspace admin** to approve it. Linear only lets workspace admins install agents. Web app CLI Instruction method Web app (app) 1. Go to **Settings → Mentions**. 2. In the **Task management** section, select **Install Ren on Linear**. 3. Approve the install in Linear.  
```sh
ren linear install
```
Open the Linear authorization URL it prints and approve the install. Once installed, Ren appears in Linear’s assignee and mention menus. The app manages one Linear workspace per organization. ## [When to use Linear](#when-to-use-linear) Use Linear when the request is already an issue. Ren posts progress and responses there, so the team can follow the work. ## [How a Linear issue maps to Ren](#how-a-linear-issue-maps-to-ren) Each assignment or mention starts a Linear agent session. Each session creates a Ren [chat](/docs/concepts/chats/) in the mapped project, and replies within that session continue it. Ren doesn’t create a Ren [task](/docs/concepts/tasks/) for the issue. If an open Ren task already links the issue and is assigned to a project, the agent session goes to that task’s chat instead. ## [Map Linear projects to Ren projects](#map-linear-projects-to-ren-projects) Each Linear project maps to one Ren project, and a Ren project can accept several Linear projects. Each mapping needs a **fallback sender**, the account Ren uses when the sender has no matching Ren account or doesn’t belong to the project’s space. Web app Ask Ren CLI Instruction method Web app (app) 1. Open the project’s **@Ren** tab. 2. On the **Linear** card, pick a Linear project. 3. Pick a fallback sender. The mapping isn’t saved until you do. You can also open **Settings → Mentions → Linear**, select a Ren project and a Linear project, choose a **Session sender**, and select **Route here**. Use **All issues (no project)** for issues outside a Linear project.  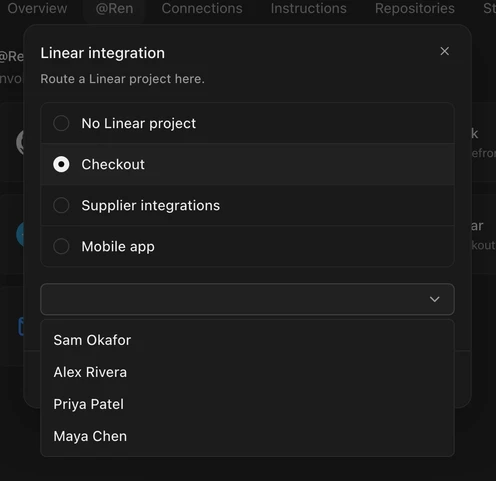 [Map the Mobile Linear project to this project, with me as the session sender.](https://useren.ai/app/sessions?prompt=Map+the+Mobile+Linear+project+to+this+project%2C+with+me+as+the+session+sender.) [Open in Ren ](https://useren.ai/app/sessions?prompt=Map+the+Mobile+Linear+project+to+this+project%2C+with+me+as+the+session+sender.) Mapping needs an organization admin, so ask from an admin account.
```sh
ren linear projects
ren linear mappings create --ren-project-id --linear-project-id --sender-user-id
```
## [Assign an issue to Ren](#assign-an-issue-to-ren) Assign the issue to Ren in Linear. Ren starts an agent session, posts “Working on it…”, and then posts its response on the issue. Ren reads the issue as its prompt. ## [Mention Ren in a comment](#mention-ren-in-a-comment) Mention Ren in a comment on an issue in a mapped Linear project. The comment is Ren’s prompt:
```text
@Ren check whether this crash also happens on Android 14 and suggest a fix.
```
A mention with no other text asks Ren to review the issue and offer help. ## [FAQ](#faq)
# Slack
> Connect Ren to Slack, map channels to projects, and send work to Ren from threads and DMs.
Ren is an app in your Slack workspace. Map a Slack channel to a Ren [project](/docs/concepts/projects/) so people can mention Ren there. Ren replies in a thread, which maps to one Ren [chat](/docs/concepts/chats/). DMs use your personal space. ## [Install Ren in Slack](#install-ren-in-slack) Connect Slack once for your organization. You need: * **A Ren organization admin:** Only admins can connect Slack and map channels. * **Permission to install apps in your Slack workspace:** If your workspace needs app approval, a Slack workspace admin has to approve Ren. Each Slack workspace can connect to only one Ren organization. Web app CLI Instruction method Web app (app) 1. Go to **Settings → Mentions**. 2. In the **Communication** section, select **Install Ren on Slack**. 3. Approve the permissions Ren asks for in Slack.  
```sh
ren slack install
```
Open the Slack authorization URL it prints and approve the permissions. After installation, Ren joins your public channels and the **Connect your Slack channels** dialog opens. Map channels to projects, or select **Skip for now**. Ren also sends the person who installed it a DM suggesting work it can do. ## [When to use Slack](#when-to-use-slack) Use Slack for requests that come up in team conversations, like summaries, lookups, or drafts. Ren reads thread context and shares progress and results with the channel. Use the [web app](/docs/surfaces/web-app/) for longer sessions or actions that need approval. ## [Talk to Ren](#talk-to-ren) @mention Ren in a mapped channel:
```text
@Ren summarize the open bugs from this week and draft a fix for the top one
```
* **Reply:** Ren replies in a thread under your mention. * **Thread context:** When you mention Ren inside an existing thread, it reads the messages since its last mention (or the whole thread, the first time), including files. * **Status:** Ren adds 👀 when it starts and ✅ when it replies. Longer requests show a task list. Replies may include up to three follow-up buttons. Selecting a button sends that suggestion as your next message. To continue a chat in more depth, open it in the [web app](/docs/surfaces/web-app/). Select **Open in Slack** in the chat header to get back to the thread. ## [Work together in a thread](#work-together-in-a-thread) Several people can use one chat through the same Slack thread. Each mention or follow-up selection runs as its sender, or the fallback sender if account matching fails. See [Who Ren acts as](/docs/channels/#who-ren-acts-as) for space membership requirements. ## [Add Ren to channels](#add-ren-to-channels) Ren only responds in channels that are mapped to a project. Each channel maps to one project. Web app Ask Ren CLI Instruction method Web app (app) 1. Open the project and go to the **@Ren** tab. 2. On the **Slack** card, pick a channel and an optional fallback sender. 3. Changes save automatically. You can also map channels for every project at once from **Settings → Mentions → Slack**: select a project, then select the channel to route to it.   [Map the #support Slack channel to the Support project.](https://useren.ai/app/sessions?prompt=Map+the+%23support+Slack+channel+to+the+Support+project.) [Open in Ren ](https://useren.ai/app/sessions?prompt=Map+the+%23support+Slack+channel+to+the+Support+project.) Mapping needs an organization admin, so ask from an admin account.
```sh
ren slack channels list
ren slack channels set --project-id --fallback-sender-user-id
```
When a channel is mapped for the first time, Ren posts “This channel is now connected to the Ren project …” in it. ### [Mention Ren every time](#mention-ren-every-time) In channels, @mention Ren to request a response, including for follow-ups. Ren also reads thread context and runs the background schedules described below. ### [Public and private channels](#public-and-private-channels) Ren joins public channels by itself when you map them. For a **private channel**, first run `/invite @Ren` in the channel so it appears in the list. ### [Who Ren acts as](#who-ren-acts-as) Ren matches you to a Ren user if you signed in to Ren with Slack, or by the email on your Slack profile. You must also be a member of the project’s [space](/docs/concepts/spaces/). The **fallback sender** is the Ren user a chat runs as when the person who wrote the message has no matching Ren account or isn’t in the space. See [Who Ren acts as](/docs/channels/#who-ren-acts-as). ## [DMs](#dms) Open Ren from the **Messages** tab of the Ren app in Slack and send a message. * DMs run in the **Default** project in your **personal space**, so they don’t need a mapping. * Each new message at the top level starts a new chat. Reply in its thread to continue it. You don’t need to @mention Ren in DMs. * Your Slack account must match a Ren account in the organization. Ren matches you by signing in with Slack or by the email on your Slack profile. ## [Automatic summaries, profiles, and suggestions](#automatic-summaries-profiles-and-suggestions) Installing Slack starts member schedules. Mapping a channel starts channel schedules and tells you they are active. These run without individual requests. * **Channel summaries:** Each morning, Ren reads new messages in mapped channels and updates their summaries. It doesn’t post a reply. * **Channel suggestions:** Once a week, midweek during working hours, Ren may post one suggestion with up to three follow-up buttons. It posts only suggestions it’s confident will be useful. * **Member profiles:** Twice a week, Ren builds each member’s private profile from their Slack messages. Once a week, it may DM one suggestion. These schedules start for existing members on installation and for new members when they join. * **Unanswered suggestions:** Ren waits for a reply before posting another suggestion. It dismisses unanswered suggestions after 14 days. Those suggestions may return after 30 days. Declined suggestions never return. * **Reduced frequency:** After three consecutive weekly runs without a useful suggestion, Ren checks monthly. * **Tasks:** Each suggestion is a task. Channel suggestions are [tasks](/docs/concepts/tasks/) in the mapped project, visible to the project’s space. DM suggestions are tasks in your personal space. These run as [schedules](/docs/concepts/schedules/) in the mapped project and in each member’s personal space, using the organization’s time zone. Channel summaries and profiles are kept as files in [file stores](/docs/concepts/storage/) in those projects. To turn them off, ask Ren, or pause or delete the schedules on the **Scheduled** page:
```text
Stop posting suggestions in #support.
```
Unmapping a channel, disconnecting Slack, or reconnecting it doesn’t stop these schedules. ## [Spaces and projects](#spaces-and-projects) The mapped project supplies instructions, apps, skills, and storage. Its space determines membership and available credentials. ## [FAQ](#faq) ## [Troubleshooting](#troubleshooting) ### [Ren doesn’t respond at all](#ren-doesnt-respond-at-all) * **You replied without a mention:** In channels, every message to Ren needs an @mention, including follow-ups in a thread. * **The channel isn’t mapped, and Ren isn’t in it:** Map the channel, or for a private channel, run `/invite @Ren` first. * **Slack was disconnected:** Check that Slack shows as **Connected** in **Settings → Mentions**. * **Ren started but never replied:** If only the 👀 is showing, open the chat in the web app to see what happened. ### [“This channel isn’t connected to a Ren project yet.”](#this-channel-isnt-connected-to-a-ren-project-yet) The channel has no mapping. An admin can select **Connect to Ren** under the message, or map the channel in **Settings → Mentions → Slack**. ### [A private channel doesn’t appear in the list](#a-private-channel-doesnt-appear-in-the-list) Ren can only see private channels it has been invited to. Run `/invite @Ren` in the channel, then reopen the list. ### [“Couldn’t map your Slack account to a Ren user.”](#couldnt-map-your-slack-account-to-a-ren-user) Ren couldn’t match the sender to a Ren user, and the channel has no fallback sender. Either sign up for Ren with the same email as your Slack profile, or have an admin set a fallback sender on the channel’s mapping. In a DM, there’s no fallback sender. Make sure the email on your Slack profile matches your Ren account. ### [“Neither your Slack account nor the channel’s fallback user is a member of this project’s space.”](#neither-your-slack-account-nor-the-channels-fallback-user-is-a-member-of-this-projects-space) The project belongs to a [space](/docs/concepts/spaces/) that neither you nor the fallback sender belongs to. Add yourself to the space, or pick a fallback sender who is a member. ### [“The project connected to this channel no longer exists.”](#the-project-connected-to-this-channel-no-longer-exists) The mapped project was deleted. Map the channel to another project. ### [“Your private Ren project isn’t set up yet.”](#your-private-ren-project-isnt-set-up-yet) Your account doesn’t have a personal space in the organization that installed Ren in Slack. Sign in to Ren in that organization, then DM Ren again. ### [“Ren hit a snag and couldn’t finish”](#ren-hit-a-snag-and-couldnt-finish) The chat failed partway through, and Ren marks your message with ❌. Open the chat in the web app to see the error, then mention Ren again to retry. If the message says your organization has run out of credits, add credits in **Settings → Billing & plans**. ### [“This Slack workspace is already connected to another Ren organization.”](#this-slack-workspace-is-already-connected-to-another-ren-organization) A Slack workspace can connect to only one Ren organization. Disconnect it from the other organization first. ## [Disconnect](#disconnect) * **Unmap a channel:** Clear the channel on the project’s **@Ren** tab, or remove it in **Settings → Mentions → Slack**. Ren stops responding to new mentions there. Its default schedules keep running until you turn them off. * **Disconnect Slack:** In **Settings → Mentions → Slack**, select **Reset mappings**. This clears every channel mapping and uninstalls Ren from Slack. You can connect again later.
# Telegram
> Talk to Ren from a Telegram group or DM. Link your Telegram account, add the Ren bot to a chat for a project, and reply to continue.
Each Telegram group or DM connects to one [Ren project](/docs/concepts/projects/), and Ren replies in the same conversation. One bot serves all organizations, without a separate installation. A project invite link adds the bot to your conversation. ## [Link your Telegram account](#link-your-telegram-account) Link your Telegram account so Ren knows which messages are yours. Each Telegram account links to one Ren user per organization. Web app CLI Instruction method Web app (app) 1. Go to **Settings → Mentions**. 2. In the **Communication** section, select **Connect Telegram**. Ren opens a link to the Ren bot in Telegram. 3. In Telegram, select **Start**. The bot replies “✅ Your Telegram account is now linked to Ren.” The link works once and expires after 15 minutes.  
```sh
ren telegram link-code
```
Open the link it prints on a device with Telegram and select **Start**. Linking is optional when the chat has a fallback sender: without a link, your messages run as that fallback sender. ## [Use Ren in a group](#use-ren-in-a-group) A project invite link adds the bot to a group and maps the group to that project. Web app Ask Ren CLI Instruction method Web app (app) 1. Open the project’s **@Ren** tab. 2. On the **Telegram** card, select **Create invite link for a new chat**. 3. Select **Open in a group (bot must be admin)**. Choose the Telegram group. Make the bot an admin. The bot posts “✅ This chat is now connected to …” with the project’s name. To set a fallback sender, create the link from **Settings → Mentions → Telegram** with **Add Telegram chat** instead. [Create a Telegram invite link for this project.](https://useren.ai/app/sessions?prompt=Create+a+Telegram+invite+link+for+this+project.) [Open in Ren ](https://useren.ai/app/sessions?prompt=Create+a+Telegram+invite+link+for+this+project.)
```sh
ren telegram claim-code --project-id
```
Open the group link it prints. To move a chat that’s already connected to another project, run `ren telegram chats set --project-id `. In a group, Ren reads only messages that @mention the bot or reply to one of its messages, and ignores the rest of the conversation. * **Start a chat** by mentioning the bot in a new message. * **Continue a chat** by replying to any of Ren’s messages in it. ## [Use Ren in a DM](#use-ren-in-a-dm) DMs also need a project mapping. Create a project invite link and select **Open in a direct message**. Without a mapping, the bot asks you to connect the DM first. In a DM, you don’t need to mention the bot: * **Start a chat** by sending a new message. * **Continue a chat** by replying to one of Ren’s messages. ## [Attachments](#attachments) Ren receives documents and photos you send with a message. Files over 32 MB are skipped, and Ren sees a note that they were. Ren reads images, text files, and PDFs directly. It saves other files to the space’s machine and opens them with its tools. ## [Receive files and open artifacts](#receive-files-and-open-artifacts) Files Ren creates, like a report or a spreadsheet, arrive in the chat as documents after its reply. An [artifact](/docs/concepts/artifacts/), such as a dashboard or a small game, is a web page. Ask Ren for its link, and open it in your phone’s browser. ## [FAQ](#faq)
# Apps
> Add a tool your team already uses, such as Gmail, Linear, or Shopify, to a project, connect an account, and use it in chats.
An app connects Ren to a service like Gmail, Linear, HubSpot, or Shopify. For example, Gmail lets Ren read, summarize, and draft email. In the API and CLI, an app is a blueprint with `kind: app`. ## [How apps work](#how-apps-work) An app usually provides tools through an MCP server and can include [skills](/docs/concepts/skills/) that explain how to use those tools. Connect the account or key the app needs. An app’s skills are listed with the app, not under **Marketplace → Skills**. Add an app to a [project](/docs/concepts/projects/) to make it available in every chat. Projects in the same space reuse the connected account. See [Connect an account](#connect-an-account) for credential storage. Apps provide tools, while [channels](/docs/channels/) receive requests and deliver replies. For example, the Linear app reads and updates issues, and the Linear channel receives issues assigned to Ren. If a tool has no app but does have an MCP server, add it as a [custom MCP](/docs/concepts/custom-mcps/). ## [Find an app](#find-an-app) Web app Ask Ren Instruction method Web app (app) Open **Marketplace → Apps** to browse or search by name. Select an app to see the MCPs and skills it adds, the publisher, and links to its documentation.  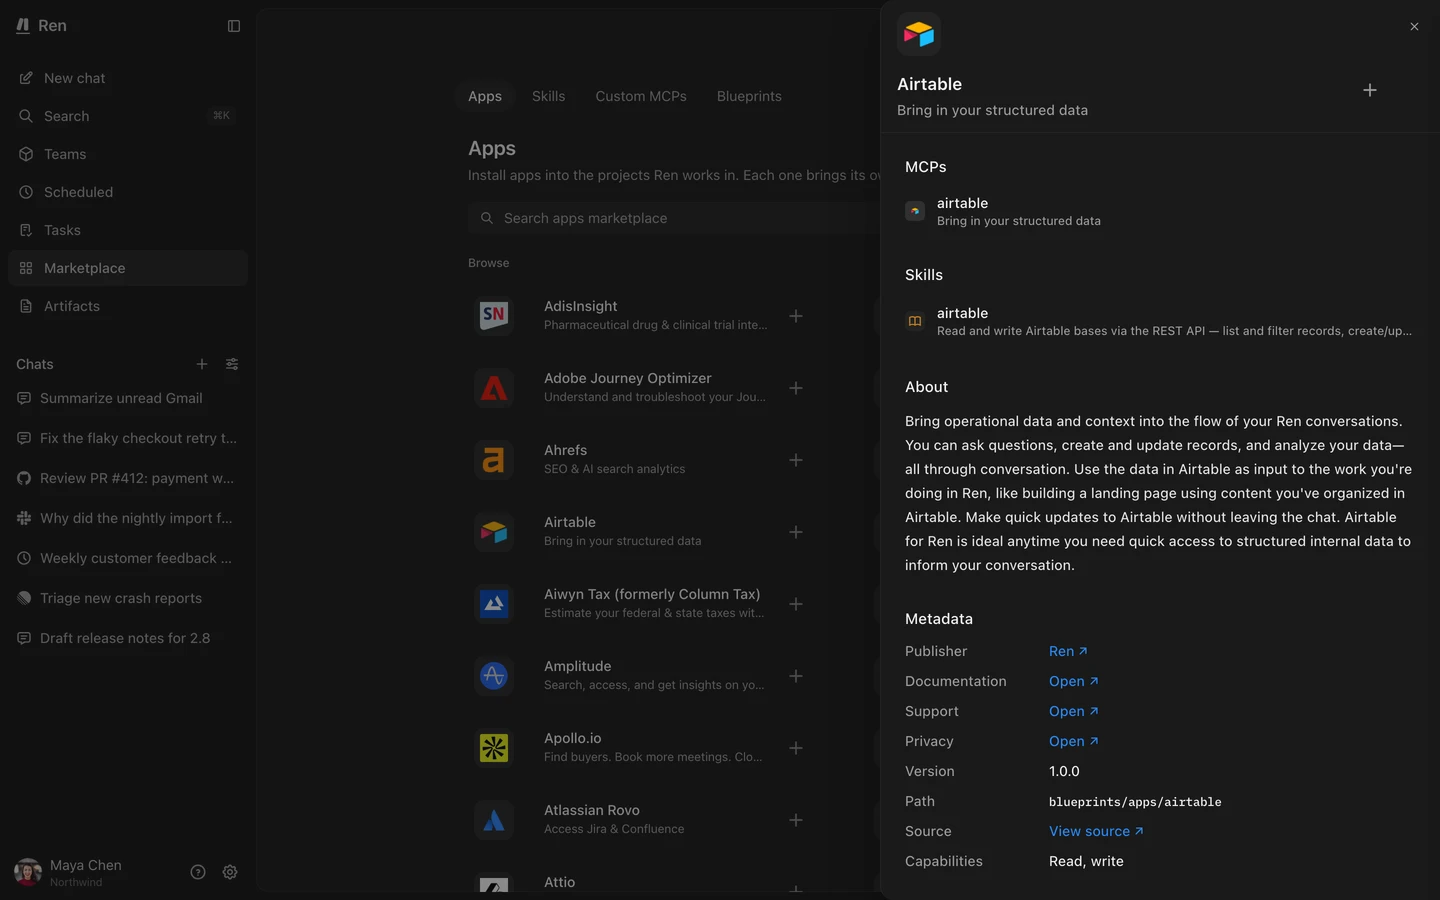 [Is there an app for HubSpot?](https://useren.ai/app/sessions?prompt=Is+there+an+app+for+HubSpot%3F) [Open in Ren ](https://useren.ai/app/sessions?prompt=Is+there+an+app+for+HubSpot%3F) You can also browse apps without signing in on the public [Blueprints catalog](/blueprints). ## [Add an app to a project](#add-an-app-to-a-project) Web app Ask Ren CLI Instruction method Web app (app) 1. Open **Marketplace → Apps** and select the app. 2. Select **Add**, then pick a project. 3. If the app needs an account, sign in or enter its key, then select **Add to** and the project name. The app’s MCPs and skills are attached to the project and ready in its next chat.  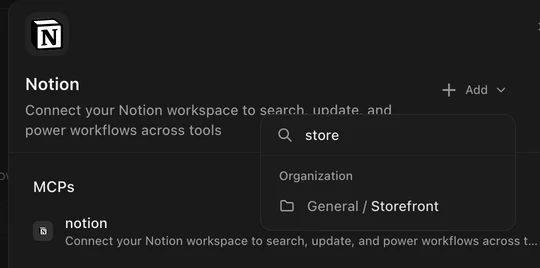 [Add the Linear app to this project.](https://useren.ai/app/sessions?prompt=Add+the+Linear+app+to+this+project.) [Open in Ren ](https://useren.ai/app/sessions?prompt=Add+the+Linear+app+to+this+project.) Ren shows a connect card if the app needs an account.
```sh
ren blueprints add --source linear --target-project-id
```
`--source` takes the app’s slug. Connect its account afterward with `ren credentials connect`. ## [Connect an account](#connect-an-account) When Ren needs an app that isn’t connected, it shows a connect card in the chat. Connecting from the card also adds the app to the project if it isn’t there yet. Web app Ask Ren CLI Instruction method Web app (app) 1. Select **Connect** on the card in the chat. 2. Sign in to the account you want Ren to use, or enter the key the app asks for. 3. Return to Ren. The card shows **Connected**, and Ren continues. Some apps, such as Figma, Meta Ads, and Shopify, end sign-in on a page that won’t load. That’s expected. Copy that page’s full address from the browser, paste it into **Paste the address from the sign-in tab** on the card, and select **Finish**. If another space you belong to has a connection, select **Reuse** to copy it into this space, or select **Add new** to connect a different account. [Connect my Gmail account.](https://useren.ai/app/sessions?prompt=Connect+my+Gmail+account.) [Open in Ren ](https://useren.ai/app/sessions?prompt=Connect+my+Gmail+account.) Select **Connect** on the card Ren shows and finish signing in. Connect cards only work in the web app, not in channels.
```sh
ren credentials connect --vault-id
```
Use the vault of the project’s space (`ren vaults list`). The connection is saved in the project’s space. In your personal space, it’s saved in your personal credentials. If your organization already has a connection for the app, Ren uses it, and the connection dialog shows **Connected using organization credentials**. See [Which credential Ren uses](/docs/concepts/credentials/#which-credential-ren-uses). ## [Use an app in a chat](#use-an-app-in-a-chat) Type `@` in the composer and pick the app. The mention tells Ren which app to use for that request:
```text
@Gmail summarize my unread email from today.
```
Mentions are optional. Mention an app to choose between services that can handle the request. If the project doesn’t have the app, Ren shows a connect card to add it. ## [Remove an app](#remove-an-app) Web app Ask Ren Instruction method Web app (app) 1. Open **Marketplace → Apps** and select the app. 2. Select **Add** to open the project list, then select a project with a check mark to remove the app from it. [Remove the Linear app from this project.](https://useren.ai/app/sessions?prompt=Remove+the+Linear+app+from+this+project.) [Open in Ren ](https://useren.ai/app/sessions?prompt=Remove+the+Linear+app+from+this+project.) Removing an app detaches its MCPs and skills from the project. Ren also deletes the app’s credentials from the space if no other project in that space still needs them, but credentials at the organization level will stay. ## [FAQ](#faq)
# Artifacts
> Ask Ren to build dashboards, reports, and pages hosted at their own link, keep them up to date, and share them.
An artifact is a web page Ren builds and hosts at a shareable URL, like a dashboard, report, or small tool. Ask Ren for a website or page to create an artifact. In the API and CLI, an artifact is an `artifact`. ## [Where artifacts live](#where-artifacts-live) An artifact belongs to a [space](/docs/concepts/spaces/), not to one project. Any project in that space can build or update it, and every member of the space sees it in the app. Open **Artifacts** in the sidebar to see the artifacts from every space you belong to. Select a card to open the artifact.  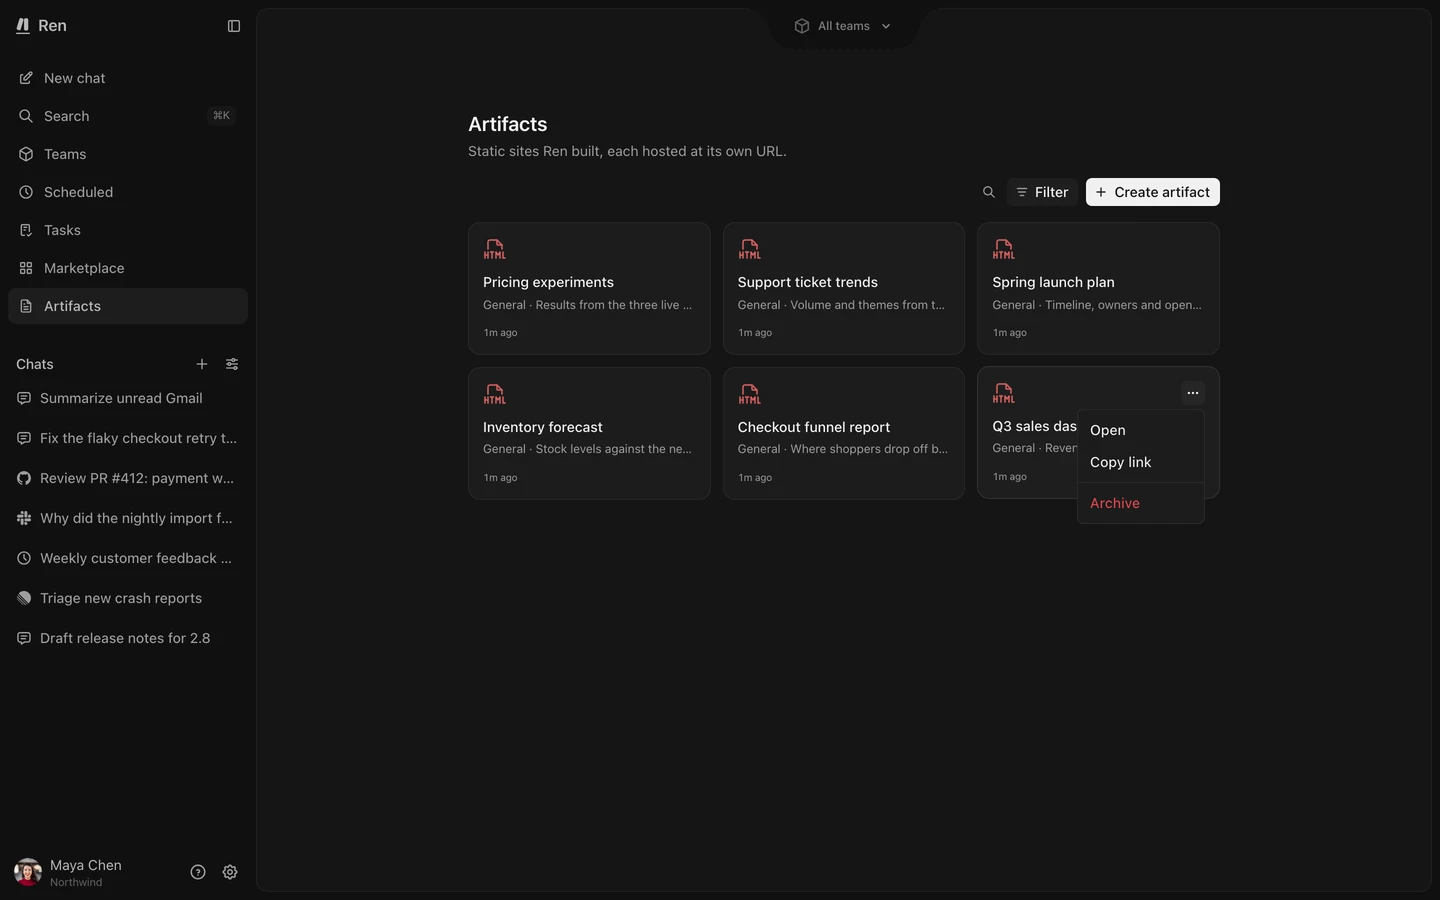 ## [Create or update an artifact](#create-or-update-an-artifact) Ren builds the page on the space’s machine and publishes it. Web app Ask Ren Instruction method Web app (app) 1. Open **Artifacts** and select **Create artifact**. 2. Finish the prompt that opens in a new chat, like `Create an artifact for our weekly signups`, and send it. 3. When Ren replies with the link, open it. To change an artifact, ask Ren in a chat in the same space. [Build a dashboard of this month's orders by region from the orders database.](https://useren.ai/app/sessions?prompt=Build+a+dashboard+of+this+month%27s+orders+by+region+from+the+orders+database.) [Open in Ren ](https://useren.ai/app/sessions?prompt=Build+a+dashboard+of+this+month%27s+orders+by+region+from+the+orders+database.) To change it later, ask Ren again, for example `Add a chart of returns to the orders dashboard.` ## [Keep an artifact up to date](#keep-an-artifact-up-to-date) An artifact can read current data whenever someone opens it, without rebuilding the page. Use a [schedule](/docs/concepts/schedules/) when Ren needs to update that data periodically:
```text
Every weekday at 8am, refresh the orders dashboard with yesterday's orders.
```
Ren creates the schedule in the project. Each run starts a new chat that updates the artifact’s data, often from a [database](/docs/concepts/storage/#databases) in the same space. Open **Scheduled** to see the schedule. ## [Share an artifact](#share-an-artifact) Anyone with the link can open an artifact without signing in. Space membership controls who sees it in the app and who can request changes. Share the link only with people who should see it. Web app Ask Ren CLI Instruction method Web app (app) 1. Open **Artifacts**. 2. Open the artifact’s menu and select **Copy link**.  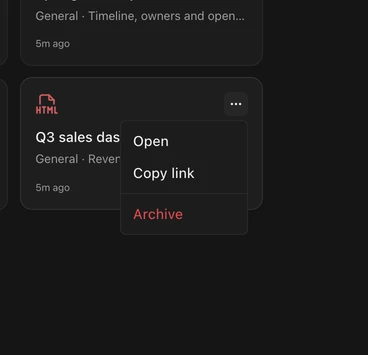 [Give me the link to the orders dashboard.](https://useren.ai/app/sessions?prompt=Give+me+the+link+to+the+orders+dashboard.) [Open in Ren ](https://useren.ai/app/sessions?prompt=Give+me+the+link+to+the+orders+dashboard.)
```sh
ren artifacts get
```
The `url` field is the link. ## [Archive an artifact](#archive-an-artifact) Archiving takes an artifact down. Its link stops working right away, and it leaves the **Artifacts** page. Ren keeps a backup copy. Artifact links can’t change, and a new artifact with the same name gets a different link. Web app Ask Ren Instruction method Web app (app) 1. Open **Artifacts**. 2. Open the artifact’s menu, select **Archive**, and confirm. [Archive the old Q2 dashboard.](https://useren.ai/app/sessions?prompt=Archive+the+old+Q2+dashboard.) [Open in Ren ](https://useren.ai/app/sessions?prompt=Archive+the+old+Q2+dashboard.) ## [FAQ](#faq)
# Blueprints
> Install a ready-made setup, such as a whole space with its projects, skills, and machine, instead of building it yourself.
A blueprint is an installable Ren setup for a project, space, or organization. It can include skills, custom MCPs, instructions, an environment, and schedules. The **Software Factory** blueprint creates a space with Plan, Build, Review, QA, and Monitoring projects. Each project has instructions and skills, and their shared machine includes the required tools. [Apps](/docs/concepts/apps/) are blueprints too: each one adds a single tool to a project. ## [What installing adds](#what-installing-adds) Installing creates editable spaces and projects in your organization. Later blueprint changes don’t update those copies, though attached skills and custom MCPs still use their latest versions. * A space blueprint creates a new shared space. A project blueprint adds a project to a space you pick. * Projects get the blueprint’s instructions, permissions, and default model. * Ren attaches skills and custom MCPs to the projects. * Schedules are created **paused**, so nothing runs until you turn them on. * Databases, artifacts, and starter tasks are added where the blueprint defines them. Installing doesn’t overwrite existing resources. In an existing project, Ren appends the blueprint’s instructions and keeps your settings. Ren lists the remaining setup after installation. Connect the required accounts and add the listed [channels](/docs/channels/), like Slack channels or GitHub repositories. ## [Install a blueprint](#install-a-blueprint) Browse blueprints in **Marketplace → Blueprints** in the app. The public [Blueprints catalog](/blueprints) lists apps. To add an app, see [Add an app to a project](/docs/concepts/apps/#add-an-app-to-a-project). Install space and project blueprints through Ren, the CLI, or MCP. Web app Ask Ren CLI Instruction method Web app (app) Open **Marketplace → Blueprints**, select a blueprint, and ask Ren to install it. [Install the Software Factory blueprint.](https://useren.ai/app/sessions?prompt=Install+the+Software+Factory+blueprint.) [Open in Ren ](https://useren.ai/app/sessions?prompt=Install+the+Software+Factory+blueprint.) Ren lists what it created and what you still need to connect. Turn on any schedules you want from **Scheduled**.
```sh
ren registry blueprints list
ren blueprints add --source software-factory
```
`--source` takes the blueprint’s slug. A project blueprint also needs `--pod-id` for the space to add it to.
# Chats
> Start a chat in the right project, pick a model and reasoning effort, mention what Ren needs, and attach files.
A chat is a conversation with Ren in a [project](/docs/concepts/projects/), including your requests, Ren’s replies, and its actions. Ren uses the project’s instructions, repositories, apps, skills, storage, and permissions. Chats can start in the web app or from a [channel](/docs/channels/), [schedule](/docs/concepts/schedules/), or [task](/docs/concepts/tasks/). All appear in the sidebar’s chat list, which you can filter by source, creator, space, project, or status. Everyone in a project’s space can see the project’s chats. Chats in your personal space are visible only to you. In the API and CLI, a chat is a `session`.  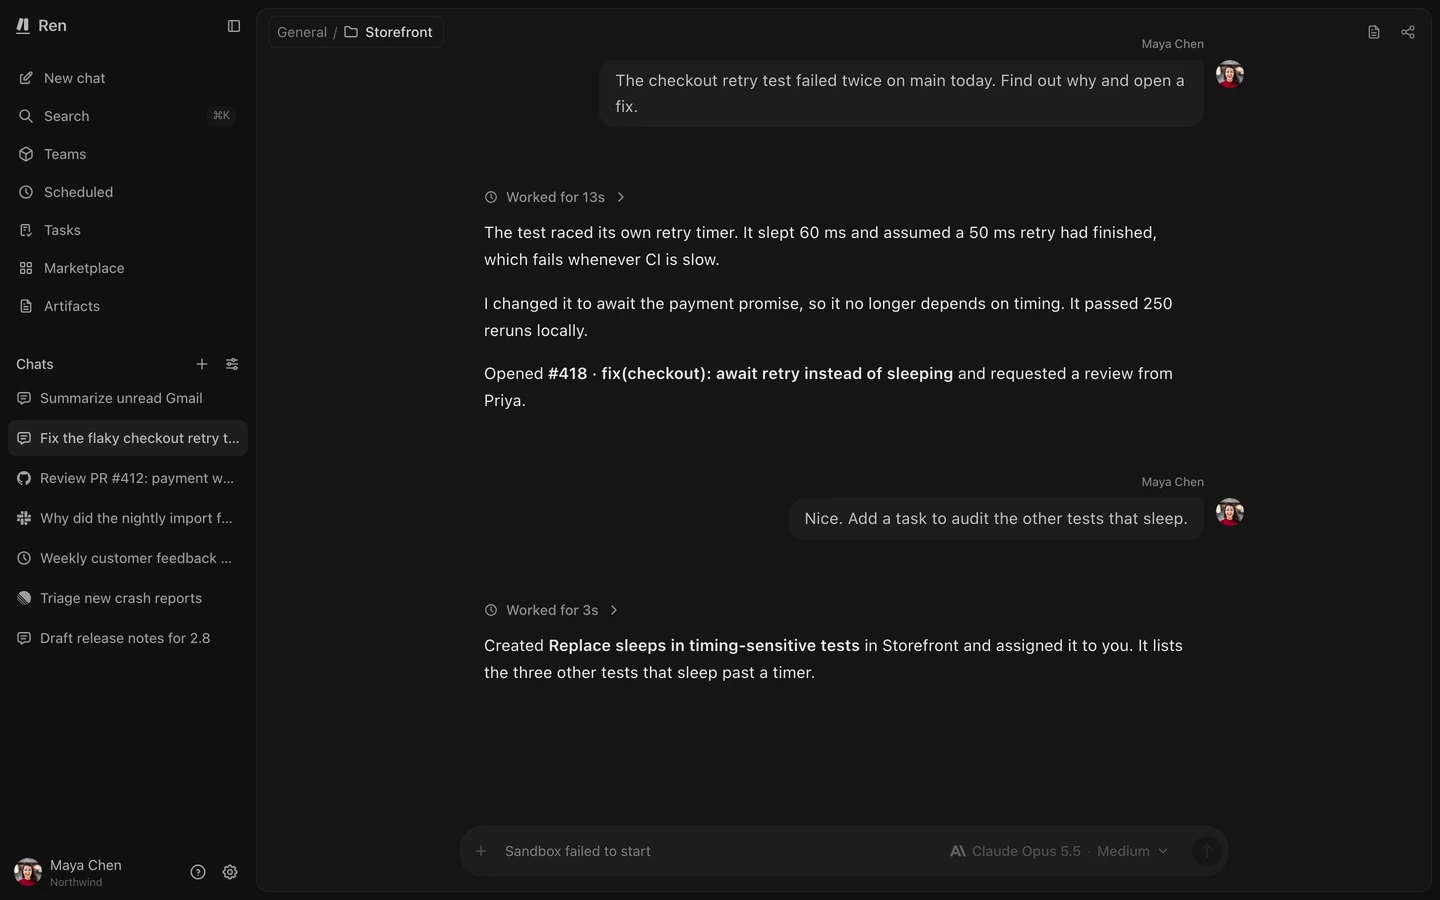 ## [Start a chat](#start-a-chat) 1. Select **New chat** in the sidebar. 2. Check **Working in** below the composer. It shows the space and project the chat runs in. Select it to choose another project. 3. Type your request and press Enter. ## [Choose a model and reasoning effort](#choose-a-model-and-reasoning-effort) Select the model picker in the composer to choose a model. For models that support it, the same picker sets the reasoning effort: higher effort spends more time thinking before answering. If you don’t pick a model, Ren uses the first available default: project, space, organization, then Ren. Select the default entry in the model picker to restore this behavior. You can change the model between messages, and the new choice applies from your next message. ## [Mention apps, skills, and more](#mention-apps-skills-and-more) Type `@` in the composer to mention an item. Ren adds it to the message as context. | Mention | What it tells Ren | | ------------ | ------------------------------------------------------------------------ | | An app | Use this app. If it isn’t connected yet, Ren shows a card to connect it. | | A skill | Use this skill’s instructions. | | A custom MCP | Use this custom MCP’s tools. | | A repository | Work in this repository from the project. | | A project | The request is about this project. | Mentions apply to one message. Attach an app, skill, or custom MCP to the project to make it available in every chat. See [Projects](/docs/concepts/projects/#apps-skills-custom-mcps-and-storage). ## [Attach files](#attach-files) Drag files onto the composer, or select **+** and then **Upload attachment**. Each file can be up to 100 MB. Ren reads images, text files, and PDFs up to 10 MB directly. It saves larger files and other formats to the space’s machine and opens them with its tools. ## [Repositories and permissions](#repositories-and-permissions) Select **+** in the composer to reach two project settings without leaving the chat: * **Repositories** adds or removes the project’s repositories and sets the branch Ren uses for each. * **Permissions** changes what Ren can do without asking. Both settings apply to every chat in the project. See [Repositories](/docs/concepts/projects/#repositories) and [Permissions](/docs/concepts/projects/#permissions). ## [FAQ](#faq)
# Credentials
> Store the accounts, tokens, and secrets Ren uses, at the organization, space, or personal level, and see which one Ren picks.
A credential is an account connection or secret Ren uses to access a service, like a Gmail connection, a Stripe API key, or a `DATABASE_URL` used by scripts. Ren stores each credential encrypted and passes it to the tools that need it. Neither you nor Ren sees the raw value again after you save it. In the API and CLI, credentials live in vaults: `credential` and `vault`. ## [Where credentials live](#where-credentials-live) Every credential belongs to one of three levels. Pick the level by who should be able to use it. | Level | Who can use it | Use it for | | ------------ | ------------------------------------------------------------ | ---------------------------------------------------- | | Organization | Every chat in the organization | Accounts shared across spaces, like a company Notion | | Space | Chats in that space’s projects, and members’ personal spaces | One team’s or one client’s accounts | | Personal | Only chats in your personal space | Your own accounts, like your inbox | For an agency, store each client’s accounts in that client’s space, so only its members can use them. A space’s credentials are visible only to its members. There’s no admin override: an organization admin who isn’t a member of a space can’t see or use its credentials. Your personal credentials are visible only to you. Organization admins can’t access personal credentials. Web app CLI Instruction method Web app (app) Open **Settings → Credentials** to see every credential you can use, with its level. Filter by level to narrow the list.  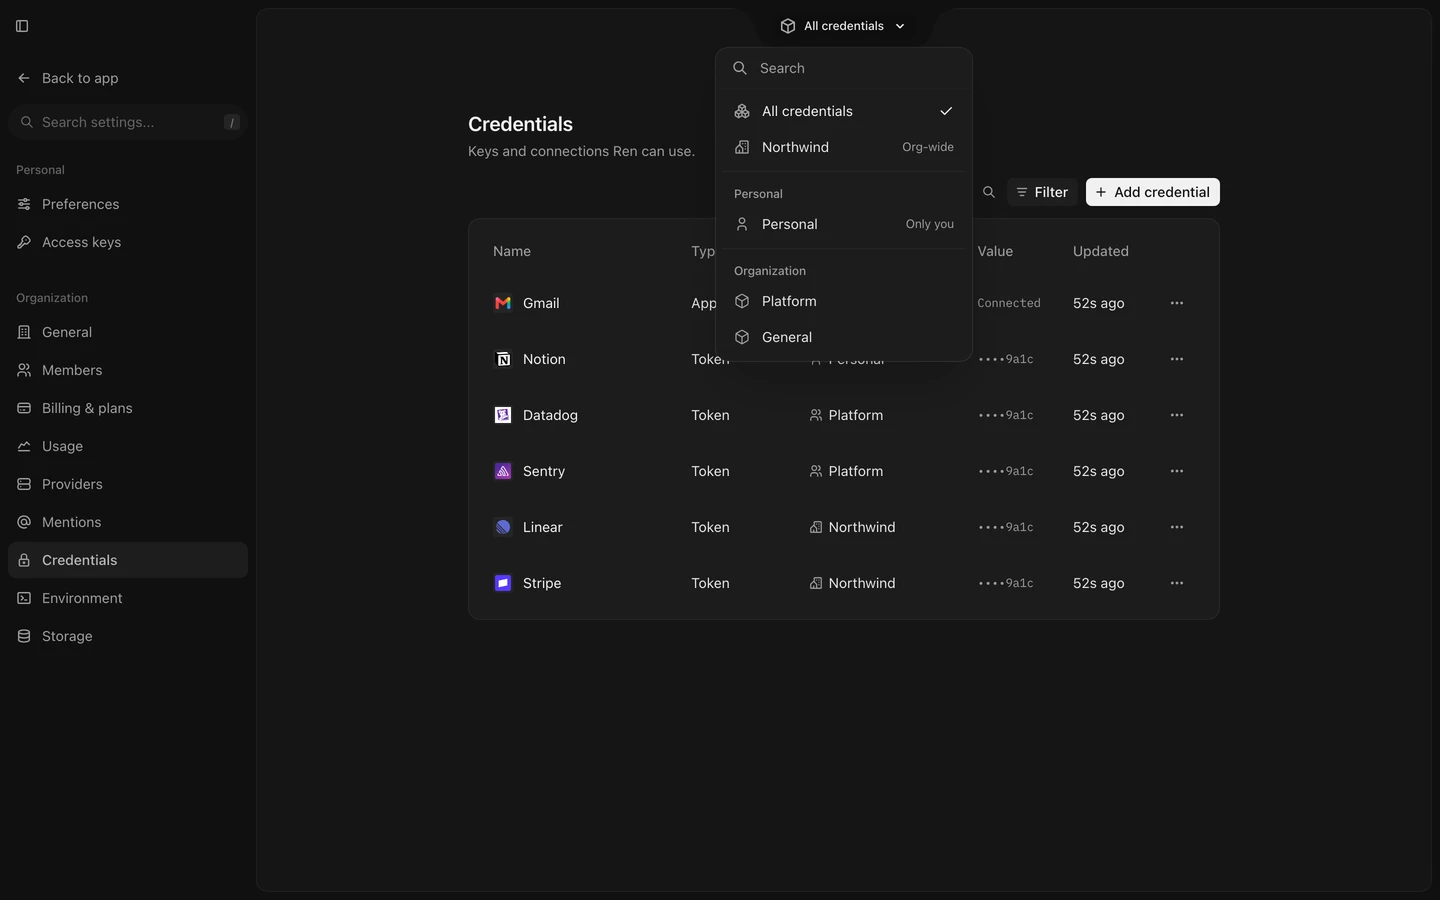
```sh
ren vaults list
ren credentials list
```
`ren vaults list` shows the vault for each level. ### [Which credential Ren uses](#which-credential-ren-uses) Ren uses the first matching credential in this order: * **In a shared space:** the space’s credential, then the organization’s. * **In your personal space:** your personal credential, then credentials from the shared spaces you belong to (oldest space first), then the organization’s. Channel, scheduled, and task chats use the credential lookup order for their project’s space. The sender’s identity doesn’t change that order. ## [Types of credentials](#types-of-credentials) **Settings → Credentials** groups credentials by type: | Type | What it holds | How you add it | | ---------- | -------------------------------------------------------------------------- | -------------------------------------------------------------------------- | | App | A signed-in account, like Gmail or GitHub | Sign in when you [connect an app](/docs/concepts/apps/#connect-an-account) | | Token | An API token for an app or custom MCP | Paste it when you connect the app or custom MCP | | Password | A username and password | Enter them when you connect the app or custom MCP | | Secret | A value Ren reads as an environment variable, like `$API_KEY` | **Add credential** on the Credentials page | | Custom MCP | The connection fields a [custom MCP](/docs/concepts/custom-mcps/) asks for | Fill them in when you connect the custom MCP | Each level holds at most 100 credentials, and one credential per app, custom MCP, or secret name. Saving a new one for the same app replaces the old one. ## [Add a credential](#add-a-credential) Add a secret, like an API key a skill reads from the environment. To sign in to an app, see [Sign in to an app](#sign-in-to-an-app). Web app Ask Ren CLI Instruction method Web app (app) 1. Open **Settings → Credentials** and select **Add credential**. 2. Choose where it lives: your organization or a space. Pick your personal space to keep it to yourself. 3. Enter a **Name** in `UPPER_SNAKE_CASE`, like `STRIPE_API_KEY`, and its **Value**. 4. Select **Store**. The credential appears in the list with its level.  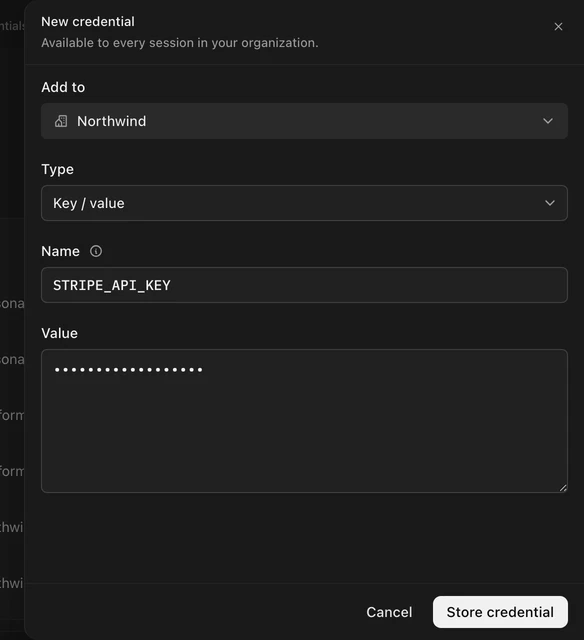 [Store my OpenWeather API key as OPENWEATHER\_API\_KEY for this space.](https://useren.ai/app/sessions?prompt=Store+my+OpenWeather+API+key+as+OPENWEATHER_API_KEY+for+this+space.) [Open in Ren ](https://useren.ai/app/sessions?prompt=Store+my+OpenWeather+API+key+as+OPENWEATHER_API_KEY+for+this+space.) Ren asks for the value or points you to where to enter it.
```sh
ren vaults list
printf %s "$STRIPE_KEY" | ren credentials create --auth-type env --label STRIPE_API_KEY --value-stdin
```
`ren vaults list` shows the vault for each level. Run `ren credentials create --help` for the other types. ## [Sign in to an app](#sign-in-to-an-app) OAuth connects apps and custom MCPs through the provider’s sign-in page. Ren saves the connection in the project’s space, or in your personal credentials when you’re in your personal space. Web app Ask Ren CLI Instruction method Web app (app) 1. Ask Ren to use the app in a chat, or open the app in **Marketplace → Apps** and add it to a project. 2. Select **Connect** on the card, then sign in to the account you want Ren to use. 3. Return to Ren. The card shows **Connected**. If the account is already connected in another space you belong to, the card offers **Reuse** to copy it into this space, or **Add new** to sign in again. [Connect my Google Calendar.](https://useren.ai/app/sessions?prompt=Connect+my+Google+Calendar.) [Open in Ren ](https://useren.ai/app/sessions?prompt=Connect+my+Google+Calendar.) Select **Connect** on the card Ren shows and finish signing in. Connect cards only work in the web app.
```sh
ren credentials connect --vault-id
```
## [Edit, move, or delete a credential](#edit-move-or-delete-a-credential) Deleting is permanent: chats that use the credential fail at the step that needs it until you add a replacement. You can’t view a credential’s value after you save it. Ren shows the last four characters of a secret, or **Connected** for a signed-in account. To change a value, select **Update value**. Web app Ask Ren CLI Instruction method Web app (app) 1. Open **Settings → Credentials** and find the credential. 2. Open its menu and choose: * **Rename** to change its display name. * **Update value** to replace a secret, or **Reconnect** to sign in to the account again. * **Transfer** to copy or move it to another level. * **Delete** to remove it. [Move the STRIPE\_API\_KEY credential from my personal credentials to the Billing space.](https://useren.ai/app/sessions?prompt=Move+the+STRIPE_API_KEY+credential+from+my+personal+credentials+to+the+Billing+space.) [Open in Ren ](https://useren.ai/app/sessions?prompt=Move+the+STRIPE_API_KEY+credential+from+my+personal+credentials+to+the+Billing+space.)
```sh
ren credentials update --name "Stripe live key"
ren credentials transfer --target-vault-id --mode move
ren credentials delete
```
# Custom MCPs
> Add an MCP server that isn't in the Marketplace, connect its credentials, and give a project its tools.
A custom MCP connects Ren to a service outside the [Marketplace](/docs/concepts/apps/). MCP is a protocol that gives agents access to tools. For example, an internal documentation server can provide search tools to projects that use it. Use an app when one exists, since apps include skills and a tested setup. Otherwise, connect a remote MCP server or run a local server on the space’s machine. The API resource is `mcp`. CLI commands use `ren mcps`. ## [Add a custom MCP](#add-a-custom-mcp) A custom MCP is one of two kinds: * **Remote:** a server reached over HTTP or SSE at a URL, like `https://mcp.example.com`. * **Local:** a command that runs on the space’s machine, like `npx -y @modelcontextprotocol/server-github`. For a remote server, choose how it authenticates: | Authentication | What you connect | | ---------------------------------- | -------------------------------------------------------- | | None (no credential) | Nothing. Use this for public servers. | | OAuth | A signed-in account, through the provider’s sign-in page | | API key (bearer) | A token Ren sends in a header | | Basic | A username and password | | Custom headers or query parameters | Values Ren places in the headers or URL you define | Web app Ask Ren CLI Instruction method Web app (app) 1. Open **Marketplace → Custom MCPs** and select **Add custom MCP**. 2. Choose where to add it: your organization, or a project. Choosing a project also adds the custom MCP to it. 3. Pick a **Transport**: **Remote** or **Local**. 4. For **Remote**, enter the **Server URL**. Choose an **Authentication** type. For **Local**, enter the **Command**. Add any required **Arguments** and **Environment variables**. 5. Enter a **Name**, then select **Add MCP**. If the URL is already registered, Ren shows an error with **Add second account**. Select it only when you mean to reach the same server with a different account.  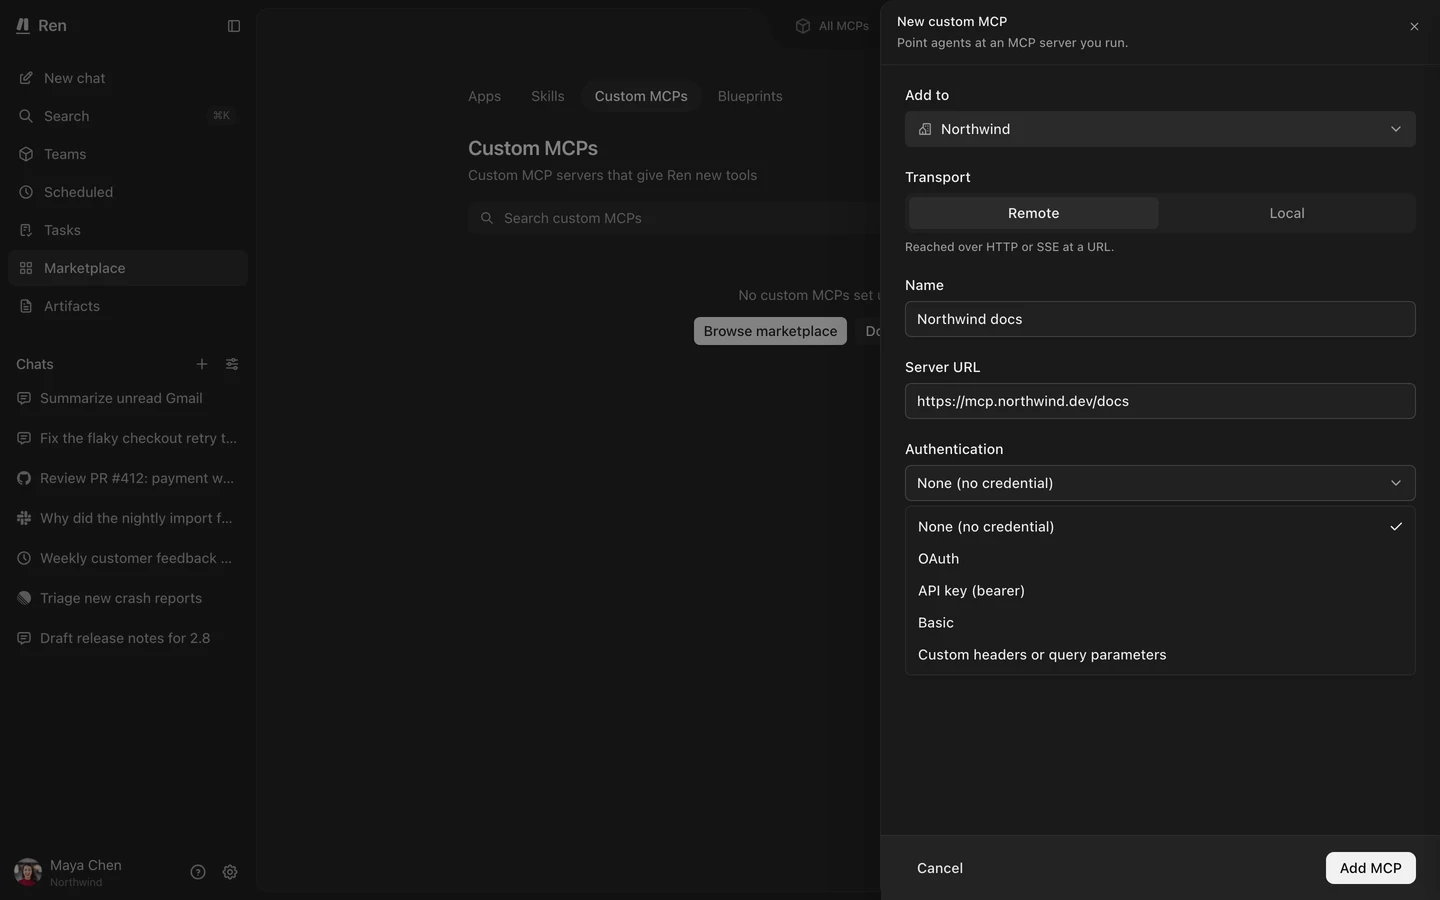 [Add our docs MCP server at https://mcp.acme.dev as a custom MCP and add it to this project. It uses OAuth.](https://useren.ai/app/sessions?prompt=Add+our+docs+MCP+server+at+https%3A%2F%2Fmcp.acme.dev+as+a+custom+MCP+and+add+it+to+this+project.+It+uses+OAuth.) [Open in Ren ](https://useren.ai/app/sessions?prompt=Add+our+docs+MCP+server+at+https%3A%2F%2Fmcp.acme.dev+as+a+custom+MCP+and+add+it+to+this+project.+It+uses+OAuth.)
```sh
ren mcps create --name "Acme docs" --type remote --mcp-server-url https://mcp.acme.dev --auth oauth
```
Run `ren mcps create --help` for local commands and other authentication types. ## [Connect its credentials](#connect-its-credentials) If the server needs a credential, connect it before Ren uses the server. Ren saves it in the project’s space, like an app connection. See [Credentials](/docs/concepts/credentials/). Web app Ask Ren CLI Instruction method Web app (app) 1. Add the custom MCP to a project, or ask Ren to use it in a chat. 2. When Ren asks, select **Connect** and sign in, or enter the key, password, or fields the server needs. 3. Select **Continue**. The connection shows as connected. [Connect the Acme docs MCP.](https://useren.ai/app/sessions?prompt=Connect+the+Acme+docs+MCP.) [Open in Ren ](https://useren.ai/app/sessions?prompt=Connect+the+Acme+docs+MCP.) Finish signing in or enter the key on the card Ren shows. For OAuth:
```sh
ren credentials connect --vault-id
```
For a token, pipe it to `ren credentials create --auth-type bearer --mcp-id --token-stdin`. ## [Add it to a project](#add-it-to-a-project) Web app Ask Ren CLI Instruction method Web app (app) 1. Open **Marketplace → Custom MCPs** and select the custom MCP. 2. Select **Add**, choose a project, and select **Add**. The drawer lists the server’s tools and the credentials it needs.  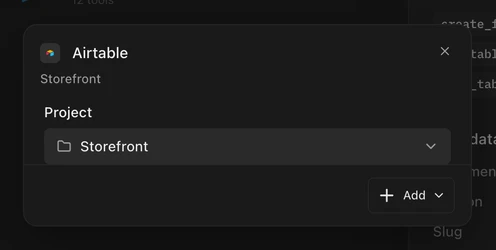 [Add the Acme docs custom MCP to the Support project.](https://useren.ai/app/sessions?prompt=Add+the+Acme+docs+custom+MCP+to+the+Support+project.) [Open in Ren ](https://useren.ai/app/sessions?prompt=Add+the+Acme+docs+custom+MCP+to+the+Support+project.)
```sh
ren projects mcps add --mcp-id
```
To detach a custom MCP, select its trash icon in the composer’s **Connect** menu. You can also run `ren projects mcps remove` or ask Ren. Detaching it doesn’t delete its definition. ## [Who can see a custom MCP](#who-can-see-a-custom-mcp) A custom MCP added at the organization level is visible to every member. One added to a project in your personal space is private to you. A credential is never part of a custom MCP’s definition, so sharing the definition doesn’t share your account. Publish with `ren mcps publish ` or `mcp_publish`. Everyone can see the published definition, without authentication settings or credentials. Publishing is permanent, but you can deprecate it with `ren mcps deprecate`.
# Environments
> Give a space's machine more CPU and memory or extra packages, build it, and know when the change takes effect.
An environment defines a [space](/docs/concepts/spaces/)’s machine: CPU, memory, installed packages, and setup commands. All projects and chats in the space share the machine. Use a custom environment when you need extra tools or computing resources. For example, video work might need `ffmpeg` and 8 GB of memory, and data analysis might need specific Python packages. ## [The default environment](#the-default-environment) **Medium** is the default: 2 vCPUs and 2 GB of memory. You can switch a space to another built-in size or to a custom environment at any time. | Built-in size | CPU | Memory | | ------------- | ------- | ------ | | Small | 1 vCPU | 1 GB | | Medium | 2 vCPUs | 2 GB | | Large | 4 vCPUs | 4 GB | | Extra large | 6 vCPUs | 6 GB | | 2X large | 8 vCPUs | 8 GB | ## [Environment options](#environment-options) A custom environment has these settings: | Setting | What it controls | | -------------- | --------------------------------------------------------------------------------------- | | Name | How the environment appears when you pick one for a space | | Machine size | CPU (1, 2, 4, 6, or 8 vCPUs) and memory (1 to 8 GB), in any combination | | Packages | Packages to install with `apt`, `npm`, `pip`, or `go` | | Build commands | Shell commands that run after the packages install, in order, such as `corepack enable` | Packages and build commands are under **Advanced settings**. ## [Create an environment](#create-an-environment) Only organization admins can manage environments in Settings. Web app CLI Instruction method Web app (app) 1. Open **Settings → Environment** and select **New environment**. 2. Enter a **Name** and set the **Machine size**. 3. Open **Advanced settings** to add **Packages** and **Build commands**. 4. Leave **Build after creation** on, and select **Create environment**.  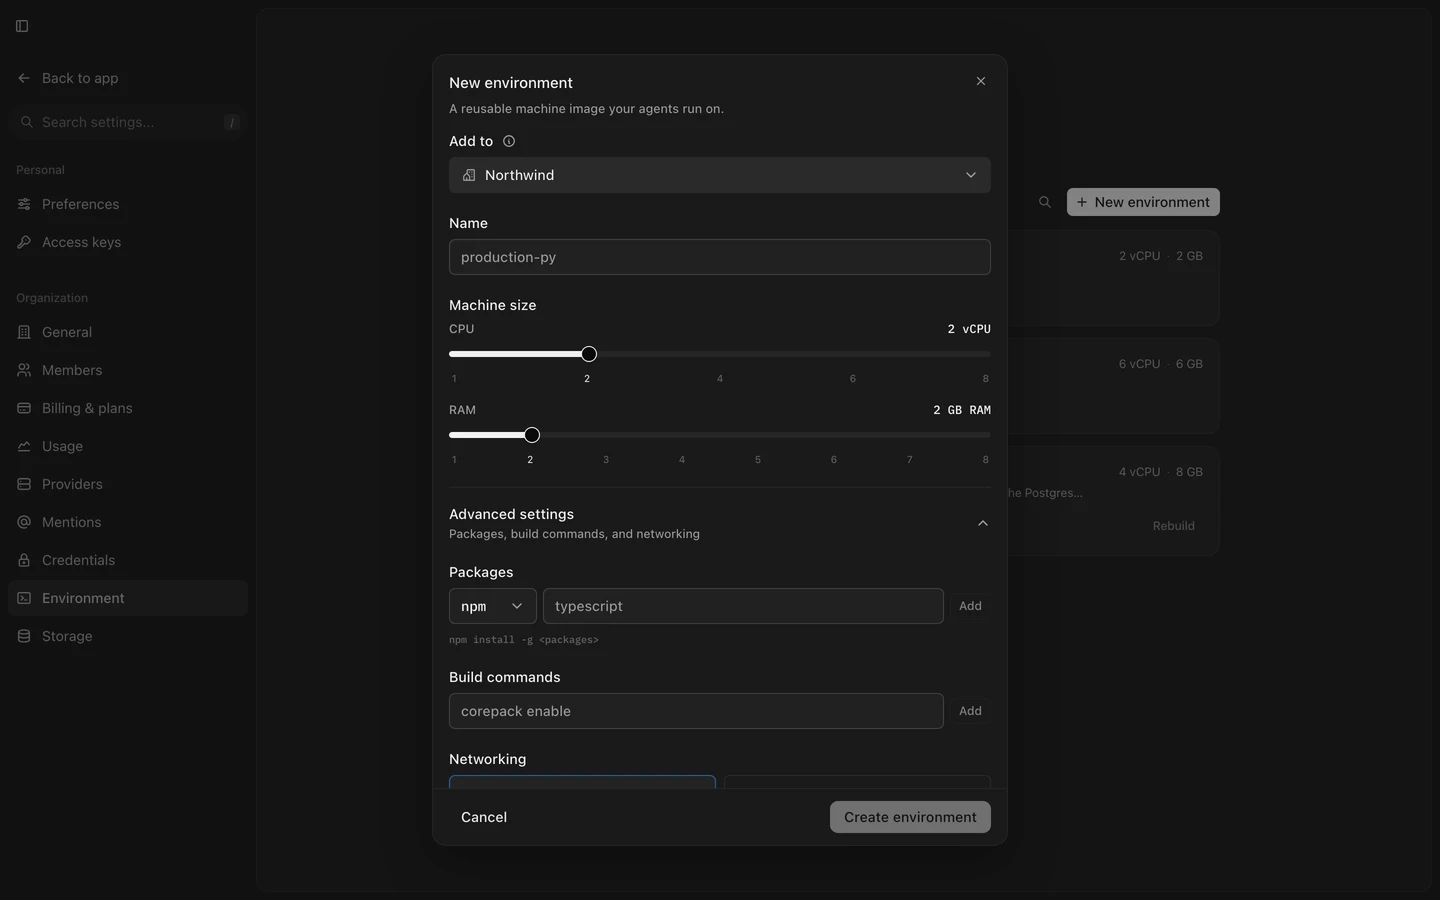
```sh
ren environments create --name media --body @environment.json
ren environments builds start
```
Put the machine size and packages in `environment.json`. Run `ren environments create --help` for the fields. ## [Edit or delete an environment](#edit-or-delete-an-environment) Rebuild after editing an environment. Spaces use the new build when their machines next resume from pause. Web app CLI Instruction method Web app (app) 1. Open **Settings → Environment** and select the environment. 2. Change its settings and select **Save changes**. 3. Select **Rebuild** on the environment to apply them. To delete it, select the delete icon in the same dialog and confirm. Spaces that used it go back to their built-in size.
```sh
ren environments update --body @environment.json
ren environments builds start
ren environments archive
```
## [Builds](#builds) A build creates a machine image from the environment settings. Start one with **Build**, **Rebuild**, or **Build after creation**. Each environment runs one build at a time, and a build can take several minutes. | Status | Meaning | | ---------------- | ------------------------------------------------------------------------------------- | | Not built | No build has succeeded yet. Spaces stay on their built-in size. | | Queued, Building | A build is in progress. | | Ready | The latest build succeeded. Spaces use it when their machines next resume from pause. | | Build failed | The last build failed. Spaces stay on their built-in size or the last ready build. | A build fails when a package doesn’t install or a build command exits with an error. Fix the setting and select **Rebuild**. To list builds, run `ren environments builds list`. ## [Use an environment in a space](#use-an-environment-in-a-space) Give a project its own environment by putting it in its own space. Web app CLI Instruction method Web app (app) 1. Open the space and go to its **Environment** tab. 2. Select **Change**, pick a built-in size or a custom environment, and confirm. The tab shows the environment’s status, packages, and build commands, with **Build** or **Rebuild**.  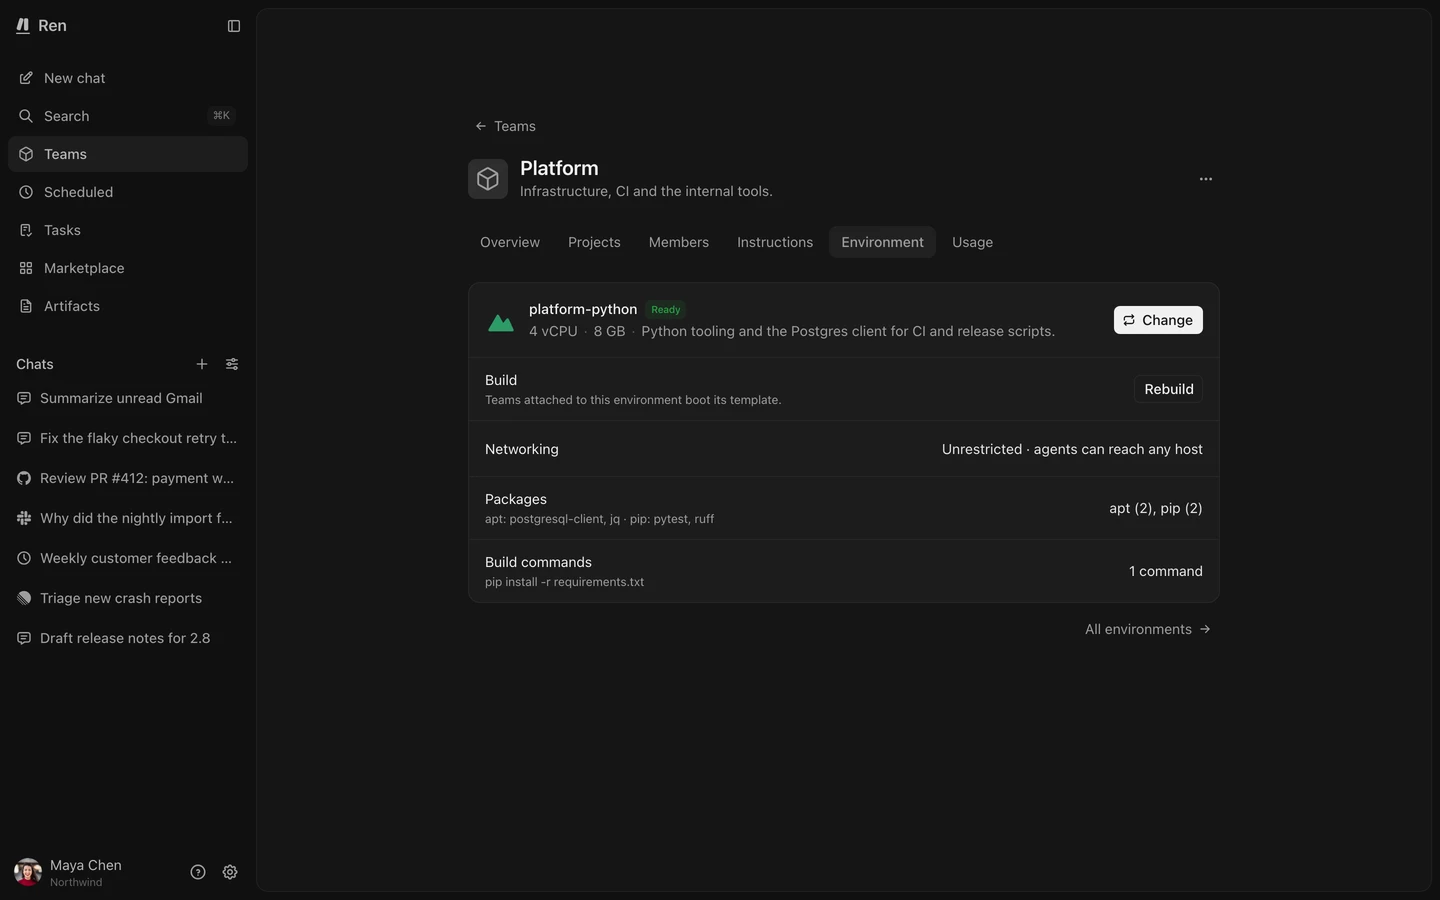
```sh
ren pods update --environment-id
```
## [When changes take effect](#when-changes-take-effect) A space’s machine pauses after about 10 minutes without activity. A new environment, a new build, or a different built-in size takes effect the next time the machine resumes from pause. A running machine is never swapped, so chats in progress aren’t interrupted. A busy space may delay the change until the machine can pause. Files outside [storage](/docs/concepts/storage/) don’t transfer to the replacement machine. Projects, storage, and databases stay available.
# Organizations
> Switch between organizations, change organization-wide settings, and invite teammates with a role.
An organization is your company’s account in Ren. It holds your members, billing, labels, organization credentials, and channel connections like Slack and GitHub. Ren creates an organization when you register without an invitation. If Ren recognizes a company email domain, it uses that domain to name the organization. Ren also creates a shared **General** space and a private **Personal** space. If you register through an invitation, you join the inviting organization instead. ## [Switch organizations](#switch-organizations) You can belong to several organizations, like your company’s and a client’s. Switching organizations changes which chats, spaces, and settings you see. Web app CLI Instruction method Web app (app) 1. Select your name at the bottom of the sidebar. The organization you’re in shows under your name. 2. Select another organization to switch to it. To add an organization, select **Create organization**, enter a name, and add a logo if you want.  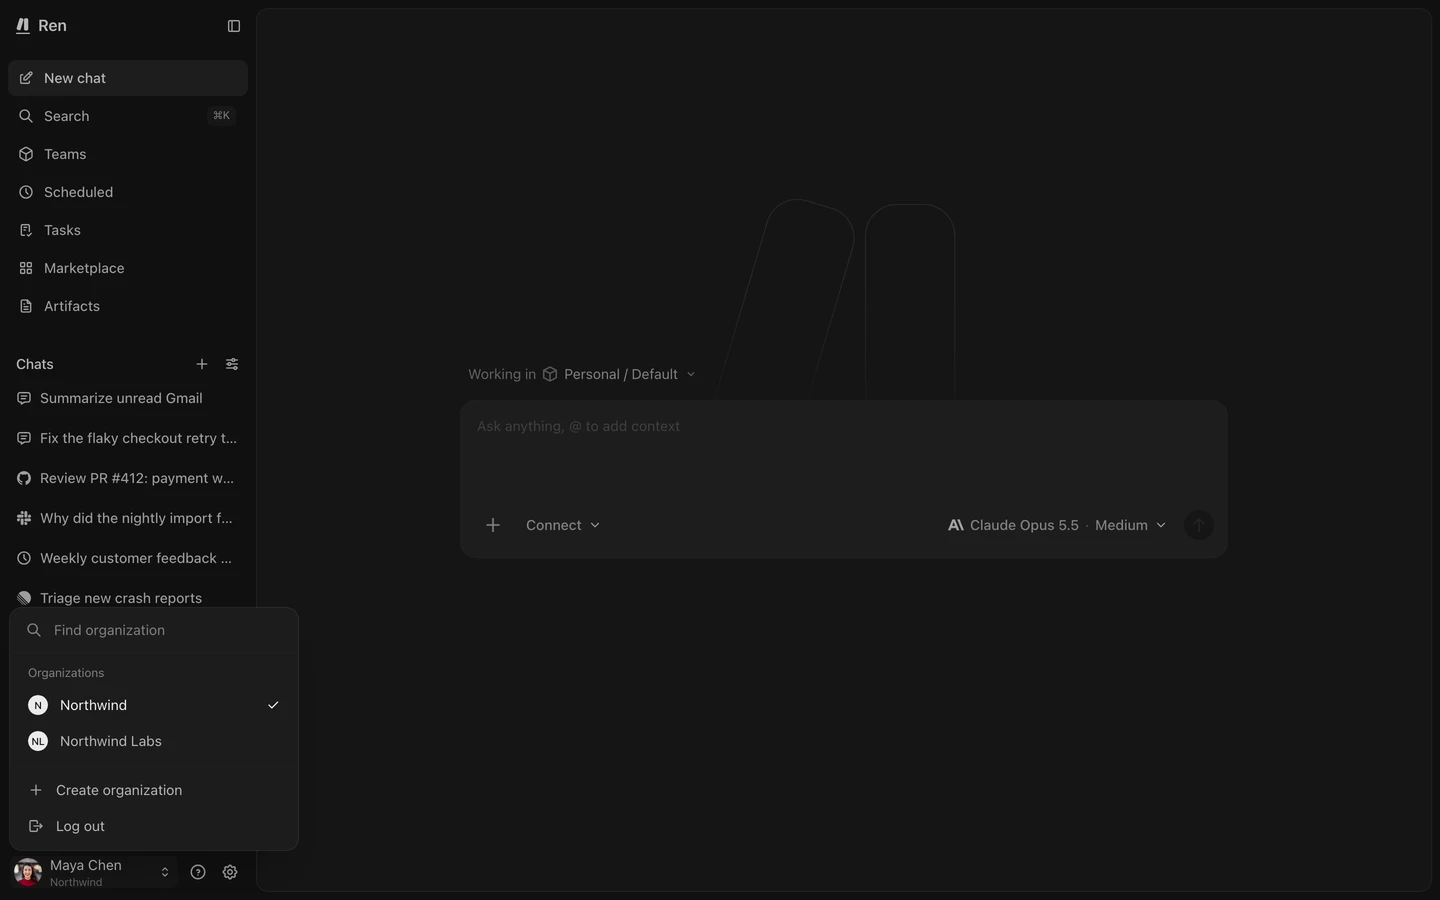
```sh
ren org list
ren org switch
ren org create "Acme"
```
`ren org create` switches your CLI profile to the new organization. ## [Organization settings](#organization-settings) Only owners and admins can change organization settings. | Setting | What it changes | | ------------- | ---------------------------------------------------------------------------------------------------------------------------------------------------------- | | Name and icon | How the organization appears in the sidebar and the organization menu. | | Timezone | The default time zone for new schedules. | | Default model | The model chats use when the space, the project, and the chat don’t pick one. | | Instructions | Rules Ren follows in every chat in the organization. Space and project instructions also apply. See [Instructions](/docs/concepts/projects/#instructions). | Web app Ask Ren CLI Instruction method Web app (app) 1. Open **Settings → General**. 2. Edit the name, time zone, or default model. Each change saves automatically. 3. Under **Instructions**, enter guidance for every chat, like your company’s writing style.  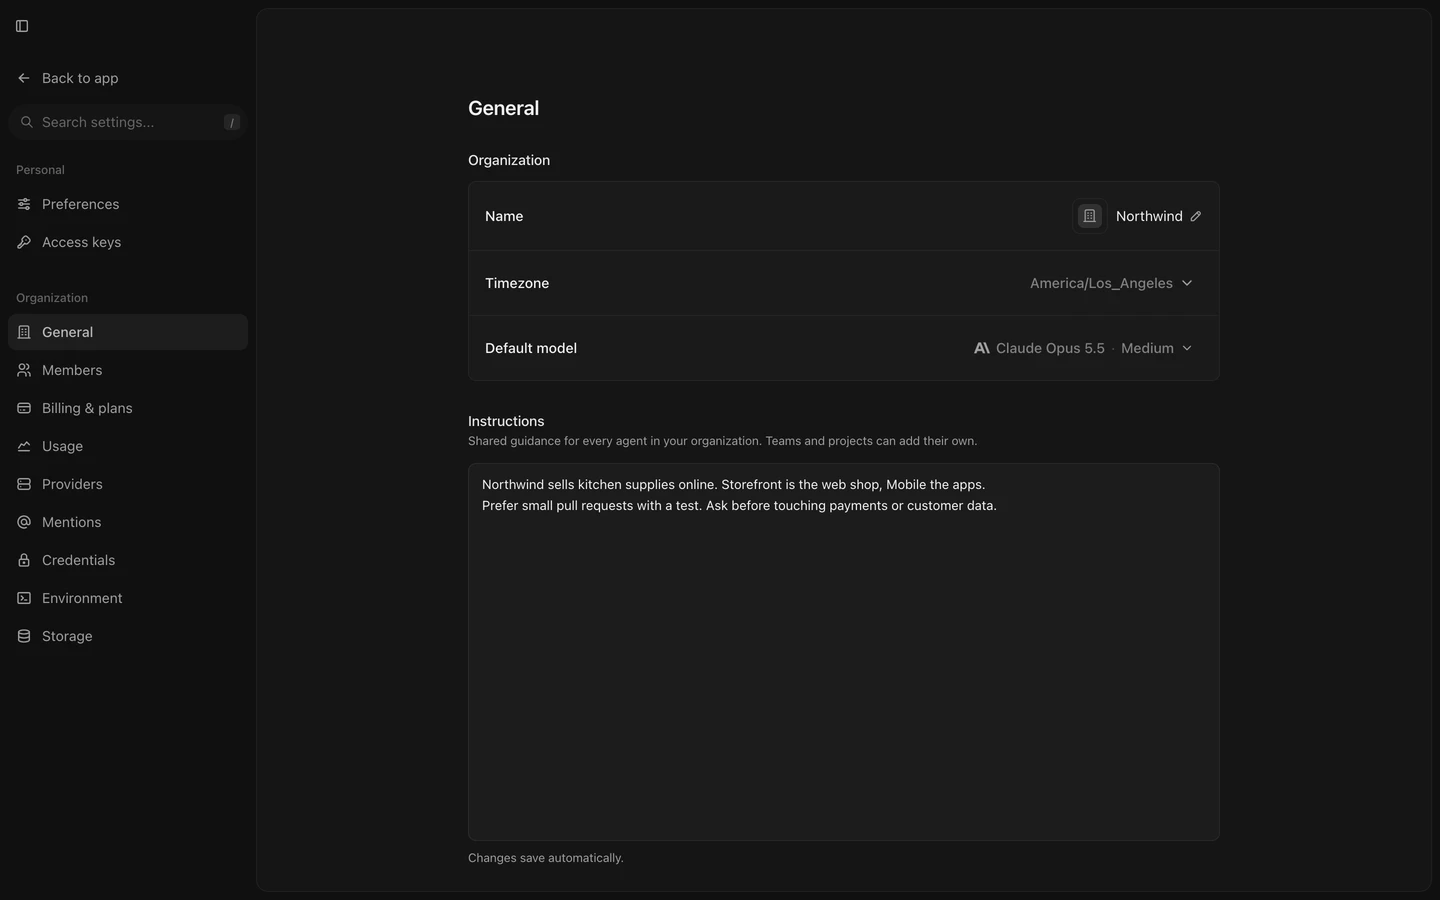 [Add an organization instruction: write dates as YYYY-MM-DD and use US English.](https://useren.ai/app/sessions?prompt=Add+an+organization+instruction%3A+write+dates+as+YYYY-MM-DD+and+use+US+English.) [Open in Ren ](https://useren.ai/app/sessions?prompt=Add+an+organization+instruction%3A+write+dates+as+YYYY-MM-DD+and+use+US+English.)
```sh
ren orgs update --instructions "Write dates as YYYY-MM-DD and use US English."
```
## [Members](#members) Every member has one of three roles: * **Member:** uses Ren in the spaces they belong to, and creates their own spaces, projects, chats, and tasks. * **Admin:** everything a member can do, plus the organization settings, members, billing, channel connections, and organization-wide storage and environments. An admin can also [join any shared space](/docs/concepts/spaces/#join-a-shared-space) in the organization. * **Owner:** the same access as an admin, for the people responsible for the organization. ### [Invite a teammate](#invite-a-teammate) Web app Instruction method Web app (app) 1. Open **Settings → Members**. 2. Select **Add member**. 3. Enter one or more email addresses, separated by commas or new lines. 4. Choose a **Role**, then select **Send invite**. Each invitee gets an email with a link to join. When they join, they’re added to the General space and get their own personal space. They also join any shared spaces you [added them to](/docs/concepts/spaces/#members) while the invitation was pending.  [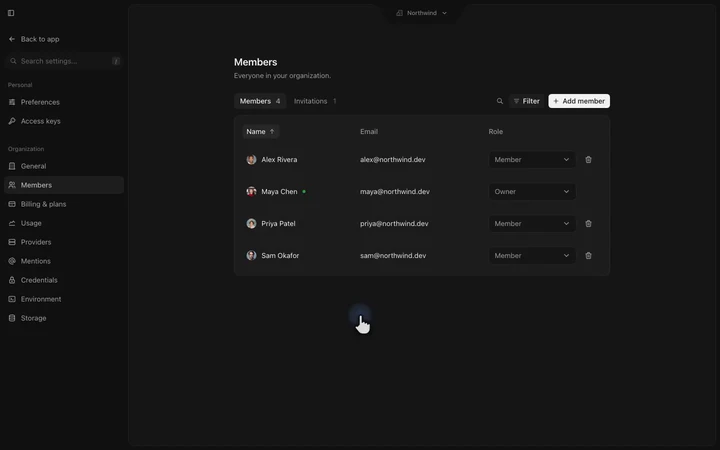](/_astro/invite-member.D2981tGT.mp4 "Inviting a member from Settings Members: enter an email, pick a role, send, then see the pending invite on the Invitations tab") ### [Manage invitations and members](#manage-invitations-and-members) The **Invitations** tab lists pending invitations. You can copy an invitation link, resend the invitation, or revoke it. Invitations expire after seven days. On the **Members** tab, change someone’s role from the **Role** menu, or select **Remove** to take them out of the organization and all of its spaces.
# Overview
> Organize Ren into spaces for teams or clients, projects for each kind of work, and chats for individual requests.
Ren organizes work in four levels. Each level sits inside the one above it. * **[Organization](/docs/concepts/organizations/):** your company or account. It holds members, billing, and settings that apply everywhere. * **[Space](/docs/concepts/spaces/):** a team or client inside the organization. It decides who can see the work, and it runs on its own machine. * **[Project](/docs/concepts/projects/):** one kind of work inside a space, such as code review. It sets the instructions, tools, and storage Ren uses for that work. * **[Chat](/docs/concepts/chats/):** one request to Ren inside a project, and everything Ren did to answer it. Organization Northwind Space Engineering Project Code review Chats * Review the login fix * Review the new API Each organization starts with a **General** space for all members. Each member gets a private **Personal** space. Add spaces for teams or clients. ## [Example: a company’s internal agents](#example-a-companys-internal-agents) Northwind’s engineers share the **Engineering** space in their company’s organization. Engineering has two projects: * **Code review**, with the team’s repositories and review instructions. * **Incident triage**, with access to the on-call tools and a runbook skill. Code review uses separate chats for the login fix and the new API, and both share the project’s repositories and review instructions. Incident triage uses a separate project because it needs different tools and instructions. ## [Example: an agency serving clients](#example-an-agency-serving-clients) Brightline is a marketing agency. Its organization is **Brightline**, with one space per client, like **Acme**. The Acme space has two projects: * **Campaign reporting**, connected to Acme’s ad accounts. * **Content production**, with Acme’s brand guidelines and assets. Campaign reporting uses separate chats for weekly reports and campaign comparisons. Only Acme’s team joins the Acme space. Acme’s tool accounts use space credentials, and another client’s space can’t access Acme’s work or credentials. ## [What else you configure](#what-else-you-configure) Most features attach to a project or a space. * **Project:** [apps](/docs/concepts/apps/), [skills](/docs/concepts/skills/), [custom MCPs](/docs/concepts/custom-mcps/), [repositories](/docs/concepts/projects/#repositories), [channels](/docs/channels/), [schedules](/docs/concepts/schedules/), and [file and memory stores](/docs/concepts/storage/). * **Space:** [databases](/docs/concepts/storage/#databases), [artifacts](/docs/concepts/artifacts/), [environments](/docs/concepts/environments/), and [tasks](/docs/concepts/tasks/). You can assign a task to a project. * **More than one level:** [credentials](/docs/concepts/credentials/) belong to the organization, a space, or your personal account. [Instructions](/docs/concepts/projects/#instructions) can be set on the organization, a space, and a project. [Blueprints](/docs/concepts/blueprints/) add a ready-made project or space to your organization.
# Projects
> Set up a project for one kind of work, with its own instructions, repositories, apps, storage, permissions, and channels.
A project groups chats for one kind of work within a [space](/docs/concepts/spaces/). It holds the instructions, repositories, apps, skills, storage, and permissions for its chats. Channels and schedules send requests to it. Create a project when work needs different instructions or tools. For example, an Engineering space can contain **Plan**, **Build**, **Review**, and **Test** projects. They write specs, write code, review pull requests, and run tests. Each has its own instructions and permissions, and they all share the space’s members and machine. In the API and CLI, a project is `project`. ## [Create a project](#create-a-project) You need a space and a name. Everything else is optional and can change later. Web app Ask Ren CLI Instruction method Web app (app) 1. Select **Teams** in the sidebar and open a space. 2. Open the **Projects** tab and select **New project**. 3. Enter a **Name**. You can also pick an icon and add a **Description**, **Instructions**, and repositories. 4. On the **@Ren** step, choose where work can reach the project, like a Slack channel or an email address. You can skip this step. 5. On the **Permissions** step, choose what Ren may do without asking. 6. Select **Create project**. [Create a project called Code review in the Engineering space. Its instructions: review for security issues first, then readability.](https://useren.ai/app/sessions?prompt=Create+a+project+called+Code+review+in+the+Engineering+space.+Its+instructions%3A+review+for+security+issues+first%2C+then+readability.) [Open in Ren ](https://useren.ai/app/sessions?prompt=Create+a+project+called+Code+review+in+the+Engineering+space.+Its+instructions%3A+review+for+security+issues+first%2C+then+readability.)
```sh
ren projects create --pod-id --name "Code review"
```
Ren creates a file store and memory store for each new project. Both use the project’s name, like **Code review Files** and **Code review Memory**. See [Storage](/docs/concepts/storage/).  [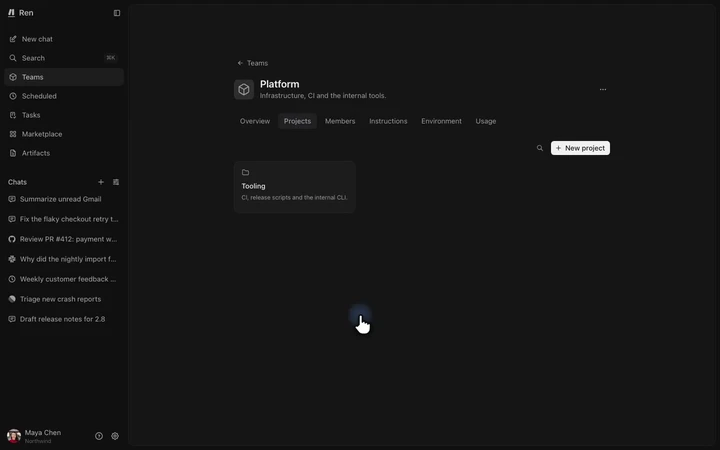](/_astro/create-project.CpDVgn8J.mp4 "Creating a project with the wizard steps General, @Ren, and Permissions, ending on the new project's tabs") ## [Project settings](#project-settings) Edit the icon, name, description, and **Default model** on **Overview**. Chats use this model unless you select another. Without a project default, Ren checks the space default, then the organization default, then Ren’s default. To archive a project, select **Project actions** (the **⋯** button), then **Archive project**. You can’t archive the **Default** project in your personal space.  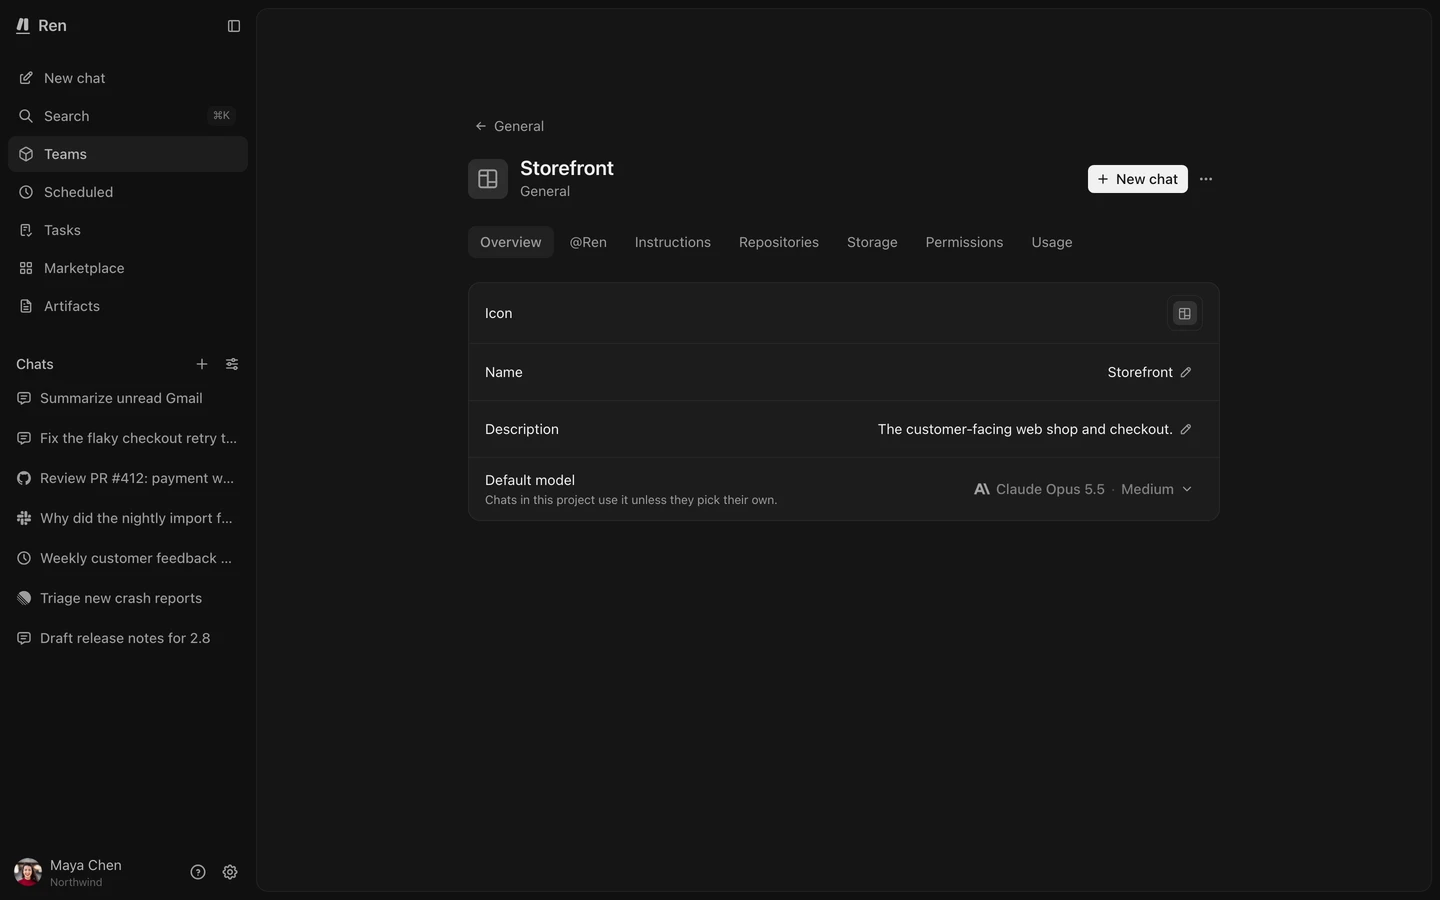 ## [Instructions](#instructions) Project instructions are standing rules for every chat in the project, like “Always open a pull request instead of pushing to main.” Ren reads instructions from three levels in every chat, from broad to narrow: 1. The organization’s instructions, from **Settings → General**. 2. The space’s instructions, from the space’s **Instructions** tab. 3. The project’s instructions. All three apply. Put company-wide rules in the organization, team or client rules in the space, and rules for this kind of work in the project. Web app Ask Ren CLI Instruction method Web app (app) Open the project’s **Instructions** tab and edit the text. [Add to this project's instructions: run the tests before you open a pull request.](https://useren.ai/app/sessions?prompt=Add+to+this+project%27s+instructions%3A+run+the+tests+before+you+open+a+pull+request.) [Open in Ren ](https://useren.ai/app/sessions?prompt=Add+to+this+project%27s+instructions%3A+run+the+tests+before+you+open+a+pull+request.)
```sh
ren projects update --instructions "Run the tests before you open a pull request."
```
## [Repositories](#repositories) Add the repositories Ren should work on. Ren clones each one into the project on the space’s machine, so it can read and change the code. A project can have several repositories. Web app Ask Ren Instruction method Web app (app) 1. Open the project’s **Repositories** tab and select **Add repository**. 2. Search for a repository and select it. You can select several. 3. Select **Add repository**. The list shows GitHub repositories the Ren GitHub app can reach. In your personal space, it shows repositories from your own GitHub account instead. If GitHub isn’t connected yet, the dialog asks you to connect it first. See [GitHub](/docs/channels/github/). To change a repository’s URL, branch, or alias, select **Edit** on its row.  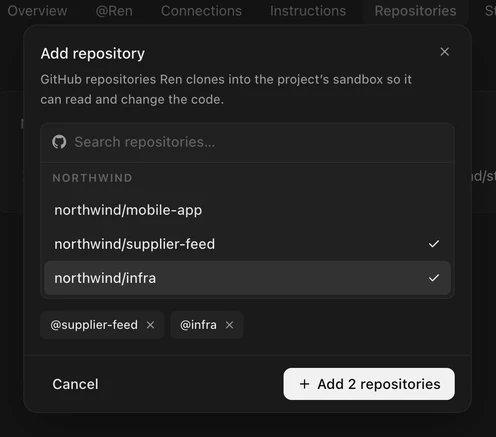 [Add the northwind/storefront repository to this project.](https://useren.ai/app/sessions?prompt=Add+the+northwind%2Fstorefront+repository+to+this+project.) [Open in Ren ](https://useren.ai/app/sessions?prompt=Add+the+northwind%2Fstorefront+repository+to+this+project.) You can mention a repository in the composer by its alias, like `@storefront`. ## [Apps, skills, custom MCPs, and storage](#apps-skills-custom-mcps-and-storage) Attach tools and stores to make them available to every chat in the project. Web app Ask Ren CLI Instruction method Web app (app) * **Apps, skills, and custom MCPs:** The project’s **Connections** tab groups **Apps**, **Custom MCPs**, and **Skills**, with **Add app**, **Add custom MCP**, and **Add skill** buttons. You can also add items through **Marketplace**. In the chat composer, select **Connect** beside **+** to add or remove items in these groups. After you attach items, their icons replace **Connect**. * **Storage:** Open the project’s **Storage** tab and choose **Memory** or **Files**. Select **Attach memory store** or **Attach file store**. To detach a store, select **Detach** on its row. The store stays in your organization.  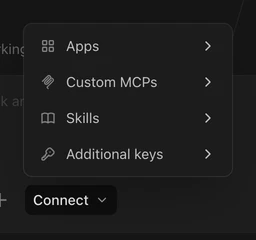 [Add the release-notes skill and the Linear app to this project.](https://useren.ai/app/sessions?prompt=Add+the+release-notes+skill+and+the+Linear+app+to+this+project.) [Open in Ren ](https://useren.ai/app/sessions?prompt=Add+the+release-notes+skill+and+the+Linear+app+to+this+project.)
```sh
ren projects skills add --skill-id
ren projects mcps add --mcp-id
ren projects file-stores add --file-store-id
ren projects memory-stores add --memory-store-id
```
See [Apps](/docs/concepts/apps/), [Skills](/docs/concepts/skills/), [Custom MCPs](/docs/concepts/custom-mcps/), and [Storage](/docs/concepts/storage/). ## [Permissions](#permissions) Permissions decide which actions Ren takes on its own, which ones it asks you about first, and which ones it never takes. Each action is set to **Allow**, **Ask**, or **Deny**. Web app Ask Ren CLI Instruction method Web app (app) 1. Open the project’s **Permissions** tab. 2. Pick a preset: * **Safe:** reads files on its own, asks before most other actions, and never touches folders outside the project. * **Balanced:** reads files and uses the internet on its own, and asks before changes and commands. * **Autonomous:** does most things on its own, and still asks before using folders outside the project. 3. To fine-tune, set **Allow**, **Ask**, or **Deny** for each action in the list, like **Run commands** or **Access websites**. 4. For rules that match specific commands or paths, select **Advanced**. Add a rule with a permission, a pattern, and a behavior, or edit the rules as JSON. You can also change the project’s permissions from a chat: select **+** in the composer, then **Permissions**. [Let Ren run commands in this project without asking, but never access folders outside it.](https://useren.ai/app/sessions?prompt=Let+Ren+run+commands+in+this+project+without+asking%2C+but+never+access+folders+outside+it.) [Open in Ren ](https://useren.ai/app/sessions?prompt=Let+Ren+run+commands+in+this+project+without+asking%2C+but+never+access+folders+outside+it.)
```sh
ren projects update --body '{"permission": {"bash": "allow", "external_directory": "deny"}}'
```
When an action is set to **Ask** in a chat you’re in, Ren shows the request above the composer. Choose **Allow once**, **Always allow**, or **Deny**, or type what Ren should do instead. Channel and scheduled chats deny actions set to **Ask** and continue without them. Set required actions to **Allow** before the chat starts.  [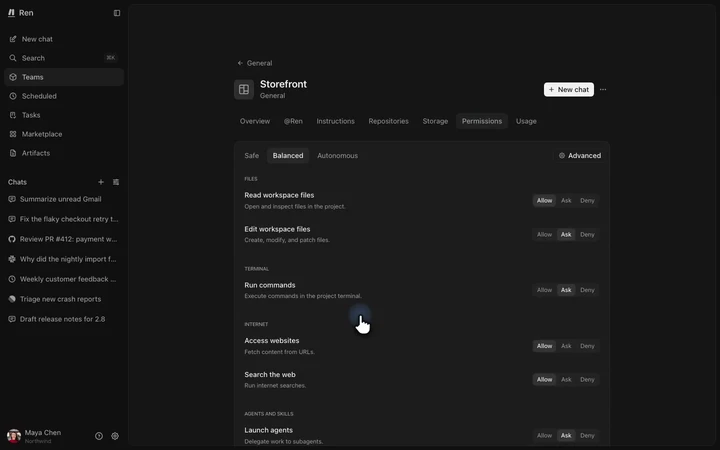](/_astro/permissions.BUqkhwVW.mp4 "Choosing the Balanced preset, changing one action, then adding a rule under Advanced on the Permissions tab") ## [Channels](#channels) The **@Ren** tab maps channels to this project: Slack channels, Linear projects, GitHub repositories, Telegram chats, and the project’s email address. Messages from a mapped channel start chats in this project. See [Channels](/docs/channels/). ## [Usage](#usage) The **Usage** tab shows chat costs. Select **Spend** or **LLM calls**, then choose a period of 7, 30, or 90 days. Open **Per session** for individual chat costs.
# Schedules
> Run a prompt in a project on a recurring schedule, and pause, edit, or delete it when the work changes.
A schedule is a recurring request to Ren, such as every weekday at 9am. Each run starts a new chat in the schedule’s project automatically. For example, a schedule can check your sales data every morning and update a dashboard [artifact](/docs/concepts/artifacts/), or summarize the week’s support tickets every Friday afternoon. In the API and CLI, a schedule is a `cronTrigger`. ## [Create a schedule](#create-a-schedule) | Setting | What it does | | -------- | ------------------------------------------------------------------------------------------------------------------- | | Message | The request Ren receives on each run. | | Project | Where each run’s chat starts. The run uses the project’s instructions, tools, and permissions. | | Repeat | **Every hour**, **Every day**, **Every weekday**, **Every week**, **Every month**, or **Custom cron**, with a time. | | Timezone | The time zone the schedule follows. New schedules use your organization’s time zone. | | Until | An optional end date, after which the schedule stops running. | | Model | An optional model for the runs. Without one, runs use the project’s default model. | Web app Ask Ren CLI Instruction method Web app (app) 1. Open **Scheduled** in the sidebar and select **Create schedule**. 2. Enter the **Message**, like “Summarize yesterday’s support tickets and post the top three issues.” 3. Choose the **Project**. 4. Choose a repeat interval and time. For a custom schedule, select **Custom cron**. Enter a cron expression, such as `0 9 * * 1-5` for weekdays at 9am. 5. If you want, change the **Timezone**, set an **Until** date, or pick a **Model**. 6. Select **Create schedule**. The dialog shows when the next run is.  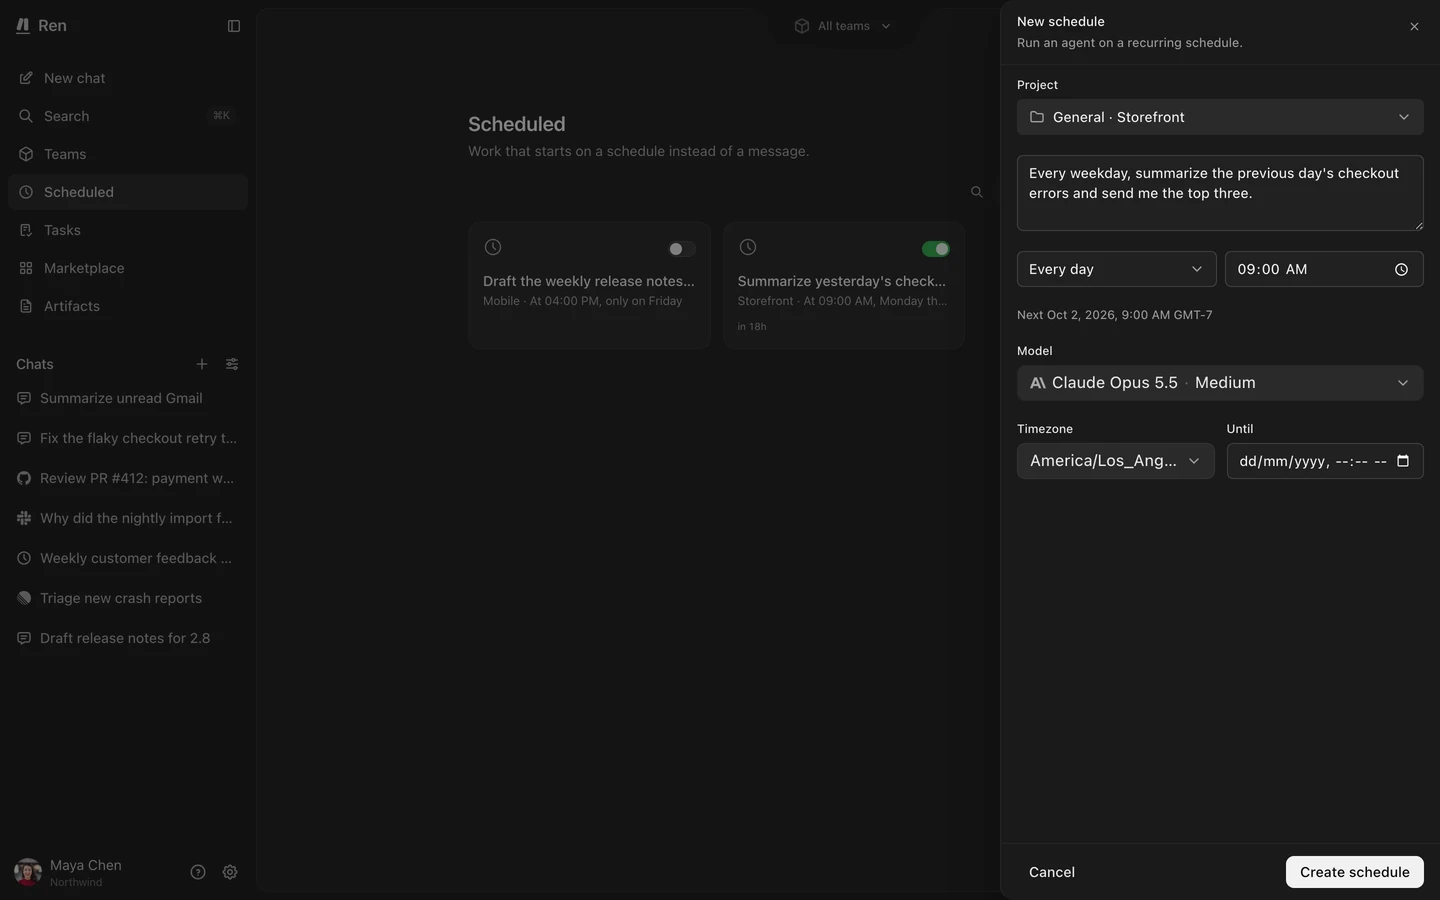 [Run this every weekday at 9am Pacific time.](https://useren.ai/app/sessions?prompt=Run+this+every+weekday+at+9am+Pacific+time.) [Open in Ren ](https://useren.ai/app/sessions?prompt=Run+this+every+weekday+at+9am+Pacific+time.) Send this in a chat after Ren has done the work once.
```sh
ren cron-triggers create \
--input-message "Summarize yesterday's support tickets." \
--schedule "0 9 * * 1-5" \
--timezone "America/Los_Angeles"
```
## [Run history and limits](#run-history-and-limits) To find past runs, filter the sidebar’s chat list by the **Scheduled** source. Scheduled chats deny actions set to **Ask**. Set required actions to **Allow** in the project’s [permissions](/docs/concepts/projects/#permissions). If your organization runs out of credits, Ren pauses its schedules and skips their runs until credits are added. ## [Edit, pause, resume, or delete a schedule](#edit-pause-resume-or-delete-a-schedule) A paused schedule keeps its settings but doesn’t run, and its card stops showing a next run time. Pausing, editing, or deleting a schedule doesn’t stop an active chat, and chats from earlier runs stay in the chat list. Web app Ask Ren CLI Instruction method Web app (app) Open **Scheduled** in the sidebar. Use **Filter schedules** to show only **Enabled** or **Paused** schedules. On the schedule’s card: * Select the edit button to change its settings, then **Save**. * Select the pause button to pause it, or the resume button to resume it. * Select the delete button, then **Delete** to remove it.  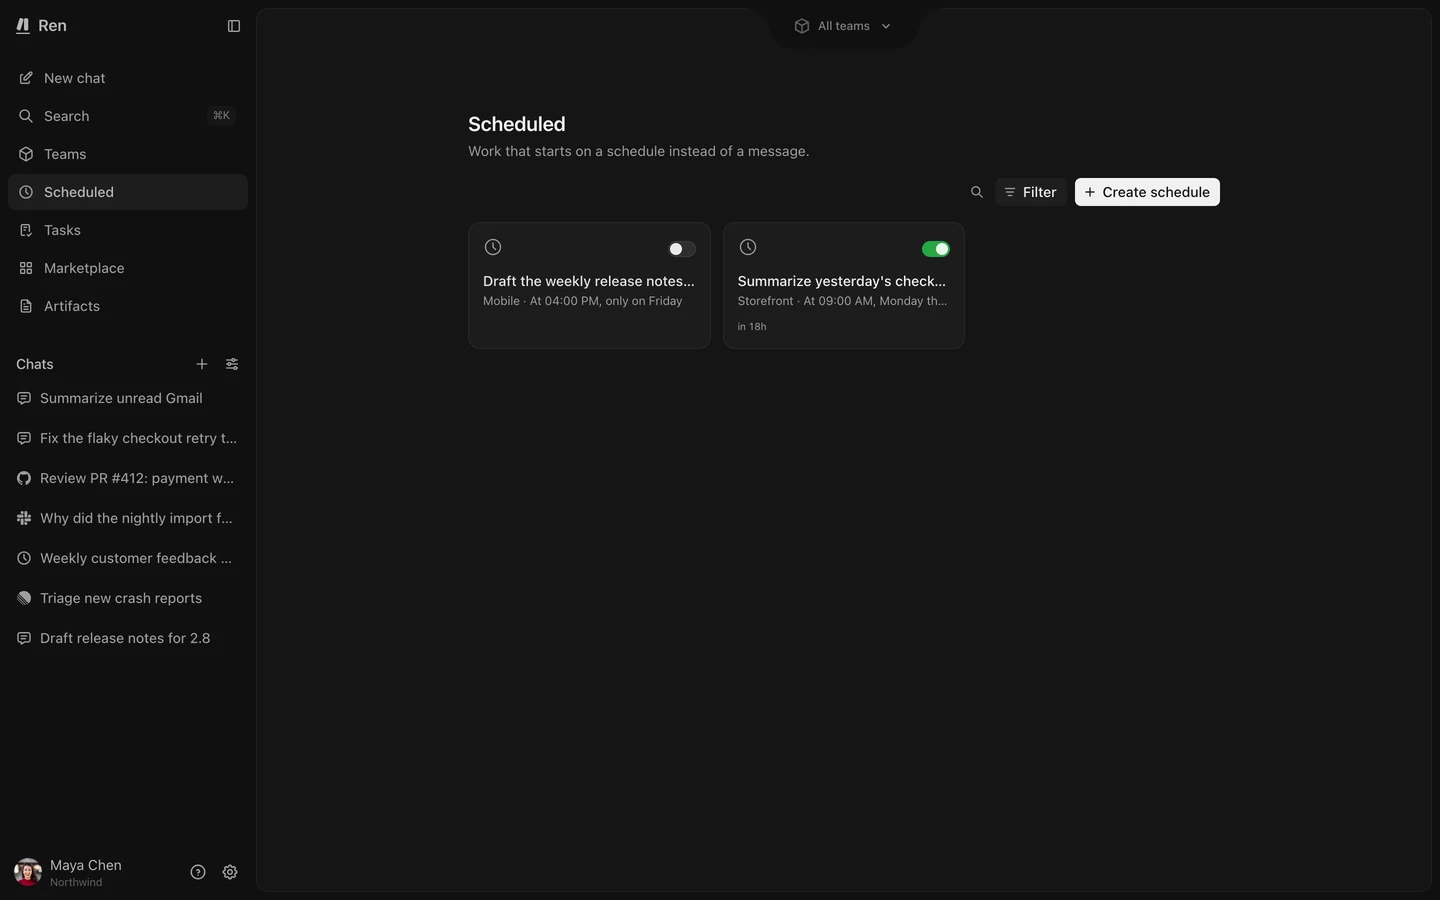 [Pause the daily support summary schedule.](https://useren.ai/app/sessions?prompt=Pause+the+daily+support+summary+schedule.) [Open in Ren ](https://useren.ai/app/sessions?prompt=Pause+the+daily+support+summary+schedule.)
```sh
ren cron-triggers update --is-enabled false
ren cron-triggers archive
```
# Skills
> Package instructions Ren loads only when a task needs them, create skills from a folder or a git repository, and add them to projects.
A skill is a reusable set of instructions for a type of task. Its folder contains `SKILL.md` and optional supporting files, like templates or scripts. Ren reads the description in every chat, but loads the full instructions only when the request needs them. Example `SKILL.md` for release notes:
```md
---
name: release-notes
description: Write release notes from merged pull requests. Use when asked for release notes or a changelog.
---
Group changes under Features, Fixes, and Internal.
Link each item to its pull request.
Skip dependency bumps unless they fix a security issue.
```
## [Skill or instructions?](#skill-or-instructions) * **Use project [instructions](/docs/concepts/projects/#instructions)** for rules that apply to every chat in a project, such as tone or which repository to work in. Ren reads them on every turn. * **Use a skill** for a procedure that only some requests need, or one you want in several projects. * **Use the chat prompt** for a one-off request. If you find yourself pasting the same steps again, make them a skill. ## [Create a skill](#create-a-skill) `SKILL.md` needs these frontmatter fields: * `name`: up to 64 characters, using lowercase letters, digits, and single hyphens. * `description`: up to 1,024 characters explaining when to use the skill. An uploaded skill can contain up to 10 MB of files. Web app Ask Ren CLI Instruction method Web app (app) 1. Open **Marketplace → Skills** and select **Add skill**. 2. Choose where to add it: your organization, or a project. Choosing a project also adds the skill to it. 3. Drop a skill folder or a `SKILL.md` file into the box, or paste the `SKILL.md` content. 4. Select **Create skill**.  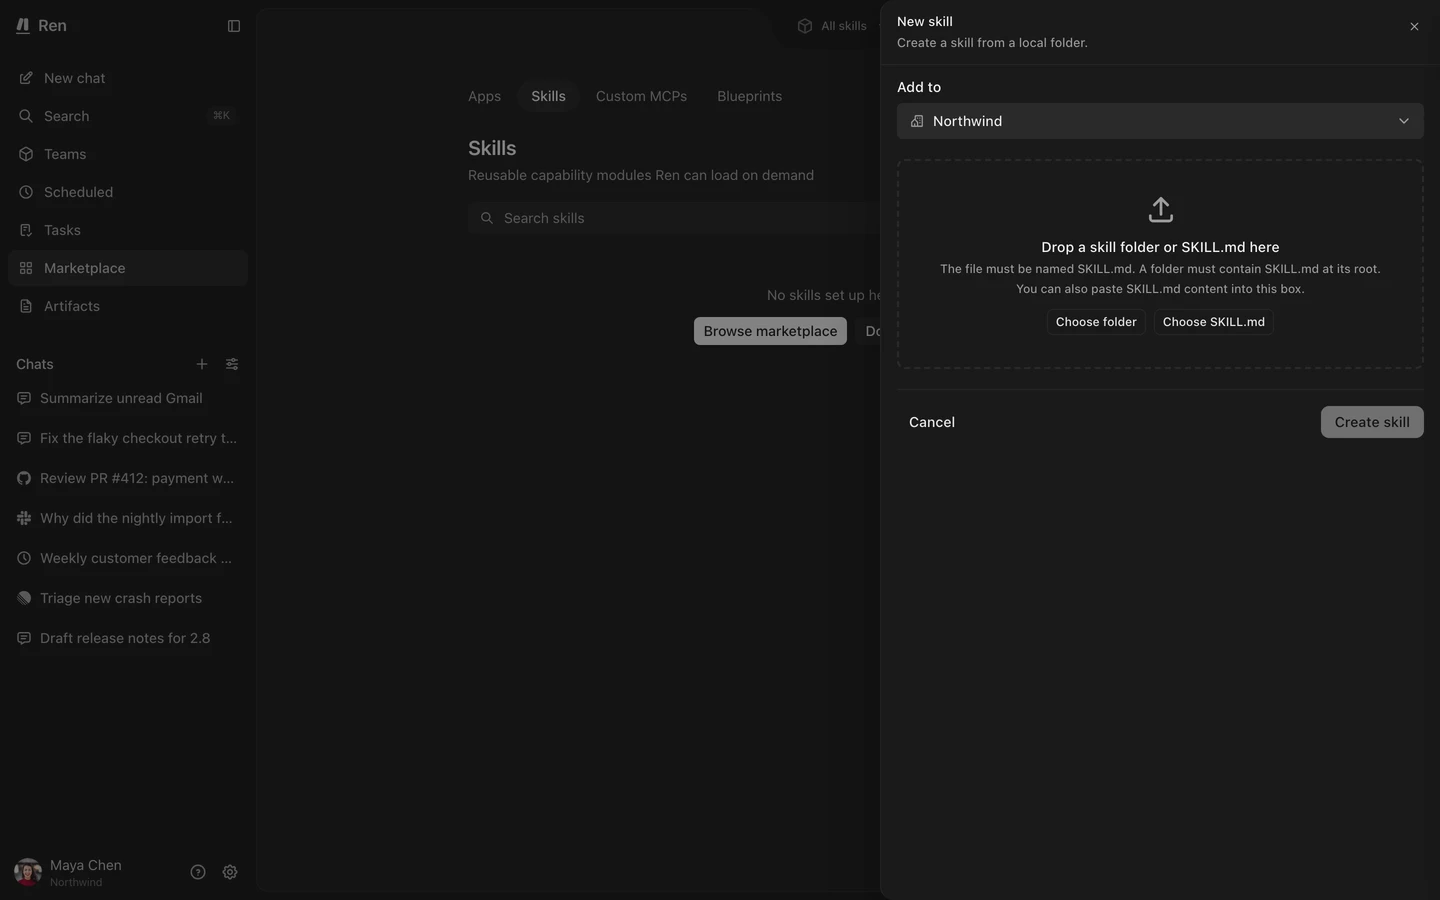 [Create a skill called release-notes from the rules I just gave you, and add it to this project.](https://useren.ai/app/sessions?prompt=Create+a+skill+called+release-notes+from+the+rules+I+just+gave+you%2C+and+add+it+to+this+project.) [Open in Ren ](https://useren.ai/app/sessions?prompt=Create+a+skill+called+release-notes+from+the+rules+I+just+gave+you%2C+and+add+it+to+this+project.) Ren writes the `SKILL.md` for you.
```sh
ren skills create ./release-notes
```
Add `--visibility private` to keep it to yourself. To use a git repository instead of a folder, see [Sources](#sources). ## [Edit a skill](#edit-a-skill) Edit uploaded skills through Ren or the CLI. Each edit creates a new version. The app can’t edit skill files. Ask Ren CLI Instruction method Ask Ren (ask-ren) [Update the release-notes skill to also list breaking changes first.](https://useren.ai/app/sessions?prompt=Update+the+release-notes+skill+to+also+list+breaking+changes+first.) [Open in Ren ](https://useren.ai/app/sessions?prompt=Update+the+release-notes+skill+to+also+list+breaking+changes+first.) Projects pick up the new version in their next chat.
```sh
ren skills pull release-notes ./release-notes
ren skills versions create ./release-notes --version minor
```
`--version` takes `major`, `minor`, `patch`, or an exact version such as `1.4.0`. ## [Delete a skill](#delete-a-skill) Deleting a skill archives it, so it stops loading in every project that uses it. Ask Ren CLI Instruction method Ask Ren (ask-ren) [Delete the release-notes skill.](https://useren.ai/app/sessions?prompt=Delete+the+release-notes+skill.) [Open in Ren ](https://useren.ai/app/sessions?prompt=Delete+the+release-notes+skill.)
```sh
ren skills archive
```
To take a skill out of one project without deleting it, see [Add a skill to a project](#add-a-skill-to-a-project). ## [Sources](#sources) * **Uploaded files.** You upload a folder. Ren stores a copy, and each change is a new version. Use this for skills you write and edit with Ren. The app creates uploaded skills only. * **A git repository.** You point Ren at an `https://` repository, with an optional branch, tag, or commit and a path to the skill’s folder. Ren fetches the files itself, up to 50 MB. Use this for skills you maintain in git: when you track a branch, Ren picks up new commits without a new version. Create a git skill with `ren skills create --source` followed by the source as JSON:
```sh
ren skills create --source '{"type":"git","url":"https://github.com/acme/skills","ref":"main","path":"release-notes"}'
```
Change its repository, branch, or path later with `ren skills sources update`. ## [Versions](#versions) Uploaded skills start at `0.0.1`, and each edit creates a version. Git skills follow their repository. Projects use the latest version unless you pin one with `ren projects skills add --skill-version-id`. Archiving the latest version returns projects to the previous version. ## [Visibility](#visibility) | Visibility | Who can see and use it | | ------------ | ---------------------------------- | | Private | Only you | | Organization | Every member of your organization | | Published | Anyone on Ren, in any organization | Anyone who can see a skill can read its instructions and supporting files. A skill you add to a project in your personal space is private. A skill you add to your organization, or to a project in a shared space, is visible to the organization. To share a private skill with your organization, run `ren skills promote `. Publishing (`ren skills publish`) lists it for everyone and can’t be undone. ## [Add a skill to a project](#add-a-skill-to-a-project) Web app Ask Ren CLI Instruction method Web app (app) 1. Open **Marketplace → Skills** and select the skill. 2. Select **Add**, choose a project, and select **Add**. If the skill needs a credential, Ren asks you to connect it before adding.  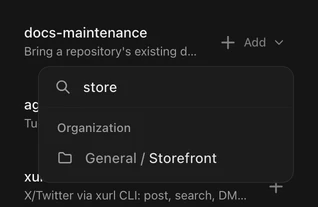 [Add the release-notes skill to the Engineering project.](https://useren.ai/app/sessions?prompt=Add+the+release-notes+skill+to+the+Engineering+project.) [Open in Ren ](https://useren.ai/app/sessions?prompt=Add+the+release-notes+skill+to+the+Engineering+project.)
```sh
ren projects skills add --skill-id
```
To remove a skill from a project, open the capabilities menu in the project’s chat composer and select its trash icon, run `ren projects skills remove`, or ask Ren. ## [FAQ](#faq)
# Spaces
> Group a team's or a client's projects in a space, with its own members, instructions, credentials, and machine.
A space is a group of projects for a team or client. It controls access to their work and credentials, and all its projects run on one machine. The app lists spaces under **Teams** in the sidebar. In the API and CLI, a space is a `pod`. ## [Your default spaces](#your-default-spaces) You start with two spaces: * **Personal:** your private space. Only you can see its projects, chats, and tasks. It comes with a project named **Default**, and Slack DMs to Ren run there. * **General:** one shared space per organization. Every member is added to it when they join, so use it for work the whole company shares.  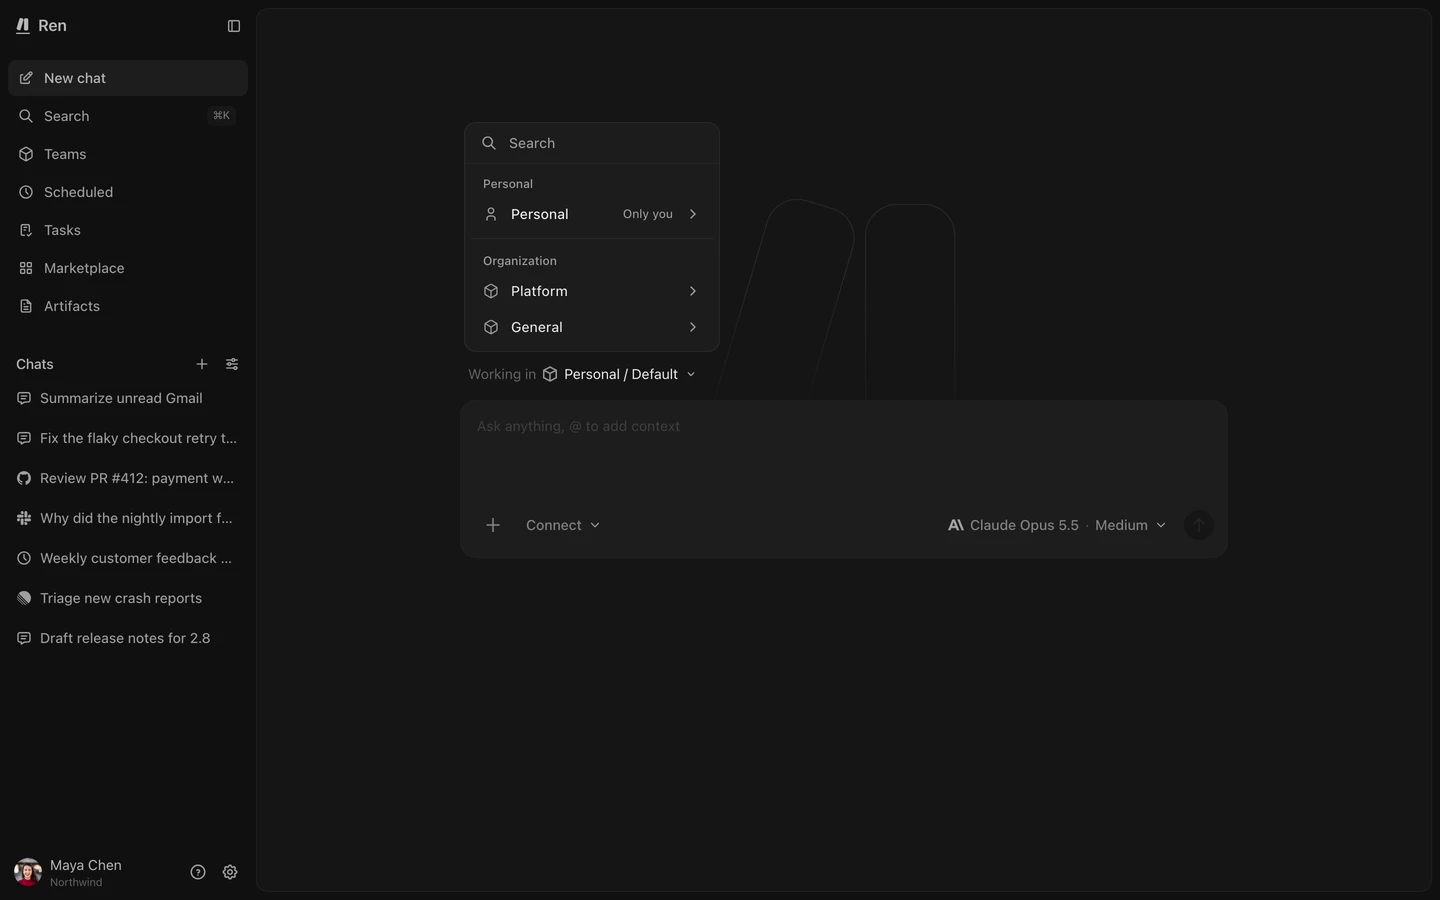 ## [Space or project?](#space-or-project) Create a space when work needs different members, tool accounts, or a machine. For example, separate client spaces keep each client’s work and accounts accessible only to that client’s team. Create a [project](/docs/concepts/projects/) when the members and machine stay the same but the work needs different instructions or tools. For example, Code review and Incident triage can share an Engineering space while using different instructions and apps. ## [Create a space](#create-a-space) You need a name. Everything else is optional or has a default. Web app Ask Ren CLI Instruction method Web app (app) 1. Select **Teams** in the sidebar, then select **New team**. Organization admins and owners select **Create or join a team** (**+**), then **Create team**. 2. Enter a **Name**. You can also pick an icon and add a **Description**. 3. Under **Visibility**, choose **Organization** for a shared space, or **Private** for a space only you can use. Select **Continue**. 4. Pick the machine the space runs on. **Medium** (2 vCPUs, 2 GB) is selected by default. Choose a larger size for heavy work, or a custom [environment](/docs/concepts/environments/). 5. For a shared space, add members and choose each one’s role. You join as owner. 6. Review the details and select **Create team**. [Create a space called Acme for our Acme client work, and add Priya and Jordan as members.](https://useren.ai/app/sessions?prompt=Create+a+space+called+Acme+for+our+Acme+client+work%2C+and+add+Priya+and+Jordan+as+members.) [Open in Ren ](https://useren.ai/app/sessions?prompt=Create+a+space+called+Acme+for+our+Acme+client+work%2C+and+add+Priya+and+Jordan+as+members.)
```sh
ren pods create --name "Acme" --description "Acme client work"
```
Ren creates the space with a project named after it, like **Acme project**, and starts its machine.  [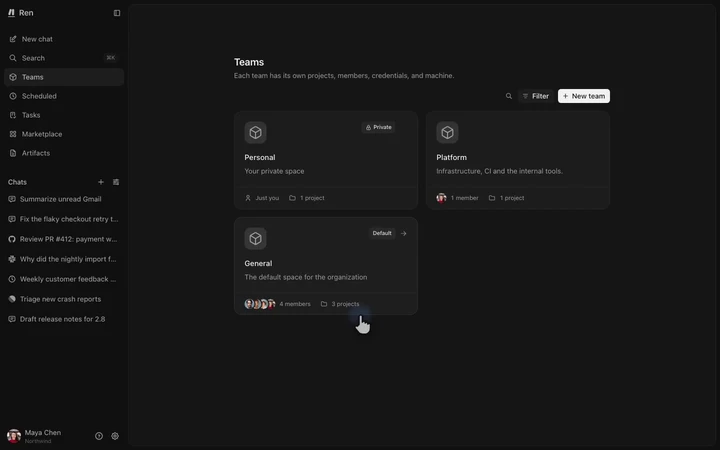](/_astro/create-space.BkOIrLBU.mp4 "Creating a team from New team through the Environment step's machine sizes to Create team") To archive a space, open it, select **Team actions** (**⋯**), and select **Archive team**. The space and its projects leave your organization, and only the API can restore them. You can’t archive General or Personal spaces. ## [Members](#members) **Owner** and **Member** have the same access within a space. Both can use its resources, manage members, and change settings. Personal spaces have no **Members** tab. Only people in your organization can join a space. Removing someone from a space doesn’t remove them from the organization. You can also add someone you’ve [invited to the organization](/docs/concepts/organizations/#invite-a-teammate) before they accept. They get no access until they accept. When they do, they join the space with the role you chose. The assignment stays if the invitation expires or you resend it. Web app Ask Ren CLI Instruction method Web app (app) 1. Open the space from **Teams**, then open the **Members** tab. 2. Select **Add member**, pick a person, choose a role, and select **Add member**. 3. To remove someone, select **Remove** on their row. Invited people appear in the members list by email, marked **Pending**, **Invite expired**, or **No active invite**. Removing one means they won’t join the space when they accept.  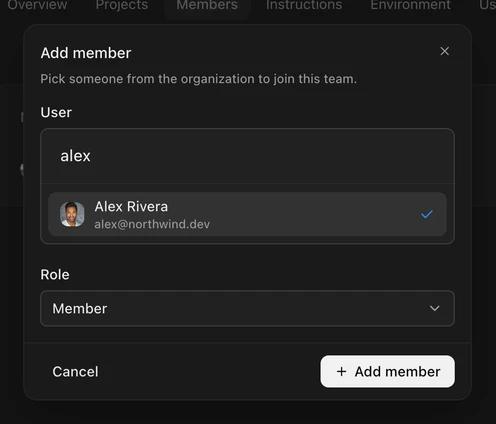 [Add Alex Rivera to the Engineering space.](https://useren.ai/app/sessions?prompt=Add+Alex+Rivera+to+the+Engineering+space.) [Open in Ren ](https://useren.ai/app/sessions?prompt=Add+Alex+Rivera+to+the+Engineering+space.)
```sh
ren pods members add --user-id
ren pods members remove
```
### [Join a shared space](#join-a-shared-space) Organization admins and owners can add themselves to any shared space in the organization. Being an admin doesn’t show you a space’s work until you join it. You join with the **Member** role. Private spaces can’t be joined. Web app Ask Ren Instruction method Web app (app) 1. Select **Teams** in the sidebar, then select **Create or join a team** (**+**). 2. Select **Join team**. The list shows the shared spaces you aren’t in yet. 3. Search for the space, select it, then select **Join team**. Ren opens the space once you’ve joined. [Add me to the Finance space.](https://useren.ai/app/sessions?prompt=Add+me+to+the+Finance+space.) [Open in Ren ](https://useren.ai/app/sessions?prompt=Add+me+to+the+Finance+space.) ## [Instructions and default model](#instructions-and-default-model) Space instructions apply to every chat in the space. Ren reads them after organization instructions and before project instructions. See [how instructions combine](/docs/concepts/projects/#instructions). The space’s default model applies to every project in the space that doesn’t set its own, and overrides the organization’s default model. Web app Ask Ren CLI Instruction method Web app (app) * Open the space’s **Instructions** tab to edit its instructions. * Open the **Overview** tab and choose a **Default model**. You can also edit the icon, name, and description there. [Add an instruction to the Engineering space: every pull request description needs a testing section.](https://useren.ai/app/sessions?prompt=Add+an+instruction+to+the+Engineering+space%3A+every+pull+request+description+needs+a+testing+section.) [Open in Ren ](https://useren.ai/app/sessions?prompt=Add+an+instruction+to+the+Engineering+space%3A+every+pull+request+description+needs+a+testing+section.)
```sh
ren pods update --instructions "Every pull request description needs a testing section."
```
## [Environment](#environment) Every space has one machine, and all of its projects and chats share it. The machine pauses when nobody is using it and resumes when the next chat starts. To change the machine, open the space’s **Environment** tab and select **Change**. Choose another size or a custom environment. See [Environments](/docs/concepts/environments/) for what a custom environment can install and when a change takes effect. ## [Usage](#usage) The space’s **Usage** tab shows what the space’s chats have cost. Switch between **Spend** and **LLM calls**, choose the last 7, 30, or 90 days, and open **Per session** to see the cost of each chat. ## [Credentials](#credentials) A shared space has its own credentials, like a client’s ad account or a team’s GitHub token. Only members of the space can use them, and every project in the space can use them. Manage them in **Settings → Credentials**. Your personal space has no separate credentials. It uses your personal credentials first, then credentials from your shared spaces, then organization credentials. See [Which credential Ren uses](/docs/concepts/credentials/#which-credential-ren-uses) for the full lookup order.
# Storage
> Choose between file stores, memory stores, and databases, see what Ren creates for you, and attach storage to projects.
Storage is where Ren keeps things between chats. Anything Ren writes outside storage disappears when the chat ends. File stores hold documents and data files. Memory stores hold information Ren should remember. Databases hold structured data that Ren queries. In the API and CLI, these are `fileStore`, `memoryStore`, and `podDatabase`. ## [Choose a store](#choose-a-store) | Store | Holds | Example | How Ren reaches it | | ------------ | ---------------------------------------------- | ----------------------------------------------- | --------------------------------------------- | | File store | Files you give Ren or files it produces | Brand assets, a pricing sheet, exported reports | A folder in every chat of an attached project | | Memory store | Facts, decisions, and preferences, as Markdown | Team conventions, a customer’s history | A folder Ren reads when relevant and updates | | Database | Tables Ren queries with SQL | A lead list, daily sales figures | A SQLite file shared by the space’s projects | Use a database when you need to filter, join, or aggregate rows. File and memory stores suit documents, Markdown, and config files. Don’t keep git repositories or SQLite files in them; use a [repository](/docs/concepts/projects/#repositories) or a database instead. ## [What Ren creates for you](#what-ren-creates-for-you) | When | Ren creates | | ---------------------------- | ------------------------------------------------------------------------------------------------------------------------------ | | Your organization is created | An organization file store and memory store, named after the organization, attached to the General space’s **Default** project | | You join an organization | A personal file store and memory store, named after you, attached to the **Default** project in your personal space | | You create a project | A ` Files` file store and a ` Memory` memory store, attached to the project | A space has no file or memory stores of its own, but each database belongs to a space. Every new file store and memory store starts with an empty `AGENTS.md`. Ren reads it when it opens the store, so use it to say what the store is for and how to organize it. ## [Ownership and access](#ownership-and-access) A file store or memory store is either organization-wide or private to one person: * **Organization-wide** stores are visible to every member, and any project in the organization can attach them. * **Private** stores are visible only to their owner, and only that person’s projects can attach them. Your personal stores and the stores of projects in your personal space are private. Projects can share an attached file or memory store. Every project in a space can query its databases, and only that space’s members can see them. Only organization admins can open **Settings → Storage**. Any member can attach stores to a project from the project’s **Storage** tab. ## [Memory stores](#memory-stores) A memory store is a folder of Markdown files. Ren reads it for past context and updates it with decisions, preferences, or customer facts. Project instructions define what Ren should keep. Ren sees attached memory stores but doesn’t load all their contents into every chat. When it opens a store, it reads `AGENTS.md`, then the files it needs. Your current request takes precedence over stored memory. Your personal memory store may also hold a `WHOAMI.md` profile that Ren writes when you join, so it knows your role from your first chat.  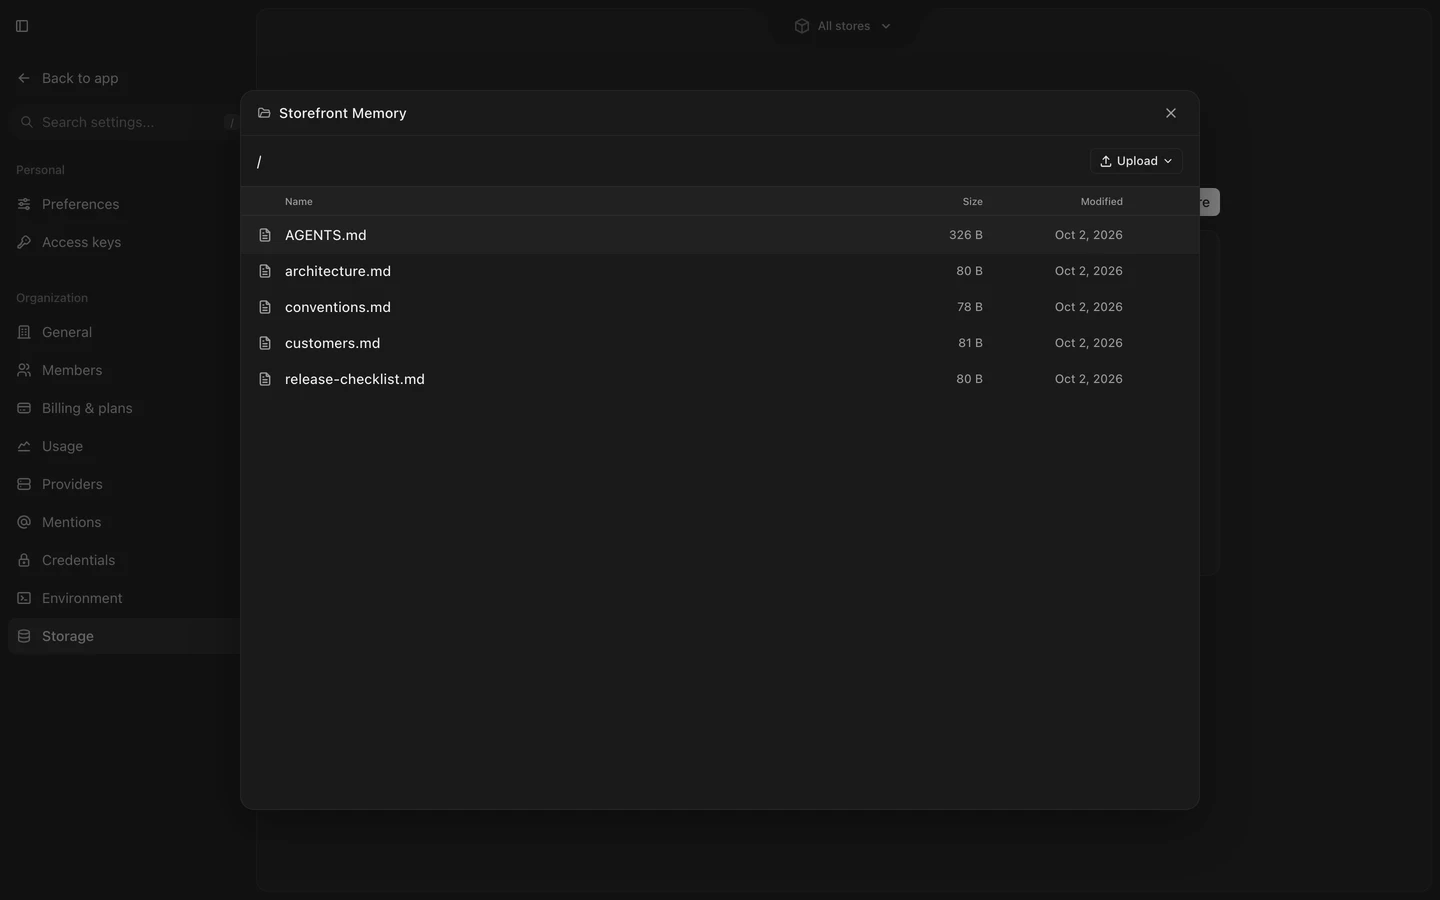 ## [Databases](#databases) A database is a SQLite file on the space’s machine at `/home/user/db/.db`. Ren backs it up continuously, so it survives when the machine is replaced. Use one when Ren needs to store rows and query them, for example to track leads across daily runs or to feed an [artifact](/docs/concepts/artifacts/) dashboard. All projects in a space share its databases, and projects in other spaces can’t access them. ## [Manage storage](#manage-storage)  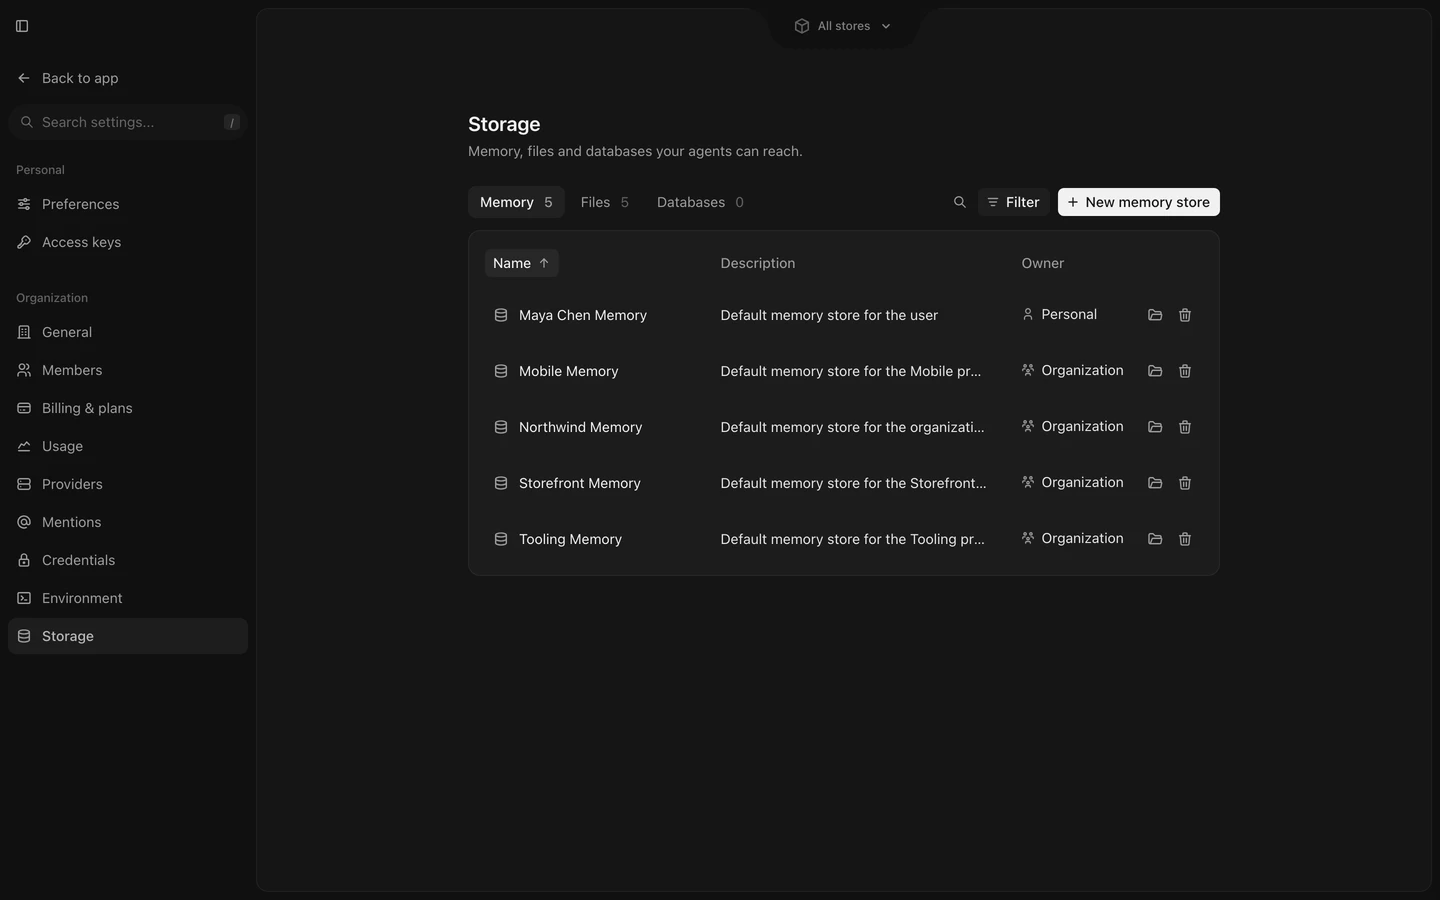 ### [Create a file store or memory store](#create-a-file-store-or-memory-store) Web app Ask Ren CLI Instruction method Web app (app) 1. Open **Settings → Storage** and choose the **Memory** or **Files** tab. 2. Select **New memory store** or **New file store**. 3. Choose where it goes: your organization, or a project. Choosing a project also attaches the store to it. 4. Enter a **Name** and select **Create memory store** or **Create file store**.  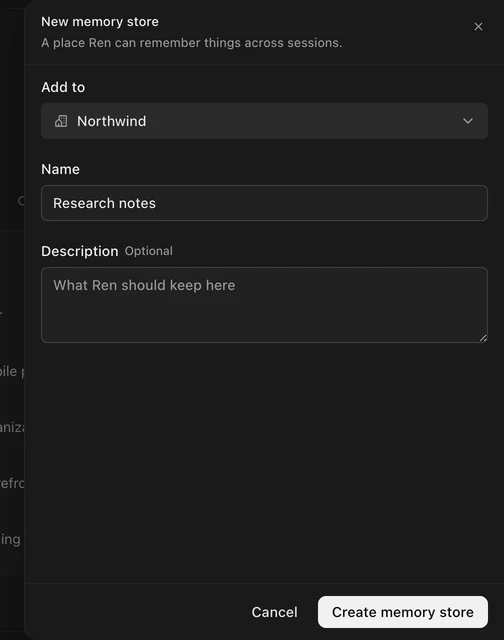 [Create a memory store called Support playbook and attach it to this project.](https://useren.ai/app/sessions?prompt=Create+a+memory+store+called+Support+playbook+and+attach+it+to+this+project.) [Open in Ren ](https://useren.ai/app/sessions?prompt=Create+a+memory+store+called+Support+playbook+and+attach+it+to+this+project.)
```sh
ren memory-stores create --name "Support playbook"
ren file-stores create --name "Brand assets" --visibility private
```
### [Attach storage to a project](#attach-storage-to-a-project) Web app Ask Ren CLI Instruction method Web app (app) 1. Open the project and go to its **Storage** tab. 2. Choose **Memory** or **Files**, then select **Attach memory store** or **Attach file store**. 3. Pick the store and select **Attach**. To detach one, open its menu and select **Detach**. The store and its files stay.  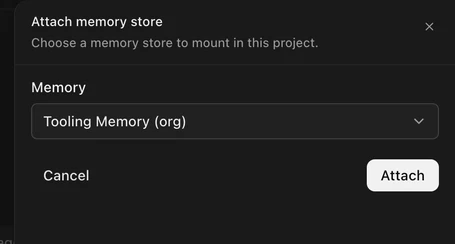 [Attach the Brand assets file store to this project.](https://useren.ai/app/sessions?prompt=Attach+the+Brand+assets+file+store+to+this+project.) [Open in Ren ](https://useren.ai/app/sessions?prompt=Attach+the+Brand+assets+file+store+to+this+project.)
```sh
ren projects file-stores add --file-store-id
ren projects memory-stores add --memory-store-id
```
Attachment changes reach chats when the space’s machine receives the update, usually within seconds. ### [Upload files](#upload-files) Each file can be up to 50 MB. Web app Ask Ren CLI Instruction method Web app (app) 1. Open the project’s **Storage** tab, or **Settings → Storage**. 2. Open the store’s menu and select **Browse**. 3. Drop files into the browser. Attach the file to your message: [Save this price list to the Brand assets file store.](https://useren.ai/app/sessions?prompt=Save+this+price+list+to+the+Brand+assets+file+store.) [Open in Ren ](https://useren.ai/app/sessions?prompt=Save+this+price+list+to+the+Brand+assets+file+store.) Upload a file through the CLI: 1. Run `ren file-stores files start-upload`. 2. Upload the file to the returned URL. 3. Run `ren file-stores files finalize-upload`. For small text files, use `ren file-stores files write-content` in one call. Memory stores use the same commands under `ren memory-stores files`. An upload that isn’t finalized doesn’t appear in the store. ### [Create a database](#create-a-database) Web app Ask Ren CLI Instruction method Web app (app) 1. Open **Settings → Storage** and choose the **Databases** tab. 2. Select **New database**, choose the space, and enter a **Name**. 3. Select **Create database**. Select **Copy path** on a database to copy its path on the machine.  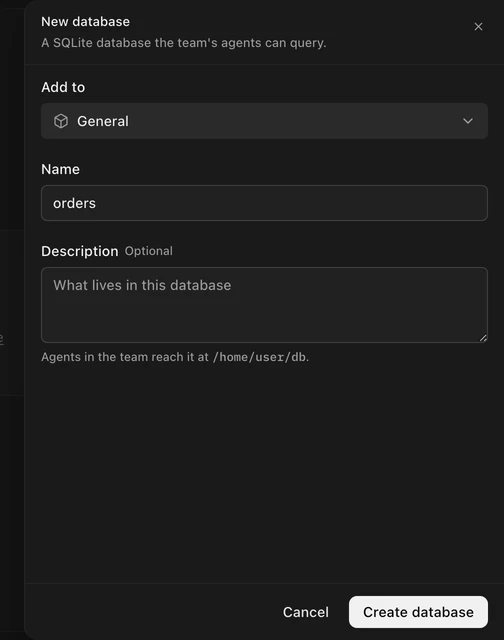 [Create a database called leads in this space with a table for company, contact, and stage.](https://useren.ai/app/sessions?prompt=Create+a+database+called+leads+in+this+space+with+a+table+for+company%2C+contact%2C+and+stage.) [Open in Ren ](https://useren.ai/app/sessions?prompt=Create+a+database+called+leads+in+this+space+with+a+table+for+company%2C+contact%2C+and+stage.)
```sh
ren pod-databases create --name Leads
```
### [Delete a store](#delete-a-store) After you delete a file or memory store, projects lose access on their next update. Ren keeps the files for 30 days, then deletes them permanently. Archived databases keep their backups. Web app Ask Ren CLI Instruction method Web app (app) 1. Open **Settings → Storage** and choose the tab. 2. For a file store or memory store, select **Delete**. For a database, select **Archive**. [Delete the Old campaign file store.](https://useren.ai/app/sessions?prompt=Delete+the+Old+campaign+file+store.) [Open in Ren ](https://useren.ai/app/sessions?prompt=Delete+the+Old+campaign+file+store.)
```sh
ren file-stores archive
ren memory-stores archive
ren pod-databases archive
```
## [FAQ](#faq)
# Tasks
> Track work for people and Ren in one list, assign it to a project, and start Ren on it when you're ready.
A task is a tracked piece of work. You or Ren can create one, including for follow-up work that comes up in a chat. A task can span several [chats](/docs/concepts/chats/). Use a task to track work, hand it between projects, or resume it later. Ren can use the task’s work and comment history when it resumes. Use a chat for a single request. Every task belongs to a [space](/docs/concepts/spaces/). Everyone in the space can see it, and nobody else can. Put a task only you should see in your personal space. In the API and CLI, a task is `task`. ## [Views](#views) Open **Tasks** in the sidebar. Use the **Display** button to switch the layout: * **List** groups tasks by **Project** or by **Status**, ordered by creation date or priority. * **Board** shows tasks as cards, grouped by project. Use **Filter tasks** to narrow by status, priority, project, assignee, or label. By default, the list shows tasks that are **Todo** or **In progress**. Search finds tasks by text.  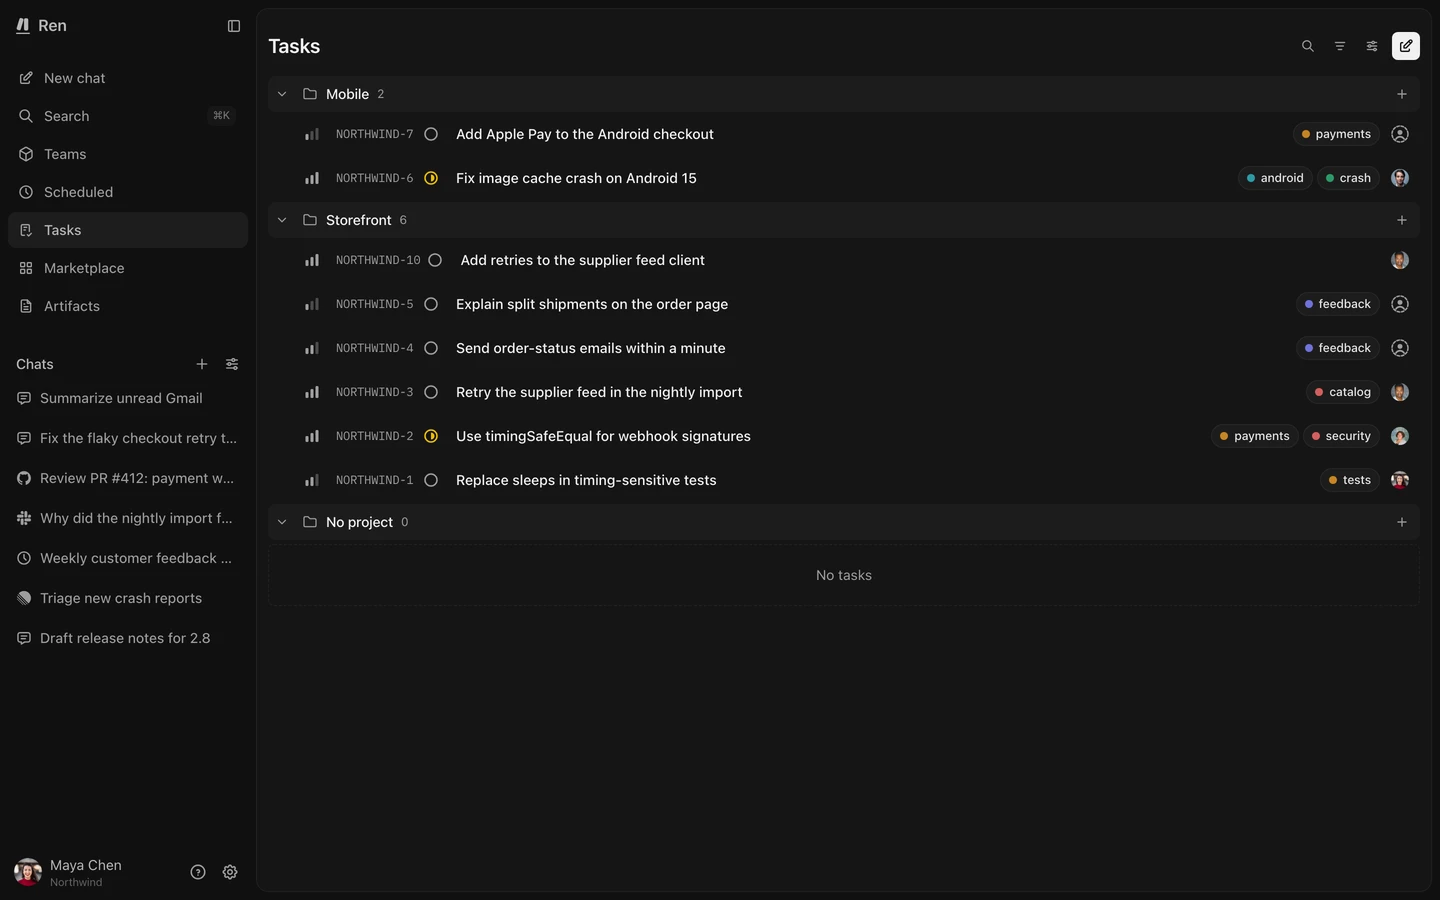  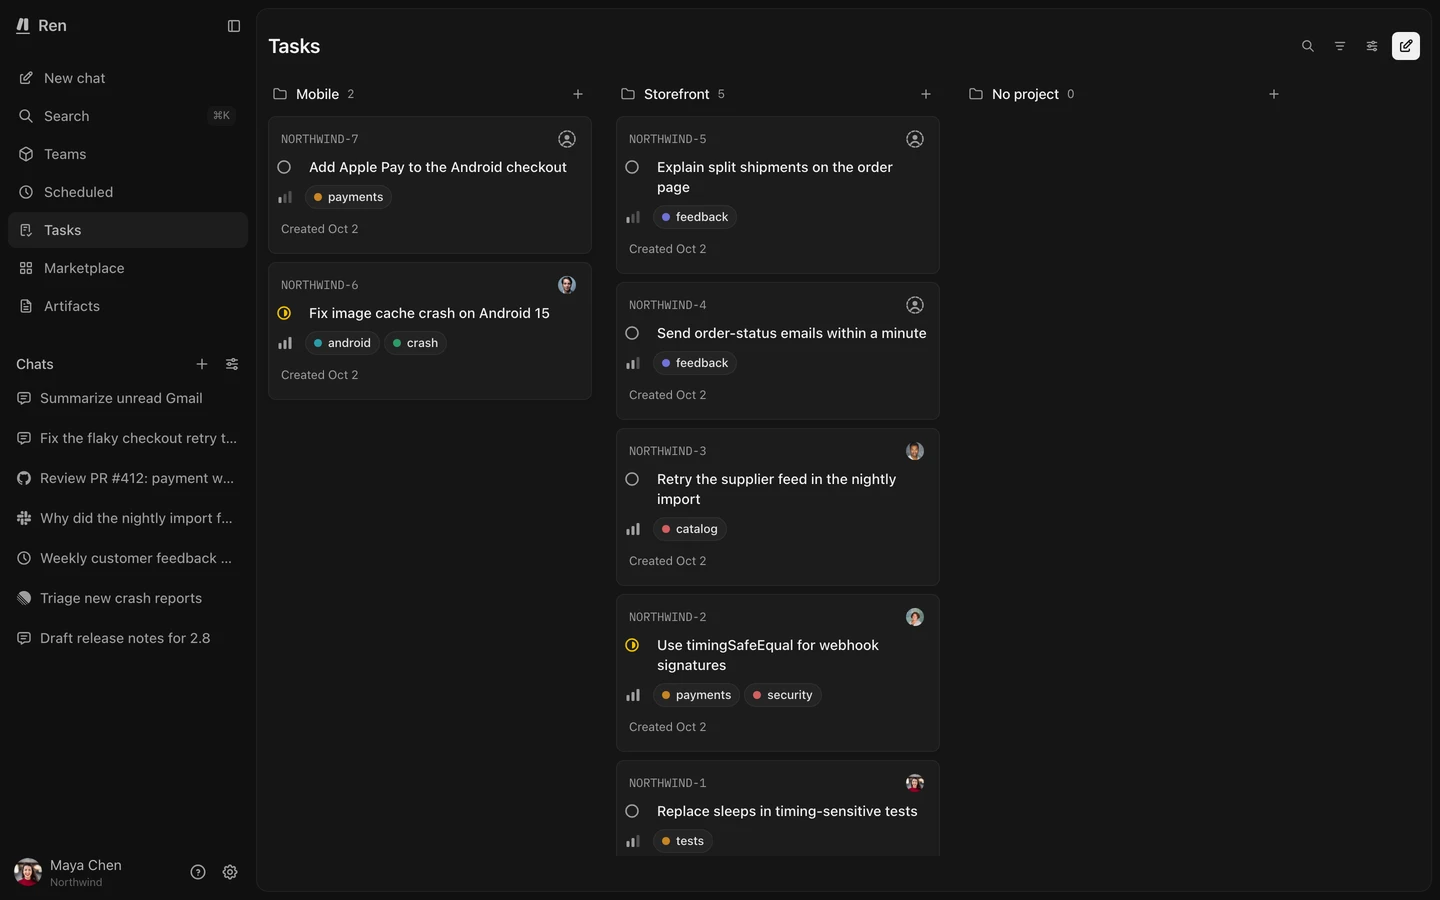 ## [Create a task](#create-a-task) A task needs a title and a space. Everything else is optional: * **Description:** the details Ren and your teammates need. * **Status:** **Todo**, **In progress**, **Done**, or **Dismissed**. * **Priority:** **Low**, **Medium**, or **High**. * **Assignee:** a person in the space who owns the task. * **Project:** the project Ren uses to work on the task. Required before starting work. * **Labels and due date:** to group and schedule the task. Web app Ask Ren CLI Instruction method Web app (app) 1. Open **Tasks** and select **New task**, or press `C`. To add a task to a project directly, select the **+** next to the project’s group. 2. Enter a title and an optional description. 3. Choose the space, then set any properties: status, priority, assignee, project, labels, and due date. 4. Select **Create task**. Turn on **Create more** to keep the dialog open for the next one.  [](/_astro/create-task.DoBtBYJh.mp4 "Creating a task by filling in its title, space, and optional fields") [Create a high-priority task in the Engineering space: add retries to the supplier feed client. Assign it to the Build project.](https://useren.ai/app/sessions?prompt=Create+a+high-priority+task+in+the+Engineering+space%3A+add+retries+to+the+supplier+feed+client.+Assign+it+to+the+Build+project.) [Open in Ren ](https://useren.ai/app/sessions?prompt=Create+a+high-priority+task+in+the+Engineering+space%3A+add+retries+to+the+supplier+feed+client.+Assign+it+to+the+Build+project.)
```sh
ren tasks create --pod-id --project-id --title "Add retries to the supplier feed client" --priority high
```
## [Labels](#labels) Labels group tasks across projects, like `billing` or `customer-request`, and they’re shared across your organization. A task can have up to 16 labels, each up to 64 characters. Ren uses two system labels: **fix** (`ren-fix`) for setup problems it can resolve, and **improvement** (`ren-improve`) for suggested improvements. You can filter by these labels but can’t edit them, and Ren reserves the `ren-` prefix. Web app Ask Ren CLI Instruction method Web app (app) 1. Open a task, or open **Labels** in the new task dialog. 2. Search for a label and select it. 3. To create one, type its name, pick a color, and select **Create label**. [Add the billing label to the supplier feed task.](https://useren.ai/app/sessions?prompt=Add+the+billing+label+to+the+supplier+feed+task.) [Open in Ren ](https://useren.ai/app/sessions?prompt=Add+the+billing+label+to+the+supplier+feed+task.)
```sh
ren labels create --name billing
ren tasks update --labels billing
```
## [When Ren starts work](#when-ren-starts-work) Ren doesn’t start on a task when you create it, or when you change its project in the app. It starts when: * Someone selects **Start** on the task. See [Start a task](#start-a-task). * Someone hands the task to a project with the CLI or the API, or asks Ren to. See [Hand a task to another project](#hand-a-task-to-another-project). * Someone messages Ren in a thread linked to the task, like the Slack thread or GitHub pull request the task came from. Ren continues the task in its project instead of starting a separate chat. A task needs a project, and a status of **Todo**, **In progress**, or **In review**, before Ren can work on it. ## [Task details](#task-details) Open a task to see everything about it: * **Properties:** status, priority, assignee, and due date. * **Links:** the Slack threads, Linear issues, GitHub pull requests, and other URLs the task points to. Ren adds links as it works, and you can add them with the API or CLI. The app shows links but doesn’t add them. * **Labels and project:** how the task is grouped and where Ren works on it. * **Activity:** every change to the task, who made it, comments, and the chats that worked on it. Open a chat from its card. Only the author can edit or delete a comment. Web app Ask Ren Instruction method Web app (app) Open the task, type in **Leave a comment…** at the bottom of the activity, and select **Comment**.  [](/_astro/open-task.DqMETvkg.mp4 "Opening a task from the list to its detail page") [Comment on the supplier feed task that the API sandbox is down until Friday.](https://useren.ai/app/sessions?prompt=Comment+on+the+supplier+feed+task+that+the+API+sandbox+is+down+until+Friday.) [Open in Ren ](https://useren.ai/app/sessions?prompt=Comment+on+the+supplier+feed+task+that+the+API+sandbox+is+down+until+Friday.) ## [Start a task](#start-a-task) **Start** runs the assigned project’s Ren on the task. Choose how: * **Start new session** opens a new chat for the task. * **Continue last session** resumes the assigned project’s last chat for this task. If none exists, Ren creates a chat. Web app Ask Ren CLI Instruction method Web app (app) Open the task, select **Start**, then choose **Start new session** or **Continue last session**. The new chat appears in the task’s activity.   [Start the supplier feed task in a new session.](https://useren.ai/app/sessions?prompt=Start+the+supplier+feed+task+in+a+new+session.) [Open in Ren ](https://useren.ai/app/sessions?prompt=Start+the+supplier+feed+task+in+a+new+session.)
```sh
ren tasks start --mode new
ren tasks start --mode continue
```
Task chats can’t ask clarifying questions. Permission requests wait in the chat until someone answers. ## [Hand a task to another project](#hand-a-task-to-another-project) To hand work from one project to another, change the task’s project and start it again. Each project’s Ren keeps its own chat on the task. For example, hand it to **Plan**, then **Build**, then back to **Plan**: Plan picks up its own earlier chat. If you use the CLI or the API, or ask Ren, you can pick a project in another space you belong to. The task moves to that space, and if its assignee isn’t a member there, the task is unassigned. In the app, you can pick only projects in the task’s space. Web app Ask Ren CLI Instruction method Web app (app) Open the task, change its **Project**, then select **Start** and choose **Continue last session**. Changing the project alone doesn’t start anything. [Hand the supplier feed task to the Build project. The plan is approved.](https://useren.ai/app/sessions?prompt=Hand+the+supplier+feed+task+to+the+Build+project.+The+plan+is+approved.) [Open in Ren ](https://useren.ai/app/sessions?prompt=Hand+the+supplier+feed+task+to+the+Build+project.+The+plan+is+approved.)
```sh
ren tasks assign --project-id --description "The plan is approved. Build it."
```
One command assigns the project, replaces the description with the instruction for the receiving project, and starts that project’s Ren in its last chat on the task, or a new one. The reply’s `message` says what changed and whether Ren started. Add `--start new` to open a new chat instead, or `--start none` to assign the project without starting it. Don’t run `ren tasks start` afterward: that starts Ren a second time. ## [Archive a task](#archive-a-task) Archive a task you no longer need. It leaves the task list, can’t be started, and messages in its linked threads no longer route to it. Its chats stay in the chat list. Web app Ask Ren CLI Instruction method Web app (app) Open the task’s actions menu (the **⋯** button) and select **Archive task**. To archive several, select them in the list and choose **Archive** in the bar that appears. [Archive the supplier feed task.](https://useren.ai/app/sessions?prompt=Archive+the+supplier+feed+task.) [Open in Ren ](https://useren.ai/app/sessions?prompt=Archive+the+supplier+feed+task.)
```sh
ren tasks archive
```
# Inference setup
> Point Claude Code, Codex, OpenCode, Pi, or Hermes at Ren inference with one CLI command.
Ren inference connects local coding tools to your organization’s Claude and ChatGPT subscriptions. Setup requires a connected provider, an inference key, and the Ren CLI. ## [Connect a provider](#connect-a-provider) An organization admin connects the subscriptions Ren routes requests through. 1. Open **Settings → Providers** and select **Connect**. 2. Choose **Claude** or **ChatGPT**. Follow the provider-specific authorization steps below. 3. **Claude:** Authorize access in the new tab. Paste the complete authorization code into Ren, including `#`. **ChatGPT:** First enable **Enable device code authorization for Codex** in ChatGPT’s security settings. Enter the one-time code Ren displays. The subscription appears on the Providers page once it is connected. ## [Create an inference key](#create-an-inference-key) 1. Open **Settings → Access keys** and select the **Inference keys** tab. 2. Select **Create key** and name it after the machine or tool that will use it. 3. Copy the key before closing the dialog. Ren shows it only once. Keep the key out of repositories. If it is exposed, revoke it on the same page and create another. ## [Install the CLI](#install-the-cli) The installer needs Node.js 18 or later.
```bash
curl -fsSL https://useren.ai/install | bash
```
See [CLI installation](/docs/surfaces/cli/#install) for other options. ## [Set up your coding tool](#set-up-your-coding-tool) Install your coding tool. Run its setup command below. Setup requests your inference key, previews changes, and creates a backup of each affected file. ### [Claude Code](#claude-code)
```bash
ren inference setup claude-code
```
Setup writes Ren models to `~/.claude/settings.json`. Send a test request with `claude -p 'which model are you?'`. ### [Codex](#codex)
```bash
ren inference setup codex
```
Setup adds a `ren` profile under `~/.codex/`. Start Ren inference with `codex --profile ren`. Plain `codex` continues using your OpenAI account. ### [OpenCode](#opencode)
```bash
ren inference setup opencode
```
Setup adds a Ren provider to `~/.config/opencode/opencode.jsonc`. Use `/models` to see Ren models. ### [Pi](#pi)
```bash
ren inference setup pi
```
Setup adds a `ren` provider to `~/.pi/agent/models.json`. Start Pi with `pi --provider ren`. ### [Hermes](#hermes)
```bash
ren inference setup hermes
```
Setup writes `~/.hermes/config.yaml` and `~/.hermes/.env`. Send a test request with `hermes -z 'hello'`.
# llms.txt
> Use the Ren docs as context for your AI agent.
Give your AI agent these Markdown files to help it work with Ren: | File | When to use it | | ------------------------------------ | -------------------------------------------------------------- | | [`/llms.txt`](/llms.txt) | Let the agent choose pages from an index of titles and links. | | [`/llms-full.txt`](/llms-full.txt) | Give the agent all the docs at once. | | [`/llms-small.txt`](/llms-small.txt) | Use shorter docs when the agent has limited space for context. | These files contain only published pages. ## [Use it with your agent](#use-it-with-your-agent) Give your agent this URL or paste the file contents:
```text
https://useren.ai/llms-full.txt
```
For one page, select **Copy page**. Its menu also offers **Open Markdown**, **Chat in Claude**, and **Chat in ChatGPT**. Each page is available as Markdown at `/raw/.md`. This page is at [`/raw/docs/developers/llms-txt.md`](/raw/docs/developers/llms-txt.md).
# ChatGPT
> Connect Ren to ChatGPT and copy what ChatGPT knows about you into your Ren memory store.
Save ChatGPT’s summary of your work and preferences to Ren’s memory. ## [Connect Ren to ChatGPT](#connect-ren-to-chatgpt) Add Ren as a custom connector in ChatGPT. See [Connect a website](/docs/surfaces/mcp/#connect-a-website). ## [Push your memory to Ren](#push-your-memory-to-ren) In a new ChatGPT chat with the Ren connector turned on, send:
```text
Record everything you know about me and my work. Include my role, team, projects, tools, and work preferences. Use the
Ren connector to save chatgpt-memory.md in my personal memory store.
```
ChatGPT saves the file in your personal memory store, like `Alex Rivera Memory`. Your personal space’s **Default** project uses this store. Open your personal space’s **Default** project and select **Storage → Memory**. Review the file before using it, since it contains ChatGPT’s selected summary, not a complete memory export. See [Storage](/docs/concepts/storage/). ## [Move a ChatGPT project to a Ren project](#move-a-chatgpt-project-to-a-ren-project) Automatic project migration isn’t available. Create a [Ren project](/docs/concepts/projects/) and copy the ChatGPT project’s instructions into its **Instructions** field.
# Claude.ai
> Connect Ren to Claude.ai and copy what Claude knows about you into your Ren memory store.
Save Claude’s summary of your work and preferences to Ren’s memory. ## [Connect Ren to Claude.ai](#connect-ren-to-claudeai) Add Ren as a custom connector in Claude.ai. See [Connect a website](/docs/surfaces/mcp/#connect-a-website). ## [Push your memory to Ren](#push-your-memory-to-ren) In a new Claude.ai chat with the Ren connector turned on, send:
```text
Record everything you know about me and my work. Include my role, team, projects, tools, and work preferences. Use the
Ren connector to save claude-memory.md in my personal memory store.
```
Claude saves the file in your personal memory store, like `Alex Rivera Memory`. Your personal space’s **Default** project uses this store. Open your personal space’s **Default** project and select **Storage → Memory**. Review the file before using it, since it holds Claude’s selected summary, not a complete memory export. See [Storage](/docs/concepts/storage/). ## [Move a Claude project to a Ren project](#move-a-claude-project-to-a-ren-project) Automatic project migration isn’t available. Create a [Ren project](/docs/concepts/projects/) and copy the Claude project’s instructions into its **Instructions** field.
# Claude Code
> Install the Ren plugin in Claude Code, run onboarding, and push your existing skills and memory to Ren.
Copy Claude Code skills and memory to Ren. Use them to run work in the cloud, on a schedule, or with your team. ## [Install the Ren plugin](#install-the-ren-plugin) The plugin adds Ren’s MCP server and skills for configuring and managing Ren. 1. Add the Ren marketplace:
```text
/plugin marketplace add renai-labs/registry
```
2. Install the plugin:
```text
/plugin install ren@renai-labs
```
3. Run `/mcp` in Claude Code. Select `ren`. Sign in through the browser. Approve access. See [Sign in](/docs/surfaces/mcp/#sign-in). ## [Run onboarding](#run-onboarding) Onboarding is a skill in the plugin, not a slash command. Ask for it:
```text
Use the ren-onboarding skill to set me up on Ren.
```
Claude Code uses your existing context and offers a tour, a demo, or help configuring recurring work. For recurring work, it asks what to delegate. It creates a project in your personal space and returns its web app link, then asks whether to connect any required accounts, like Gmail. If Claude Code can’t reach Ren through the MCP server, onboarding installs the [CLI](/docs/surfaces/cli/) and asks you to approve a sign-in link in the browser. ## [Push your skills to Ren](#push-your-skills-to-ren) Ask Claude Code to copy your local skills into Ren:
```text
Use the ren-systems-architect skill to push my Claude Code skills from ~/.claude/skills to Ren as personal skills.
Skip skills that already exist in Ren. List the skills you created.
```
Claude Code creates one Ren [skill](/docs/concepts/skills/) from each skill folder, including its `SKILL.md` and supporting files. Personal skills are visible only to you. To share one with your organization, ask Claude Code to create it at the organization level instead. Ren checks each uploaded `SKILL.md` against the [skill requirements](/docs/concepts/skills/#create-a-skill). Claude Code lists any rejected skills. ## [Push your memory to Ren](#push-your-memory-to-ren) Ask Claude Code to copy what it remembers about you and your work:
```text
Use the ren-systems-architect skill to push my Claude Code memory and CLAUDE.md files to my personal memory store in Ren.
```
Claude Code uploads `CLAUDE.md` and saved memory files to your personal memory store, such as `Alex Rivera Memory`. Your personal space’s **Default** project uses this store. See [Storage](/docs/concepts/storage/). ## [Check it worked](#check-it-worked) * **Skills:** In the web app, open **Marketplace → Skills** and switch to **Installed**. Your pushed skills are listed as personal. * **Memory:** Open your personal space’s **Default** project. Select **Storage → Memory**. Open your memory store to check the uploaded files. You can also ask Ren in a new chat: [What do you know about me from my memory store?](https://useren.ai/app/sessions?prompt=What+do+you+know+about+me+from+my+memory+store%3F) [Open in Ren ](https://useren.ai/app/sessions?prompt=What+do+you+know+about+me+from+my+memory+store%3F)
# Codex
> Install the Ren plugin in Codex, run onboarding, and push your existing skills and memory to Ren.
Copy your Codex skills and memory to Ren, then use them to run work in the cloud, on a schedule, or with your team. ## [Install the Ren plugin](#install-the-ren-plugin) The plugin adds Ren’s MCP server and skills for configuring and managing Ren. 1. Add the Ren marketplace:
```sh
codex plugin marketplace add renai-labs/registry
```
2. Open Codex’s plugin directory. Find **Ren** in the `renai-labs` marketplace. Install the plugin. 3. Sign in when Codex first connects to Ren, and approve access in the browser. See [Sign in](/docs/surfaces/mcp/#sign-in). ## [Run onboarding](#run-onboarding) Onboarding is a skill in the plugin, not a slash command. Ask for it:
```text
Use the ren-onboarding skill to set me up on Ren.
```
Codex uses your existing context and offers a tour, a demo, or help configuring recurring work. For recurring work, it asks what to delegate. It creates a project in your personal space, returns its web app link, and asks whether to connect any required accounts, like Gmail. Codex needs network access to reach Ren. Without it, onboarding stops and directs you to the [web app](https://useren.ai/app). ## [Push your skills to Ren](#push-your-skills-to-ren) Ask Codex to copy your local skills into Ren:
```text
Use the ren-systems-architect skill to push my local Codex skills to Ren as personal skills.
Skip skills that already exist in Ren. List the skills you created.
```
Codex creates one Ren [skill](/docs/concepts/skills/) from each skill folder, including its `SKILL.md` and supporting files. Personal skills are visible only to you. To share one with your organization, ask Codex to create it at the organization level instead. Ren checks each uploaded `SKILL.md` against the [skill requirements](/docs/concepts/skills/#create-a-skill), and Codex lists any it rejects. ## [Push your memory to Ren](#push-your-memory-to-ren) Ask Codex to copy your standing instructions and notes:
```text
Use the ren-systems-architect skill to push my AGENTS.md files and anything you remember about me to my personal memory store in Ren.
```
Codex uploads your instructions and notes to your personal memory store, like `Alex Rivera Memory`. Your personal space’s **Default** project uses this store. See [Storage](/docs/concepts/storage/). ## [Check it worked](#check-it-worked) * **Skills:** In the web app, open **Marketplace → Skills** and switch to **Installed**. Your pushed skills are listed as personal. * **Memory:** Open your personal space’s **Default** project, select **Storage → Memory**, and open your memory store to check the uploaded files. You can also ask Ren in a new chat: [What do you know about me from my memory store?](https://useren.ai/app/sessions?prompt=What+do+you+know+about+me+from+my+memory+store%3F) [Open in Ren ](https://useren.ai/app/sessions?prompt=What+do+you+know+about+me+from+my+memory+store%3F)
# CLI
> Install the Ren CLI, sign in from your terminal, and manage Ren from a shell or a coding agent.
The Ren CLI, `ren`, manages spaces, projects, tasks, and settings from a terminal or script, and coding agents with shell access can run it. The CLI supports more operations than the [MCP server](/docs/surfaces/mcp/). Use the [web app](/docs/surfaces/web-app/) to chat with Ren and review its work. Use [MCP](/docs/surfaces/mcp/) for AI tools that can’t run shell commands, like chat websites. ## [Install](#install) The installer uses npm and needs Node.js 18 or later.
```sh
curl -fsSL https://useren.ai/install | bash
```
The installer runs `ren init` after installation. To skip initialization, use `curl -fsSL https://useren.ai/install | bash -s -- --no-init`. To install version `0.2.4`, use `curl -fsSL https://useren.ai/install | bash -s -- --version 0.2.4`. You can also install with npm:
```sh
npm install -g @renai-labs/cli
```
## [Sign in](#sign-in) 1. Run `ren init`. It opens Ren in your browser. Sign in to connect the CLI to your account. Use `ren init --no-browser` to print the sign-in URL instead. 2. Run `ren whoami` to confirm. It shows your user, your organization, and your role. ## [Check it worked](#check-it-worked) Ask your coding agent:
```text
Summarize my Ren setup using the ren CLI.
```
Check that the answer names your organization and lists its spaces and projects. ## [See active devices](#see-active-devices) Web app Instruction method Web app (app) Each connected CLI appears under **Settings → Preferences → Devices** as **CLI ·** followed by the computer’s name. Select **Remove** to revoke its access, which takes effect on its next request.  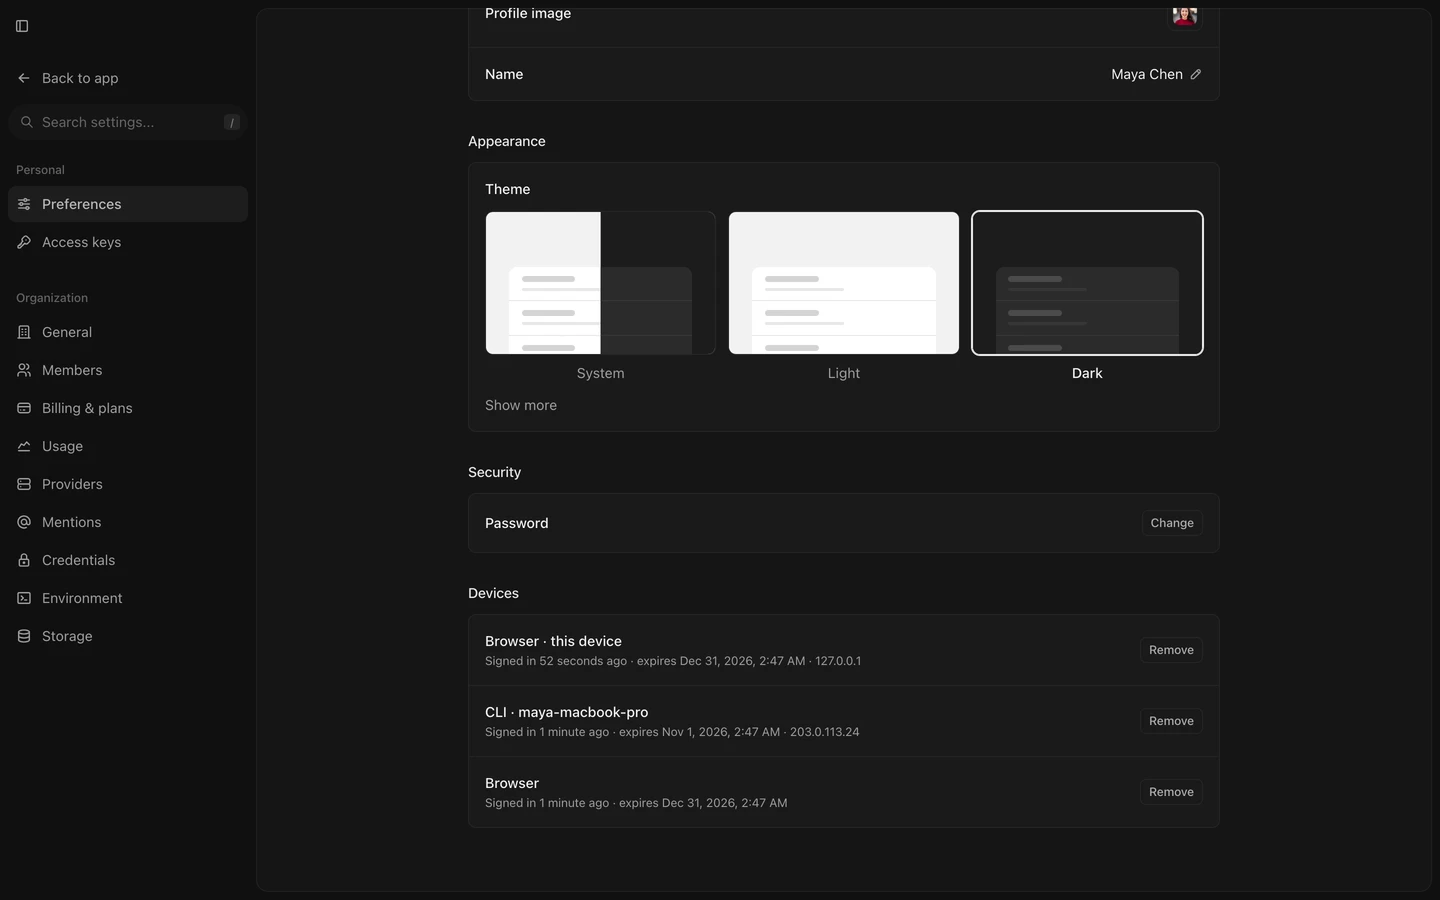 ## [Switch profiles](#switch-profiles) A profile stores a signed-in account. `ren init` creates the first profile as `default`. To add another account, use a different profile name:
```sh
ren init --profile work
```
Then list and switch between profiles:
```sh
ren auth profile list
ren auth profile switch work
```
To use a profile for a single command, add `--profile ` or set `REN_PROFILE`. To act in another organization with the same account, run `ren org list`, then `ren org switch `. `ren auth logout` removes the active profile’s sign-in from this computer. Profiles are stored in `~/.config/ren/auth.json`. ## [Limits](#limits) * The CLI can’t send chat messages. `ren sessions create` creates an empty chat. Send messages through the web app or a channel. * You can only invite people to your organization from the web app. * Signing in to an app or a custom MCP with OAuth opens your browser. For every command and flag, run `ren --help` or `ren --help`. Run `ren upgrade` to update the CLI.
# MCP
> Connect a coding agent or a chat website to Ren's MCP server so it can manage your Ren setup.
Ren’s MCP server lets another AI tool manage your Ren setup. For example, Claude can add a skill to a project or create a task. * Use the [CLI](/docs/surfaces/cli/) instead when your coding agent has a shell. The CLI covers more of Ren than the MCP server. * Use the [web app](/docs/surfaces/web-app/) to chat with Ren itself and review its work. ## [Connect a coding agent](#connect-a-coding-agent) Add a remote MCP server using Streamable HTTP and this URL:
```text
https://api.useren.ai/mcp
```
For Claude Code and Codex, use the Ren plugin to install the MCP server and Ren skills together. See [Claude Code](/docs/migrate/claude-code/) and [Codex](/docs/migrate/codex/). To add only the MCP server to Claude Code, run:
```sh
claude mcp add --transport http ren https://api.useren.ai/mcp
```
For opencode, add the server to `opencode.json`: opencode.json
```json
{
"$schema": "https://opencode.ai/config.json",
"mcp": {
"ren": {
"type": "remote",
"url": "https://api.useren.ai/mcp",
"enabled": true
}
}
}
```
For any other client, add a remote MCP server named `ren` with the URL above, using that client’s MCP settings. ## [Connect a website](#connect-a-website) Create a custom connector in your client, using `https://api.useren.ai/mcp` as the server URL and OAuth for authentication: * **claude.ai:** Open **Customize → Connectors** and add a custom connector. * **chatgpt.com:** Open **Settings → Connectors → Advanced** and add a custom connector. Start a new chat after you add the connector so the site loads Ren’s tools. ## [Sign in](#sign-in) Web app Instruction method Web app (app) 1. Use a Ren tool. Your client opens the authorization page in your browser. Sign in if needed. 2. Choose an **Organization** on the **Authorize access** screen. Select **Allow**. The connection can act only in that organization.  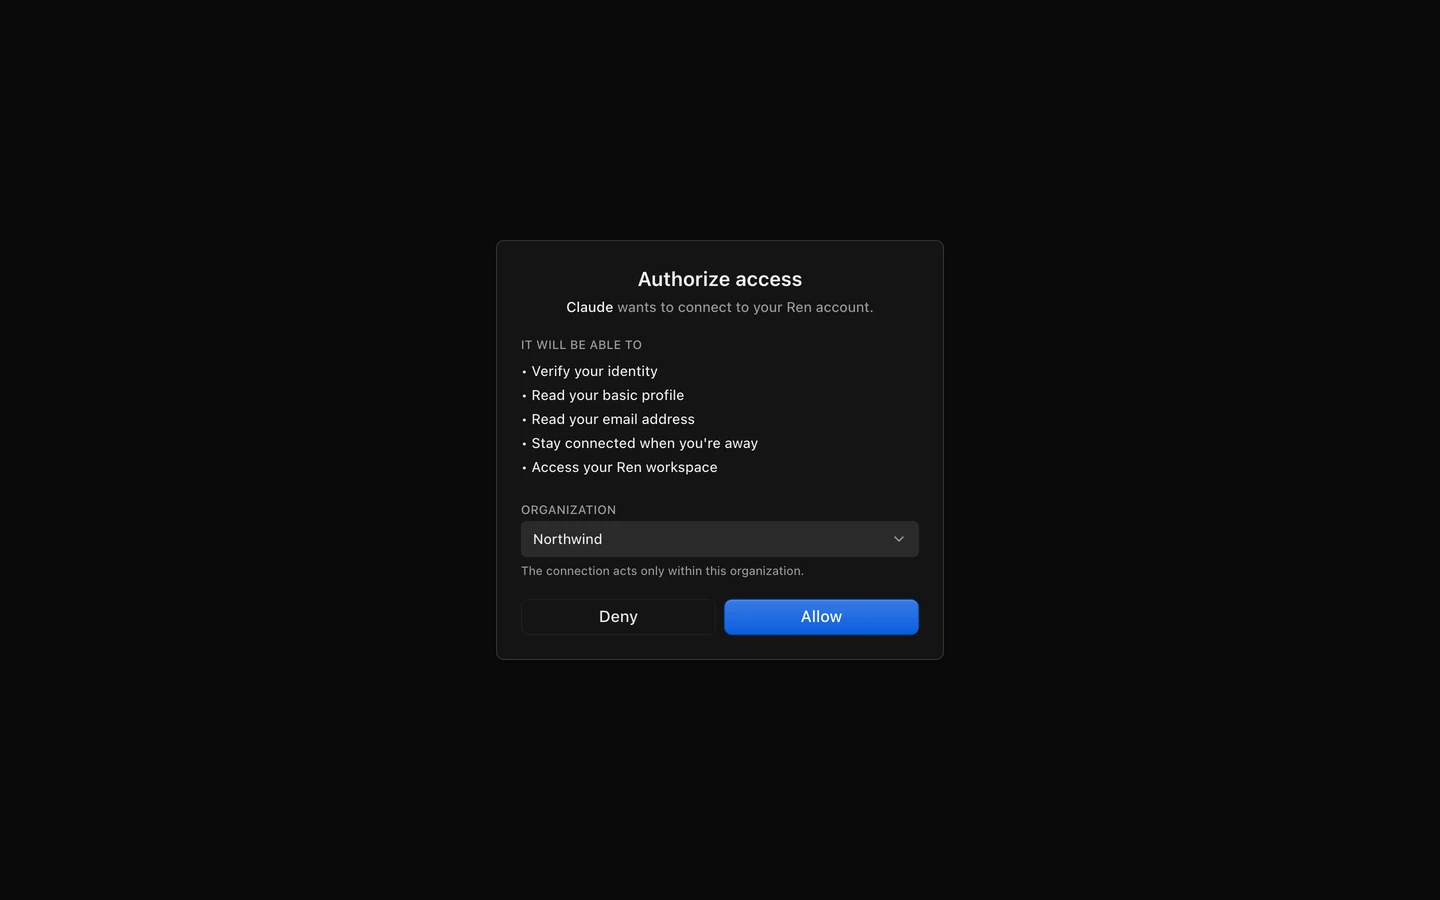 To use a different organization later, disconnect and sign in again. ### [Use an access key](#use-an-access-key) For clients without browser authentication, use an [access key](/docs/surfaces/sdk/#create-an-access-key). The client must support an `Authorization` header. Send the key as a bearer token:
```text
Authorization: Bearer ren_pat_...
```
The key acts with its own role in the organization it was created in. ## [Check it worked](#check-it-worked) Ask your agent:
```text
Summarize my Ren setup.
```
Check that the answer names your organization, spaces, and projects. If Ren tools are missing, check the server’s connection status in your client, then start a new chat. ## [Limits](#limits) The Ren MCP server can’t: * Send a message to Ren in a chat. It can create an empty chat, but the conversation happens in the web app or a channel. * Set up Slack, GitHub, Linear, or Telegram. It can only set a project’s email address. * Invite people to your organization, create labels, or manage environments and databases. Use the [web app](/docs/surfaces/web-app/) for these. The [CLI](/docs/surfaces/cli/) also covers channel setup, labels, environments, and databases.
# SDK
> Call the Ren API from your own TypeScript code, scripts, and CI with @renai-labs/sdk and an access key.
`@renai-labs/sdk` is the TypeScript client for the Ren API. Use it to create tasks from a script, update a skill in CI, or list projects in an internal tool. * Use the [CLI](/docs/surfaces/cli/) for one-off changes from a terminal. * Use [MCP](/docs/surfaces/mcp/) to let another AI tool manage Ren. ## [Install](#install)
```bash
npm install @renai-labs/sdk
```
## [Create an access key](#create-an-access-key) An access key is a token the SDK uses to call the API through your account. It belongs to one organization and has its own permission role. 1. Open **Settings → Access keys**. 2. On the **Personal tokens** tab, select **Create token**. 3. Enter a **Token name**, such as `CI pipeline`. Choose an **Expiration**. The default is 30 days. 4. Select **Create token**. Copy the key. It starts with `ren_pat_`. Ren shows the full key only once. App-created keys are read-only and can read the organization resources available to you. The CLI supports `readonly`, `member`, and `admin` roles, so choose `member` or `admin` for a key that makes changes.
```sh
ren pats create --name "CI pipeline" --role member --expires-at 2027-01-01T00:00:00Z
```
A new key can’t exceed your current role. It keeps its original role if your role later changes. It works only in the organization where you created it. ## [Quick start](#quick-start) 1. **Create a client** with a base URL and your access key:
```ts
import { createRenClient, pat } from "@renai-labs/sdk"
const client = createRenClient({
baseUrl: "https://api.useren.ai",
auth: pat(process.env.REN_ACCESS_KEY!),
})
```
2. **Call a resource.** Methods are grouped by resource and return `{ data, error, request, response }`:
```ts
const { data: skills } = await client.skill.list()
```
Some API resources use a different name than the app: | In the app | In the SDK | | ---------- | -------------------- | | Space | `client.pod` | | Chat | `client.session` | | Schedule | `client.cronTrigger` | | Access key | `client.pat` | | Database | `client.podDatabase` | The [API reference](/docs/developers/api/) lists every resource and operation. ## [Example: create a task from a script](#example-create-a-task-from-a-script) This script creates a high-priority task in the `Support` project. Run it with a `member` key. create-task.ts
```ts
import { createRenClient, pat } from "@renai-labs/sdk"
const client = createRenClient({
baseUrl: "https://api.useren.ai",
auth: pat(process.env.REN_ACCESS_KEY!),
})
const { data: projects } = await client.project.list({ throwOnError: true })
const project = projects.find((p) => p.name === "Support")
if (!project) throw new Error("No project named Support")
const { data: task } = await client.task.create({
body: {
podId: project.podId,
projectId: project.id,
title: "Draft replies to this week's open support tickets",
priority: "high",
},
throwOnError: true,
})
console.log(`Created ${task.identifier}: ${task.title}`)
```
The task appears under **Tasks** in the web app, in the project’s space. Creating a task doesn’t start work on it. See [Tasks](/docs/concepts/tasks/). ## [Revoke an access key](#revoke-an-access-key) Revoking a key immediately blocks API calls that use it, including calls from running scripts. Revocation is permanent. Open **Settings → Access keys**, select the key’s revoke button, then select **Revoke token**. From the CLI, run `ren pats list` to find the key’s ID, then `ren pats revoke `. ## [Errors](#errors) Non-2xx responses don’t throw by default. Check `error`, or opt into throwing:
```ts
const { data, error } = await client.skill.get({ path: { id } })
if (error) {
// error is typed to the operation's error schema
}
const { data } = await client.skill.get({ path: { id }, throwOnError: true })
```
## [Configuration](#configuration) `createRenClient` accepts any `@hey-api/client-fetch` `Config` option: `baseUrl`, `headers`, `fetch`, `credentials`, interceptors, and more.
```ts
createRenClient({
baseUrl: "https://api.useren.ai",
auth: pat(token),
headers: { "X-Request-Id": crypto.randomUUID() },
fetch: customFetch,
})
```
## [Types only](#types-only) If you only need types, import from `/types` to leave out the client runtime:
```ts
import type { Skill, SkillCreateData } from "@renai-labs/sdk/types"
```
# Web app
> Chat with Ren, review its work, and manage your projects, tasks, and schedules from your browser.
Use the [web app](https://useren.ai/app) to chat with Ren, attach files, and review its work in your browser. ## [When to use the web app](#when-to-use-the-web-app) * **Inspect work:** Expand individual steps to see Ren’s actions. Send more instructions between messages. * **Review results:** Open the reports, dashboards, and files Ren creates next to the chat that made them. * **Answer questions and approve actions:** Respond in the chat. [Channel](/docs/channels/) and [scheduled](/docs/concepts/schedules/) chats can’t ask questions and deny actions that need approval. * **Manage Ren:** Create [spaces](/docs/concepts/spaces/) and [projects](/docs/concepts/projects/), invite teammates, connect apps, and map channels. Use [channels](/docs/channels/) for requests from team conversations, and continue those chats in the web app. Use the [CLI](/docs/surfaces/cli/) or [MCP](/docs/surfaces/mcp/) to manage Ren from a terminal or another AI tool. ## [Choose how to assign work](#choose-how-to-assign-work) Ren can research topics, summarize data from apps, analyze files, write code, and create reports, dashboards, and pages. For example, ask it to turn meeting notes into a follow-up email. Choose how to hand off work: * **Delegate a one-off request** in a [chat](/docs/concepts/chats/). * **Track work** that people and Ren share as a [task](/docs/concepts/tasks/). * **Repeat work** on a timer, like a weekly report, with a [schedule](/docs/concepts/schedules/). [Apps](/docs/concepts/apps/) provide tools, while files and repositories provide context for the work.